Want to know how to build an easy bench in about 15 minutes? Read below to find out how to build the easiest hairpin leg bench.
Read More
BOREDOM BUSTERS - 90 fun activities for kids to do over the summer
AN ULTIMATE GUIDE FOR SUMMER activities
READY OR NOT, IT’S THAT TIME OF YEAR AGAIN! Whether you can’t wait for these slow lazy days OF SUMMER, or they make you QUAKE in your boots a little bit, one thing I know for sure is that you want this TO BE THE BEST SUMMER for you and your kids.
One of the biggest challenges our family faces during Summer Vacation is the dreaded ‘B’ word (BOREDOM). I’ve found that even just a small amount of intentional time spent with my kids at the beginning of the day can set the tone for the rest of the day to be joyful, successful, and restful.
That being said, I’ve created a list of 90 fun activities to do with your kids over the Summer. One for each day of Summer Vacation. Most of these ideas are easy, low cost, and technology free. I hope reading this list will kickstart you into having YOUR best Summer yet!
So without further ado, here are 90 fun activities to do with your kids over the Summer.
1. Go Berry Picking
Strawberries! Blueberries! There are so many different things in season over the summer. Do a simple online search, and see what’s ripening around your area.
2. Make Beaded Buddies
This is such a fun craft for all ages. As a bonus, the kids will have a fun little pet to play with when they are finished. If you aren’t familiar with Beaded buddies, you can watch this tutorial.
https://www.youtube.com/watch?v=bozQHrHS1GA
3. Bring books to a local coffee shop and read
My older kids love this one, and would be content for an hour or two sipping their London Fog and reading a few chapters of a book. Our local Barnes and Nobles has both a coffee shop, and a little play area for younger kids to entertain themselves as well.
4. Geo Caching
If you haven’t been Geo Caching before, you have to check it out! It’s such a cool community activity. You can read about it here.
https://www.geocaching.com/play
5. Make a dinosaur dig out of ice
http://parentingchaos.com/excavating-dinosaurs-ice/
6. Build a fort out of boxes
You could go all out and make a giant fort using X-Large furniture boxes, or keep it simple and make a house for a doll or stuffed animal using a small box.
7. Have a picnic by a lake (don’t forget to save some bread crumbs to to feed the fish)
8. Go on a Family Adventure Day Trip
One of our favorite family activities, and one that takes a bit more intentionality, is taking a day trip to a nearby city to explore. You can read more about it in my blog post below.
https://www.houseonasugarhill.com/blog/2019/2/20/chattanooga-family-adventure
9. Go on a progressive dinner and discover local restaurants in your community
Grab an appetizer at the first restaurant, dinner at the second, and dessert at the last.
10. Build something together out of wood
This could be a big project, or a small one. But some of my kids, especially my boys, love getting to work together using tools.
https://cutthewood.com/inspiration/woodworking-projects-kids
11. Bake cookies for the neighbors, and deliver them with a note
12. Sign up for a VBS camp
Where we live, there are so many Vacation Bible School’s offered over the Summer at local churches. They are a drop off camp that will usually run for a week, about 4 hours a day. The best part? They are free!
13. Make bath bombs
https://www.youtube.com/watch?v=4OSM7M0Zm48
14. Make slime
https://www.youtube.com/watch?v=q9B3bsUDoRo
15. Play ‘School’
Costco has fun workbooks for K -3rd grade, to help keep your kids fresh over the summer. Add in a little imagination -You’re the ‘Teacher’, they’re the ‘Students’, turns this activity into a game.
16. Allow them to use some educational tech
Some Technology that we have found usueful and educational over the Summer are the app Duolingo, and the educational websites Prodigy Math, and ABCmouse.com
https://www.abcmouse.com/abt/homepage?8a08850bc2=T415607038.1559916830.5358
17. Make ‘street art’ with chalk.
https://www.youtube.com/watch?v=XgC_KU0ce4A
18. Learn Macrame
There are some simple plans out there that older kids could easily pick up.
https://www.youtube.com/watch?v=MaeUZP1zP3w
19. Paint By Number
20. Learn how to finger knit
https://www.youtube.com/watch?v=MsZsUBYU0qU
21. Make a ‘movie’
Download iMovie, and let them act out a play or script. They could even make their own commercial.
22. Organize a neighborhood 5k
23. Learn magic tricks with a deck of cards
23. Go to a pottery painting class
24. Tie Dye t-shirts together.
25. Make a tree swing
26. Play Sardines
https://www.icebreakers.ws/medium-group/sardines-reverse-hide-and-seek.html
27. Make a Thunder cake
Based off the Book Thunder Cake from Patricia Polocco. Make sure to read the book together first, and when the next Summer storm rolls in, get ready to build your Thunder Cake. I recently did this with my daughter and the timing ended up being absolutely perfect, just like the book, I nearly cried with joy. It was pure magic.
28. Sign up for MasterClass and let them learn a new skill from a ‘Master’
29. Face Painting
30. Learn how to make balloon animals together
31. Make pins together
Always wanted a pin with Grandma’s face on it?
32. Learn how to play the cup song
https://www.youtube.com/watch?v=RZf_joR1Srk
33. Visit a farmers market and get familiar with local produce
34. Learn how to braid hair
35. Give a lesson on proper table setting
36. Easter egg hunt
My toddler age kids LOVED doing an Easter Egg hunt in the Summer. I’d simply fill the plastic eggs with little treats like fruit snacks, or even their tiny toys, and hide them around the house.
37. Visit a community pool
38. Plant a garden
39. Play games with the garden hose or sprinkler
40. Build a bug house
41. Play hopscotch
42. Make a giant bubble wand
https://www.youtube.com/watch?v=EGvw0-sWJRw
43. Play a favorite or new board game
Some of our favorites are The Game of Things, Ticket to Ride, and Settlers of Catan
44. Make a bonfire (don’t forget those marshmallows)
45. Play in a slip and slide
46. Bring an ENO or another hammock to the park
47. Play ‘the floor is lava’
https://en.wikipedia.org/wiki/The_floor_is_lava
48. Play a neighborhood game of bigger and better
https://www.thegamegal.com/2016/01/07/bigger-or-better-scavenger-hunt/
49. Join a summer book reading club
A local library would be a good place to sign up, but some book stores offer book clubs as well (Barnes and Noble is one). When you kids have completed their chosen amount of reading, they get a free book.
50. Join a summer fitness club
51. Get involved in a community treasure hunt
Similar to Geo Caching, but .more organic. See if you can find one by searching online, or create your own as a family.
52. Visit an afternoon Movie matinee
53. Go camping in the backyard
54. Go on a nature scavenger hunt
55. Create a stuffed animal pet shop
My daughter would play this all day everyday, so I thought it be a good one to put on the list. Set up all the stuffed animals as a pet shop, and then let her come in and shop.
56. Catch fireflies
57. Make a car track on the floor using duct tape
https://kidsactivitiesblog.com/17823/build-a-track/
58. Go on a hike
60. Make a lemonade stand
61. Find a new park to explore
62. Throw a garage sale together
63. Make a special dinner for the family together
Go all out, light some candles, add some music, and pull out your best serving wear
64. Learn how to knit
This is a little harder than finger-knitting, but my 8 year old recently picked it up, and it’s kept his mind and fingers busy for hours already this summer.
65. Go iceskating
66. Play in a splash pad
67. Have a water fight
68. Visit a Children’s Museum, Zoo, or Aquarium
69. Sew a quilt together
70. see a show at a community theatre
71. Throw a dance party
72. Get a job (pet sitter, baby sitter, simple lawn care like raking leaves)
73. Volunteer together at a local animal shelter or food bank
74. Put a sprinkler under the trampoline
Add some dishsoap to the top of the trampoline if you dare.
75. Backyard games like Badminton, Four Square, or Wiggle Ball
76. Play with Playdough, Moonsand, or Sensory Sand
77. Make your own popsicles
https://www.jessicagavin.com/make-your-own-homemade-fruit-popsicles/
78. Make little ‘bugs’ by painting rocks
https://www.youtube.com/watch?v=CuqJXJLMCQ8
79. Create an ‘Art Room’ for the summer
80. Play dress up and have a fashion show
81. Visit a farm or petting zoo
82. Invite the neighborhood crew over for some organized backyard games
83. Learn how to make String Figures, like Cat’s Cradle and Jacob’s Ladder
84. Do a puzzle together
85. Write a letter to a distant relative or friend
86. Make a fort out of sheets
Bonus, let them have a sleepover in it!
87. Build a tee-pee or fort outdoors
88. Make paper airplanes
We sometimes draw little people, cut them out, and let them ‘ride’ in the airplane. The little ones love that.
89. Learn to Jumprope
90. DIY Foam Paint
I hope this list has given you some great ideas of how to spend time with your kids over the Summer. I’ve been trying to choose one activity a day with our kids, and so far, this truly has been our best Summer yet!
Did this list make you think of some more summer activities? What where some things you loved to do as a kid? Drop me a line below! I’m always looking for new ideas!


10 Easy Ways to Decorate a Large Wall (without using Framed Art)
10 EASY WAYS TO DECORATE A BLANK WALL (Without using framed art)
I don’t know about you, but the thought of “What do I put on a large wall?” can be overwhelming at times. I’ve comPILed a list of 10 Easy DIY Wall art Projects that anyone can pull off. So Start Reading and say goodbye to blank walls forever.
10 Wall Decorating Ideas:
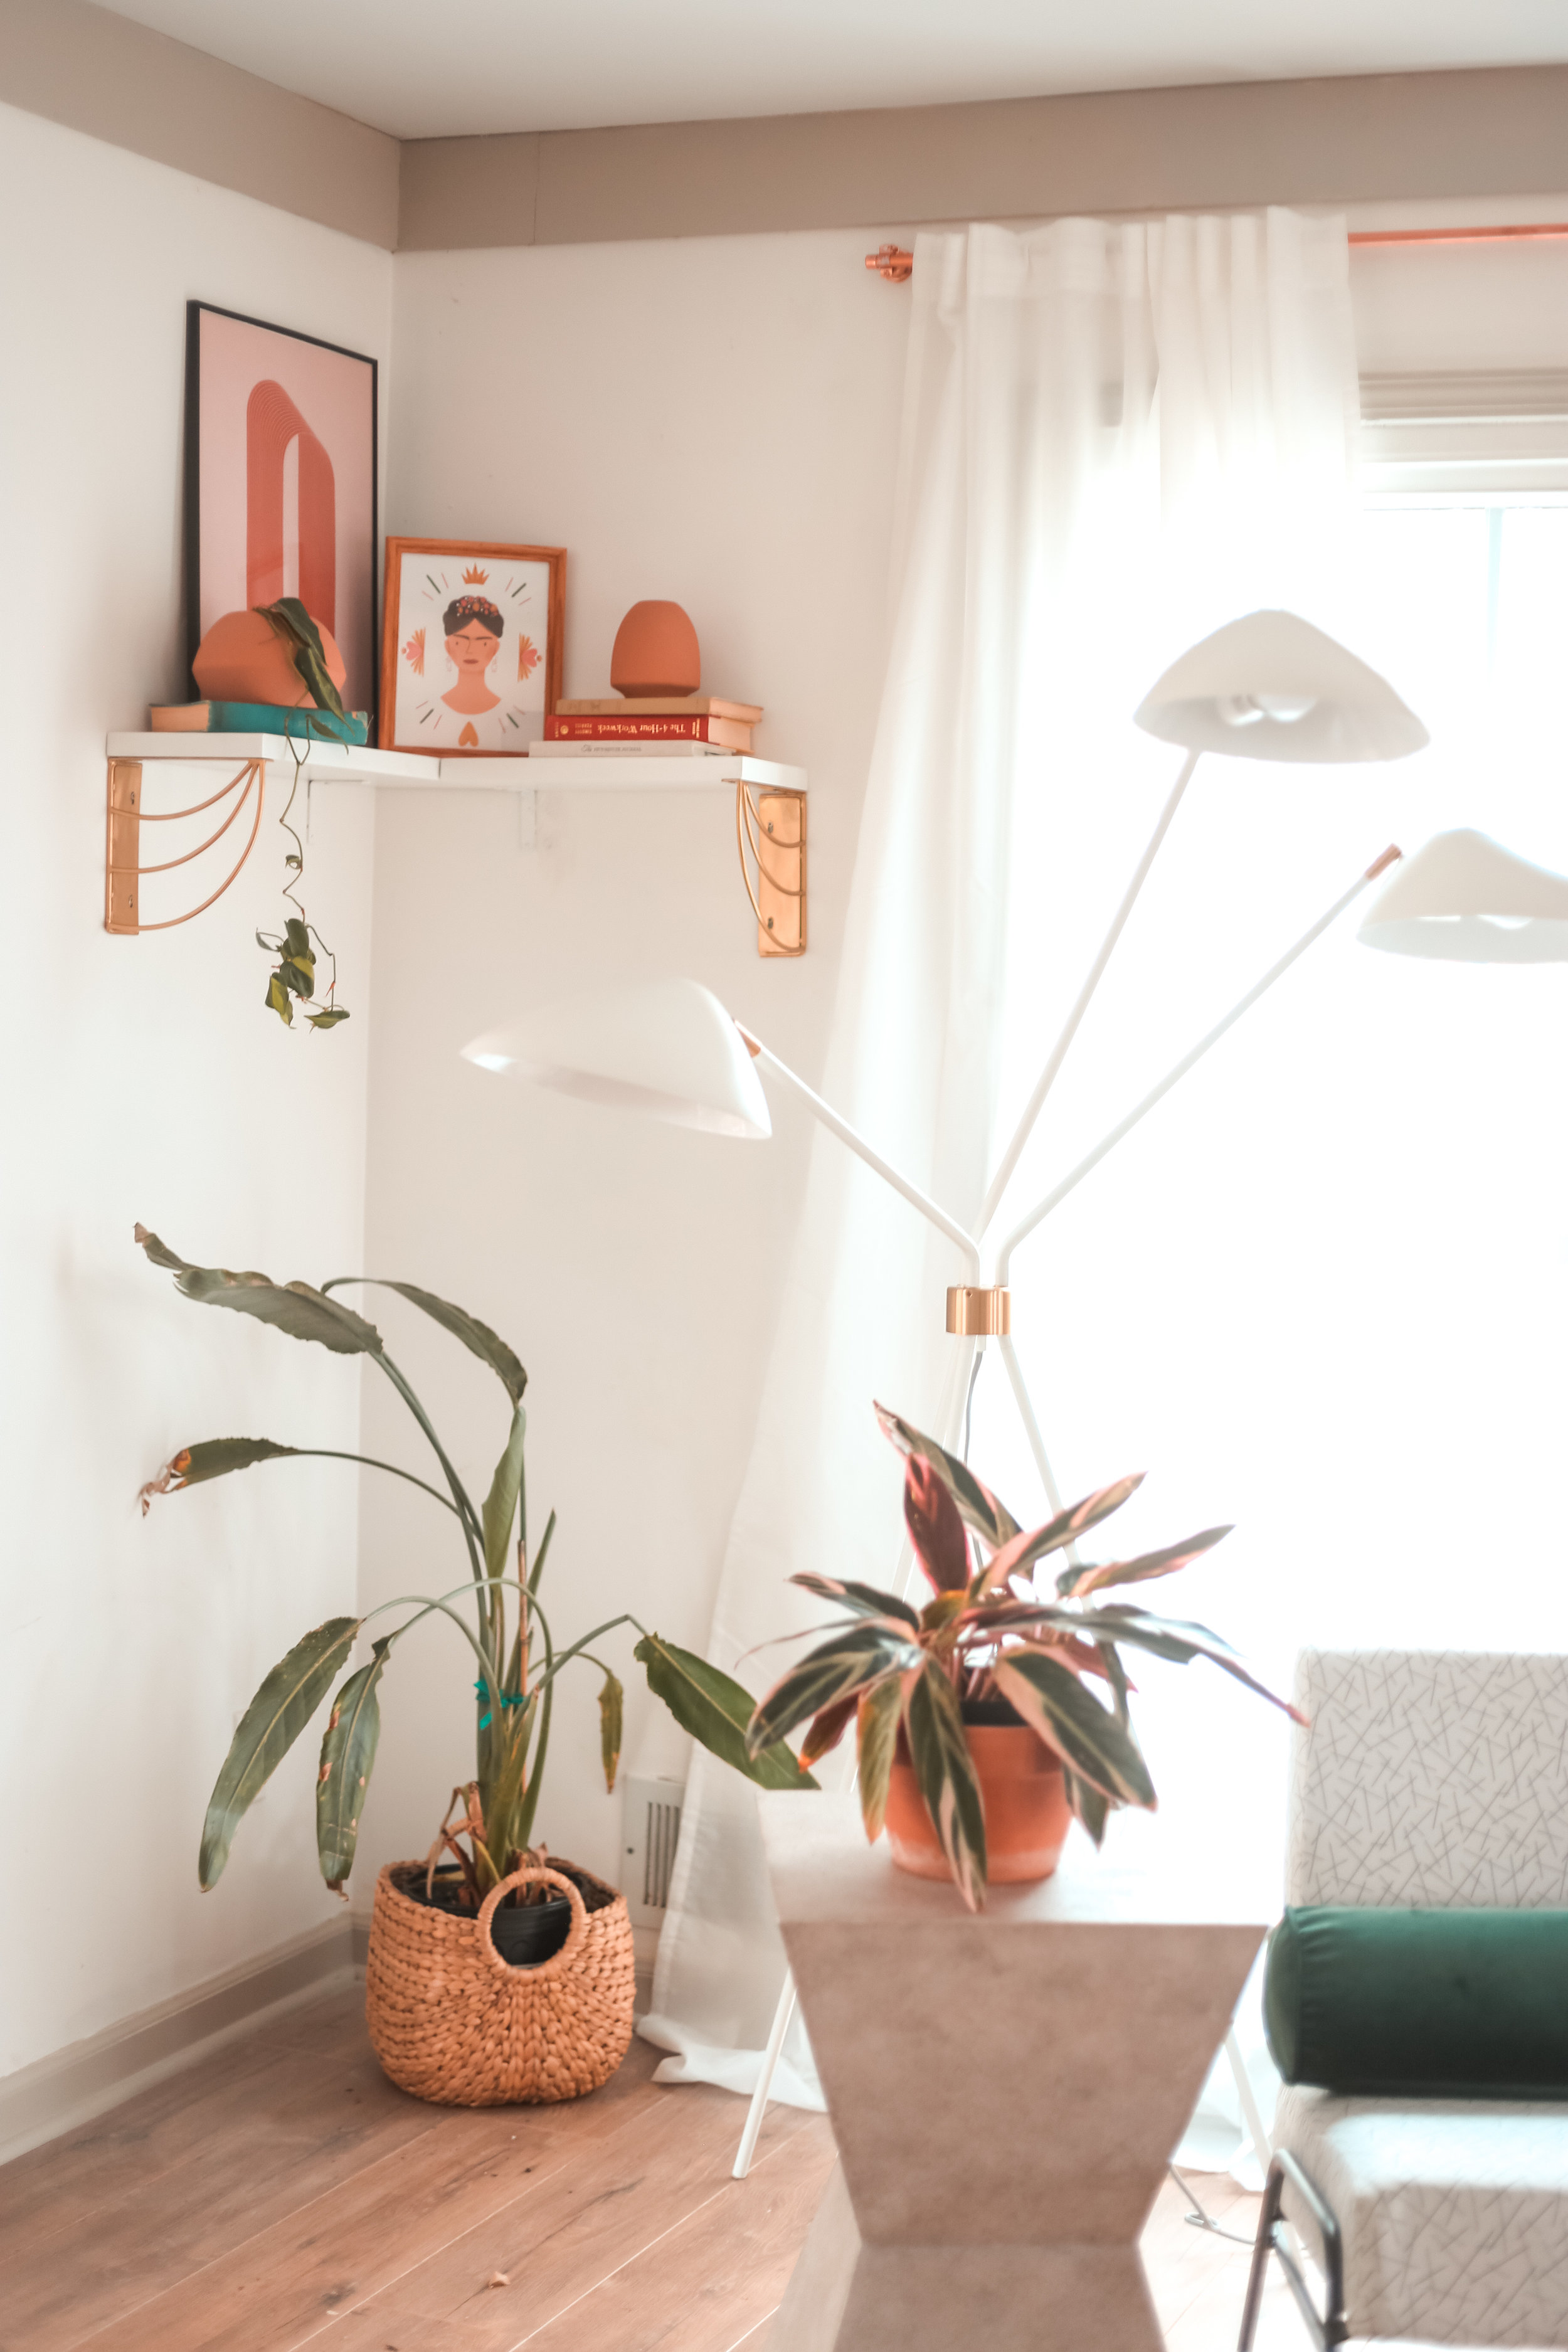
Decorate your wall with Plants:
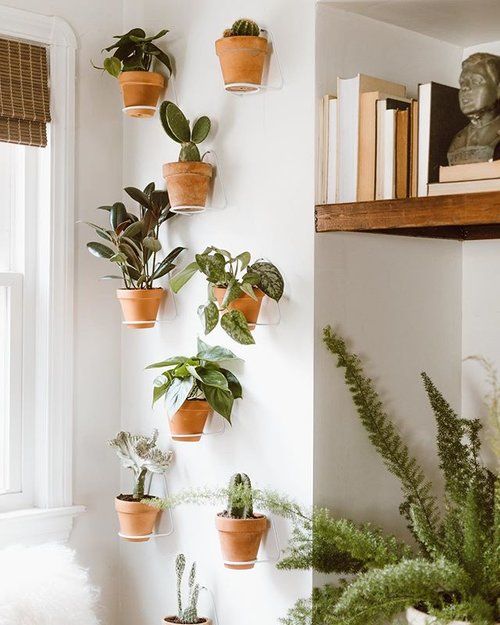
There are so many ways to incorporate a living plant wall, ranging from full blown built in’s, to hanging simple planters. I love how Christine from @_forthehome decorated her walls with simple terra-cotta pots. You can read her entire process HERE. This is such a beautiful way to cover a blank wall. If you nervous about keeping so many plants alive, don’t be shy about using faux versions, there are so many realistic looking ones to buy these days.
2. Make a statement wall with a statement

The home decor world has gone through a few iterations of the classic letter board. I love this oversized version from Alexi over at SeekingAlexi. This X-large letter board is perfect for decorating a large wall in one shot! You can get a closer look at that awesome letter board on Alexi’s Blog HERE!
3. Fill a Blank Wall with a Flag
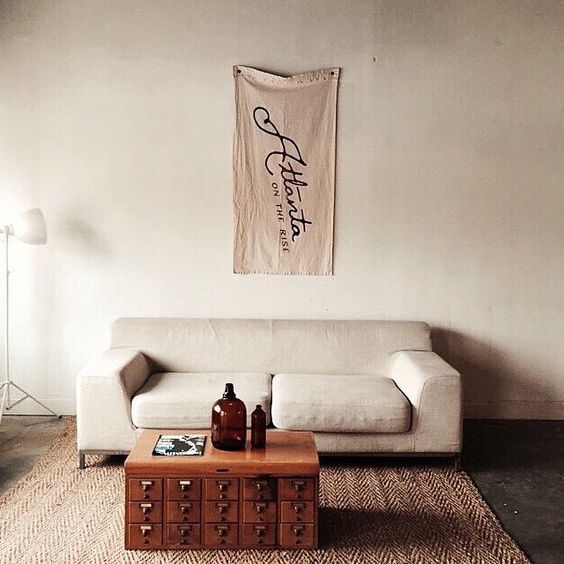
There are so many cool flags to be found out there. Etsy is full of customizable options! I love this one HERE from Wild Standard, but using a vintage flag would be just as gorgeous. Some of the authentic flags are quite large so you could cover a large area with one of those. I’d love to find a vintage State flag to hang in my living room at some point.
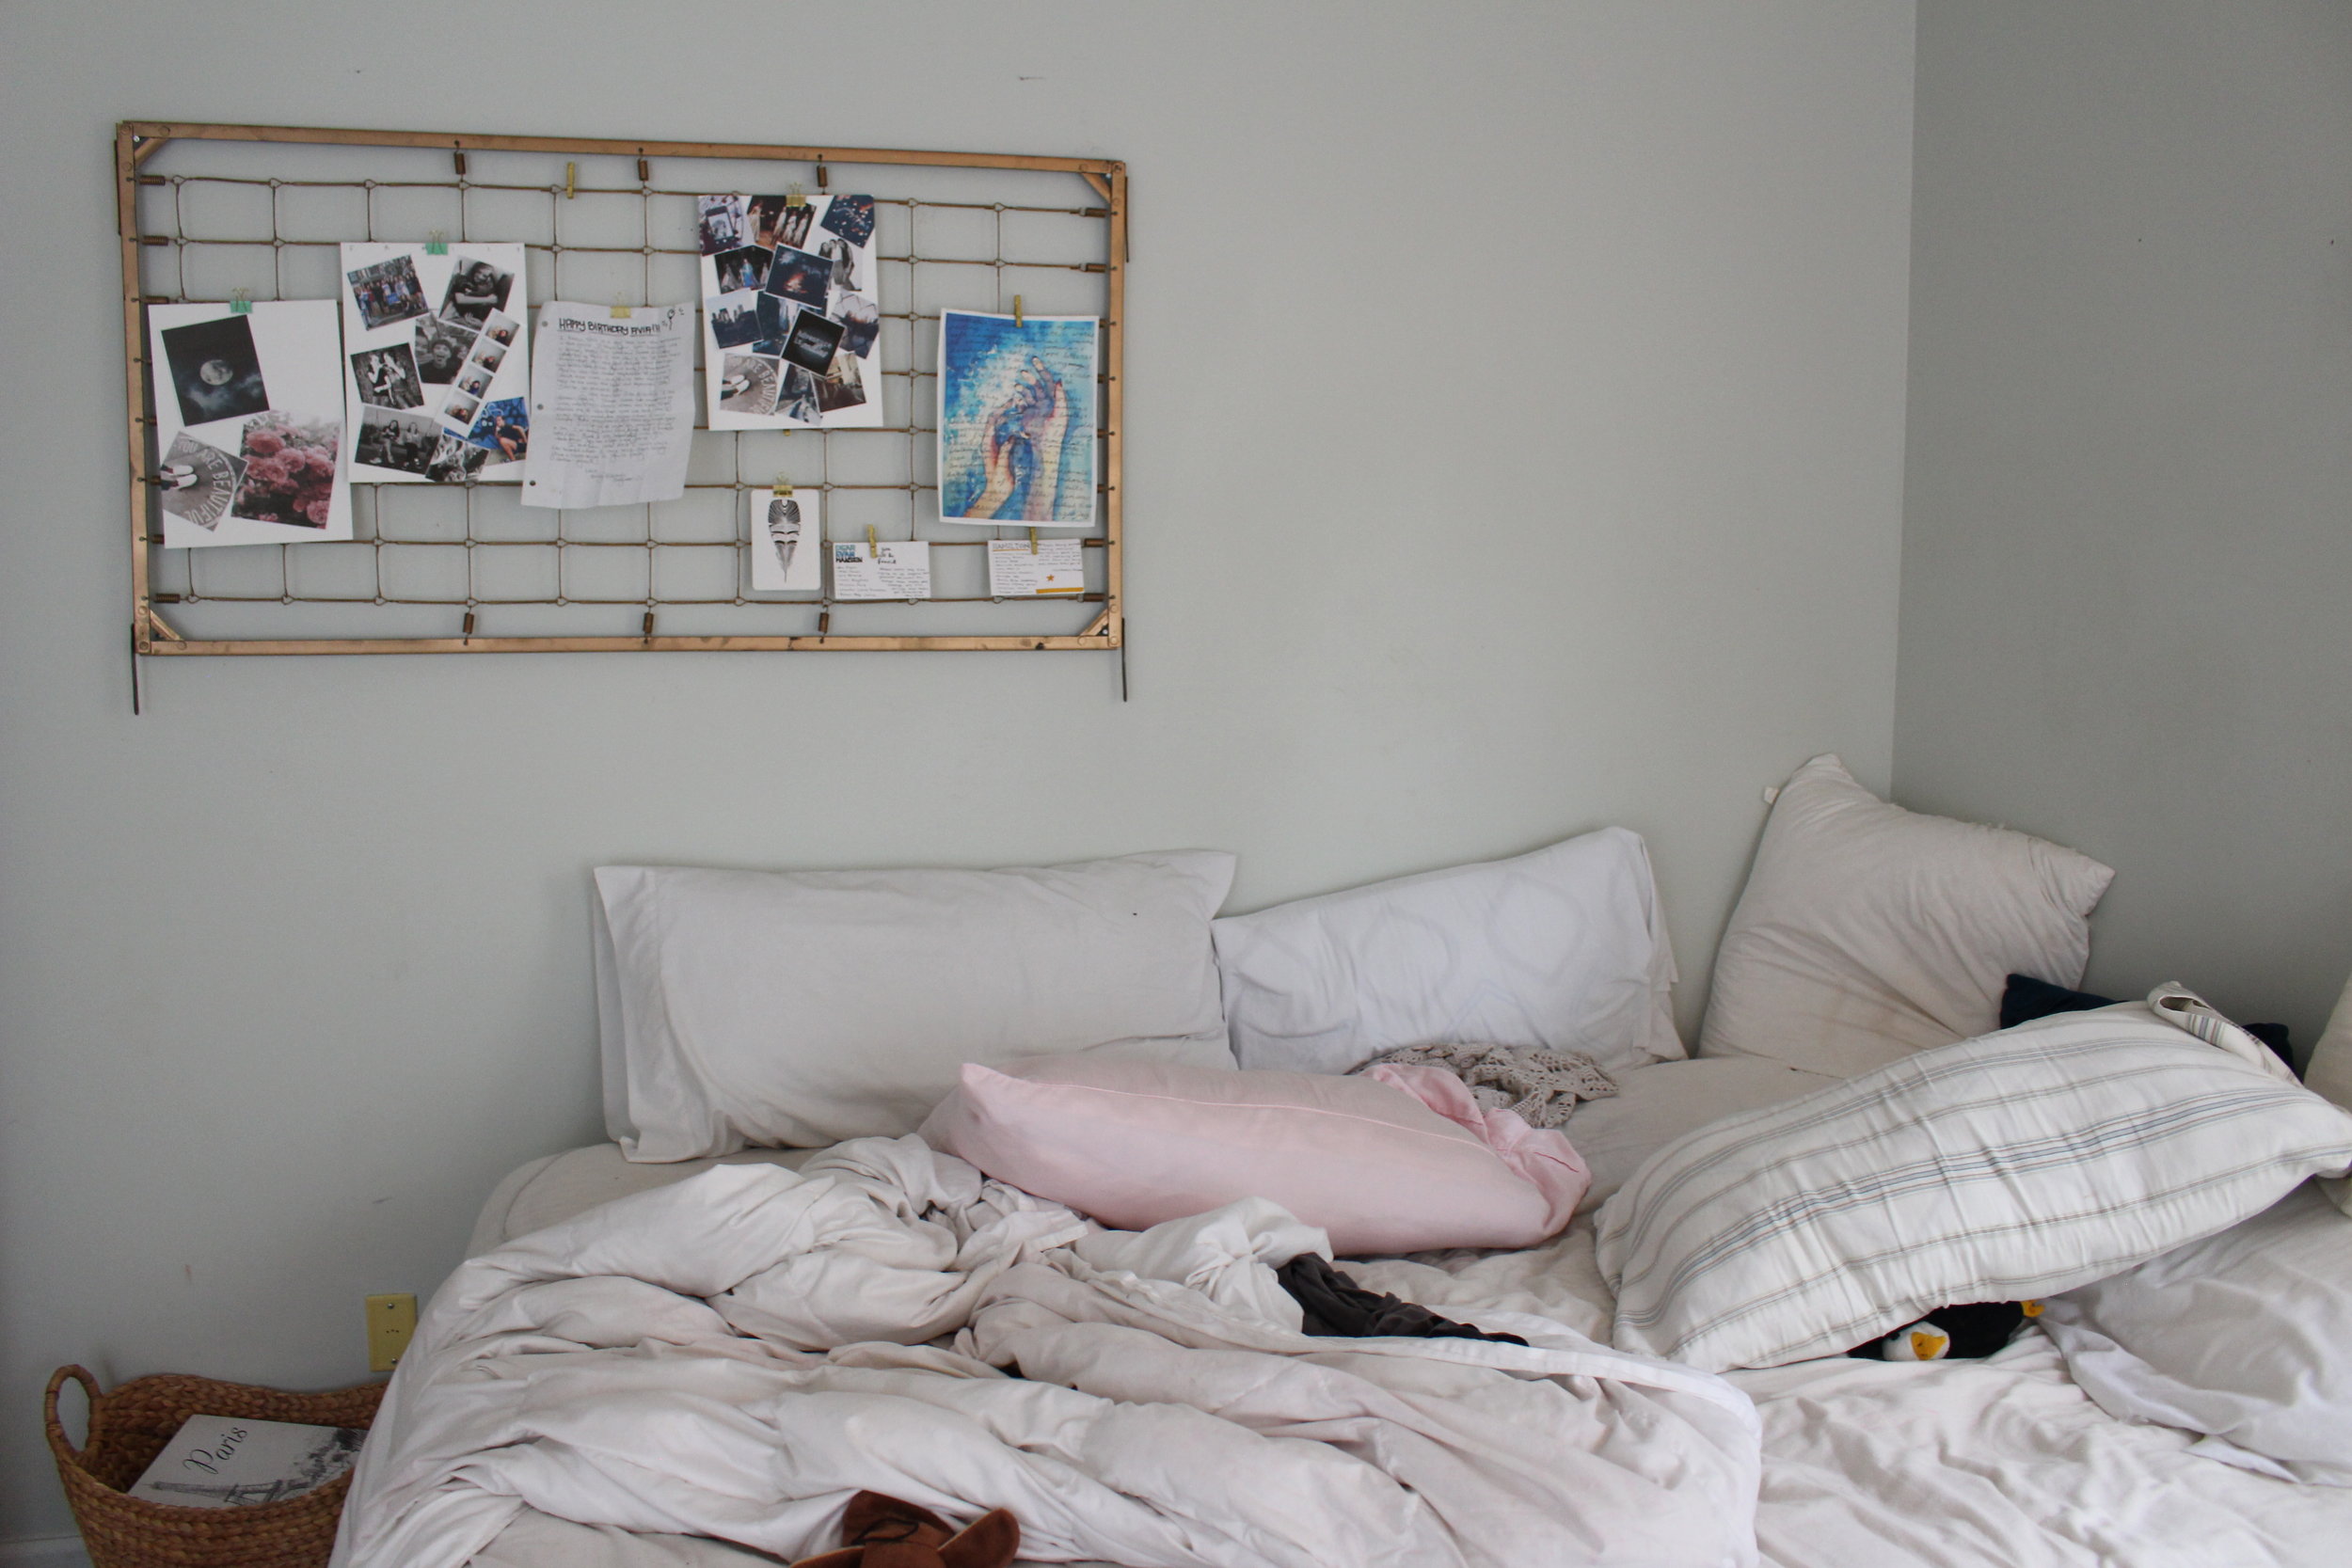
4. Decorate a blank wall with a DIY photo ledge (or Two)
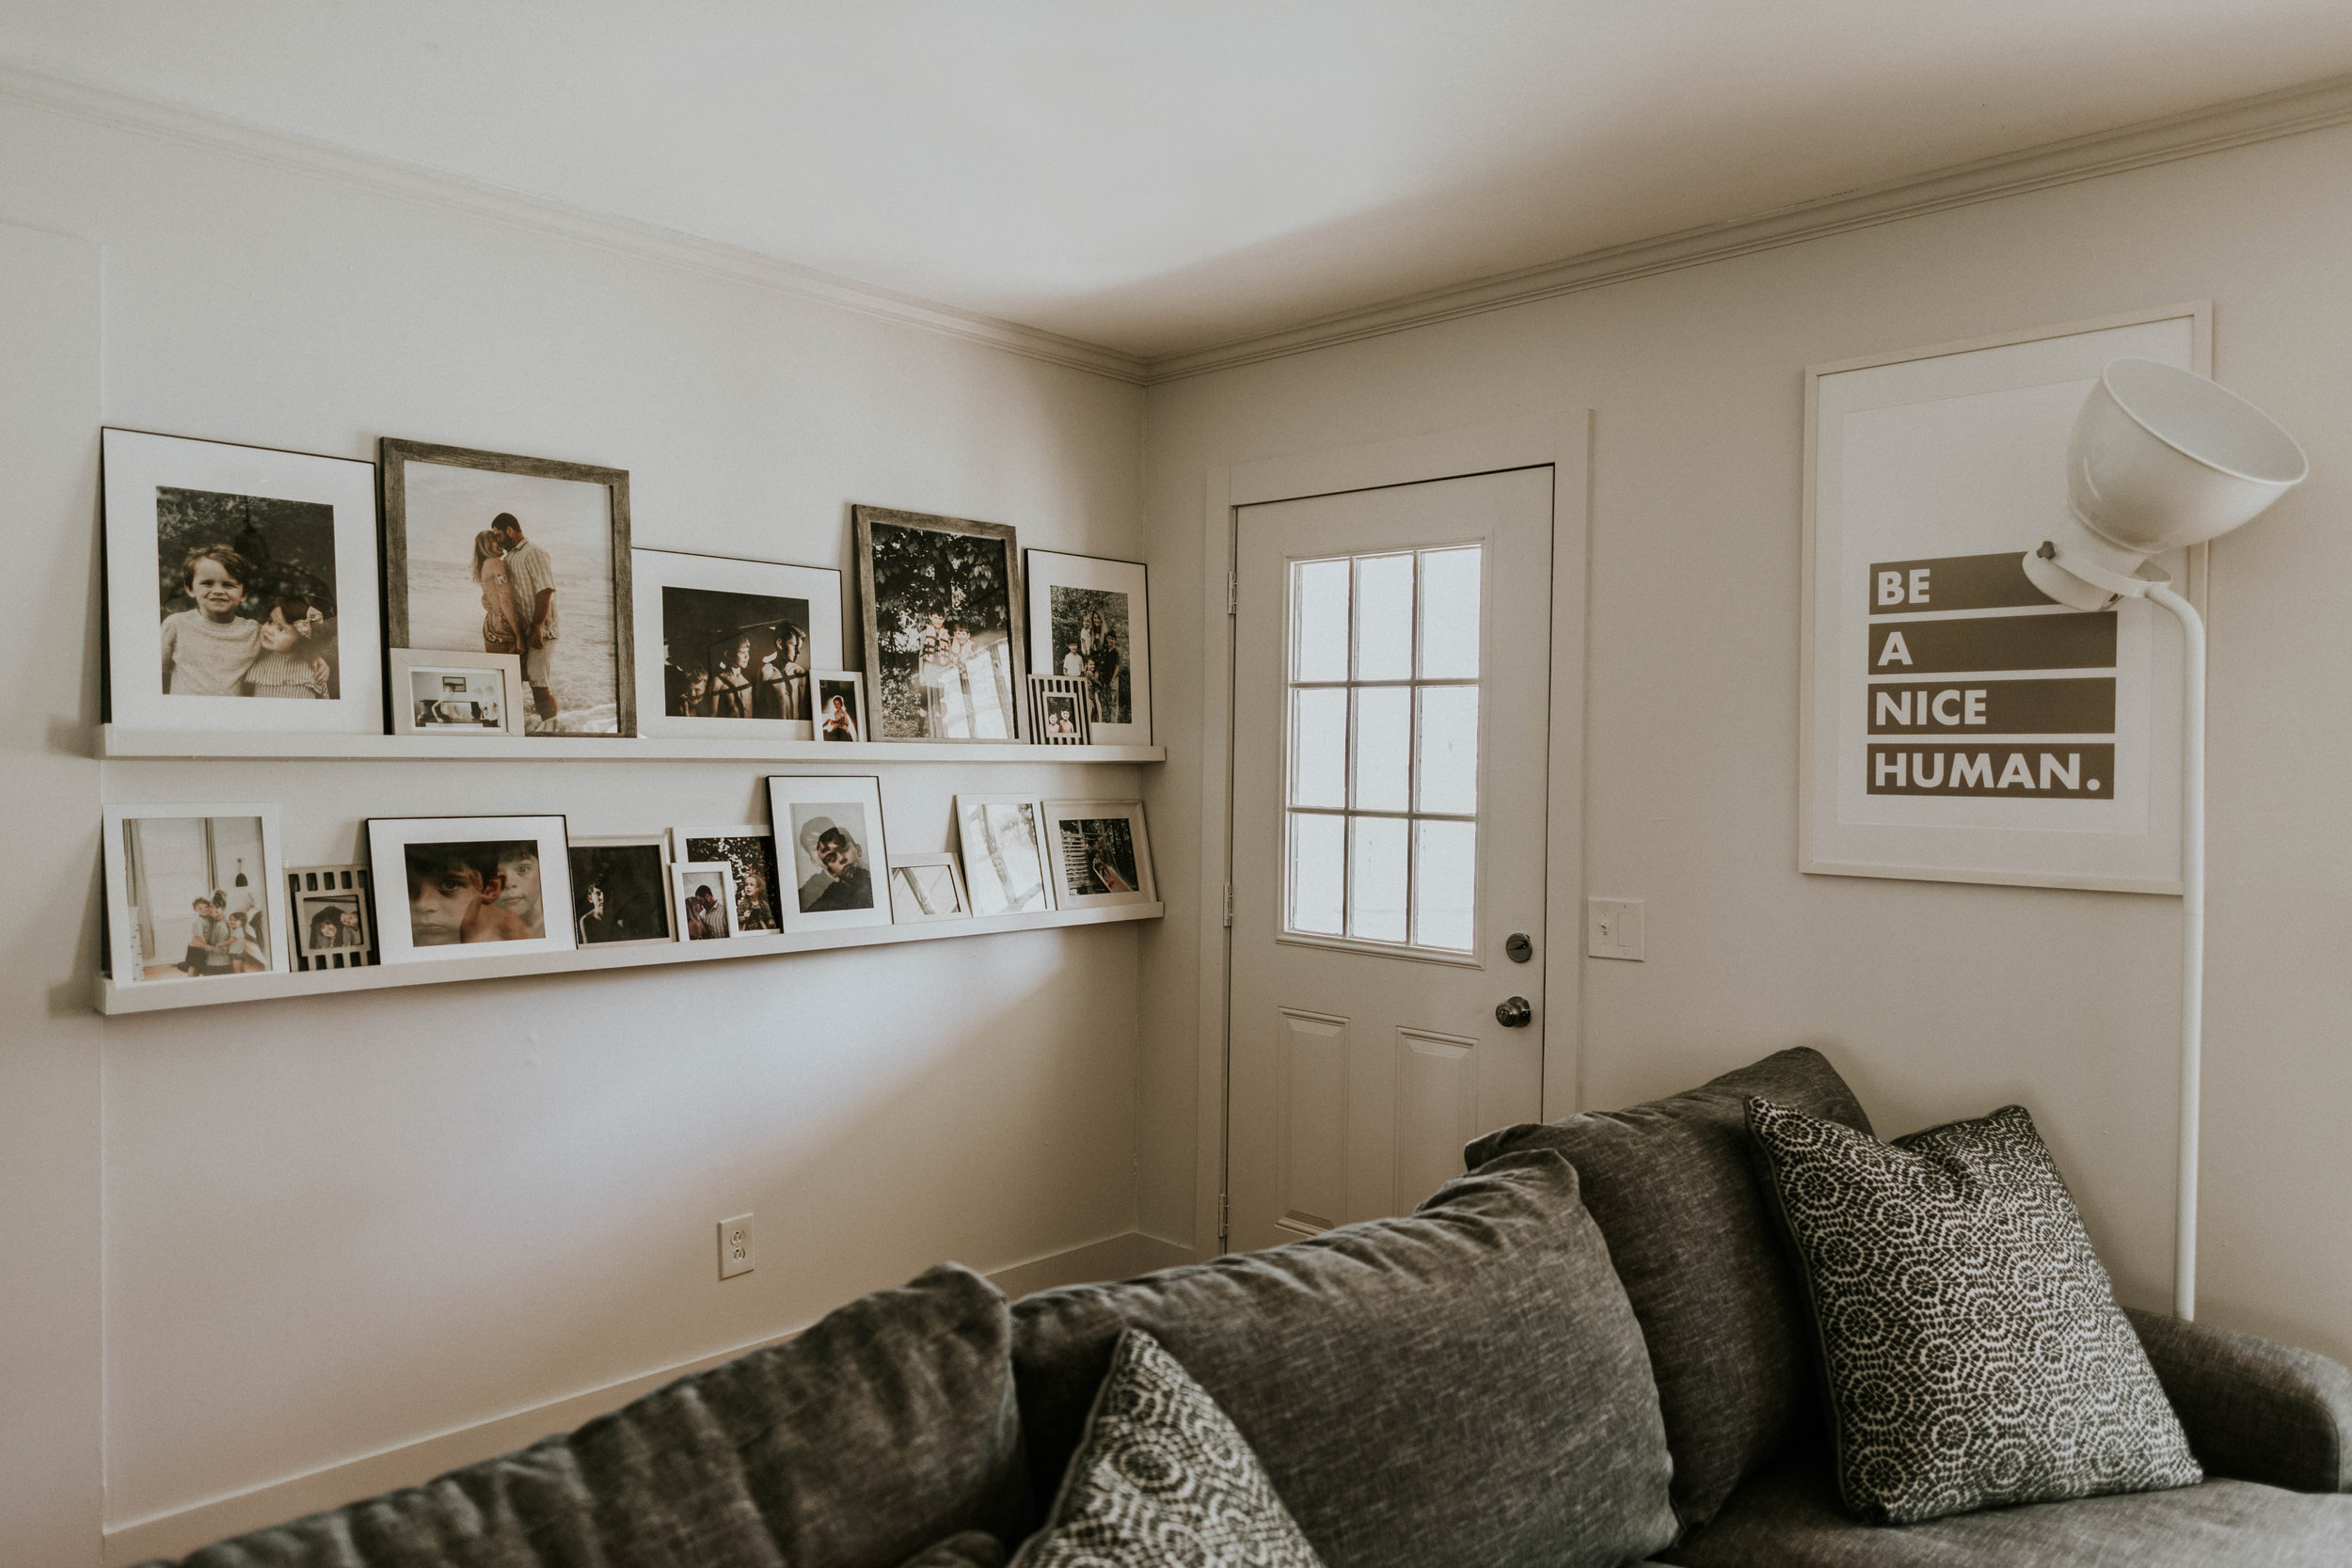
Okay, Okay, so technically this still incorporates using framed art, but the addition of the photo ledge gives some super awesome structure and interest. Depending on how long you make your ledge, this is a really easy way to cover a large wall. Bridgett from This Minimal House has a great DIY on how to make your own Photo ledge. You can read all about it HERE.
5. Decorate your wall with hats

Have you been seeing this trend everywhere like I have? So fun and easy. You can buy a simple hat rack from amazon, or do what I did in my bedroom and throw a couple nails in the wall to hang your hats on. Use just a few hats like Sara Mueller did here, or cover your entire wall with hats! Both are equally stunning. Decorating your wall with hats is not only super cool and easy, it’s also practical, so there you go!
6. Paint a Wall Mural

Painting a Wall Mural is a fun way to transform an entire wall into a piece of art in and of itself. There are so many amazing versions out there. Recently I painted this accent wall in a terrazzo pattern. You can read all about the process HERE. Painting your wall is an easy DIY wall art project that will really make an impact.
7. Decorate your wall using Macrame
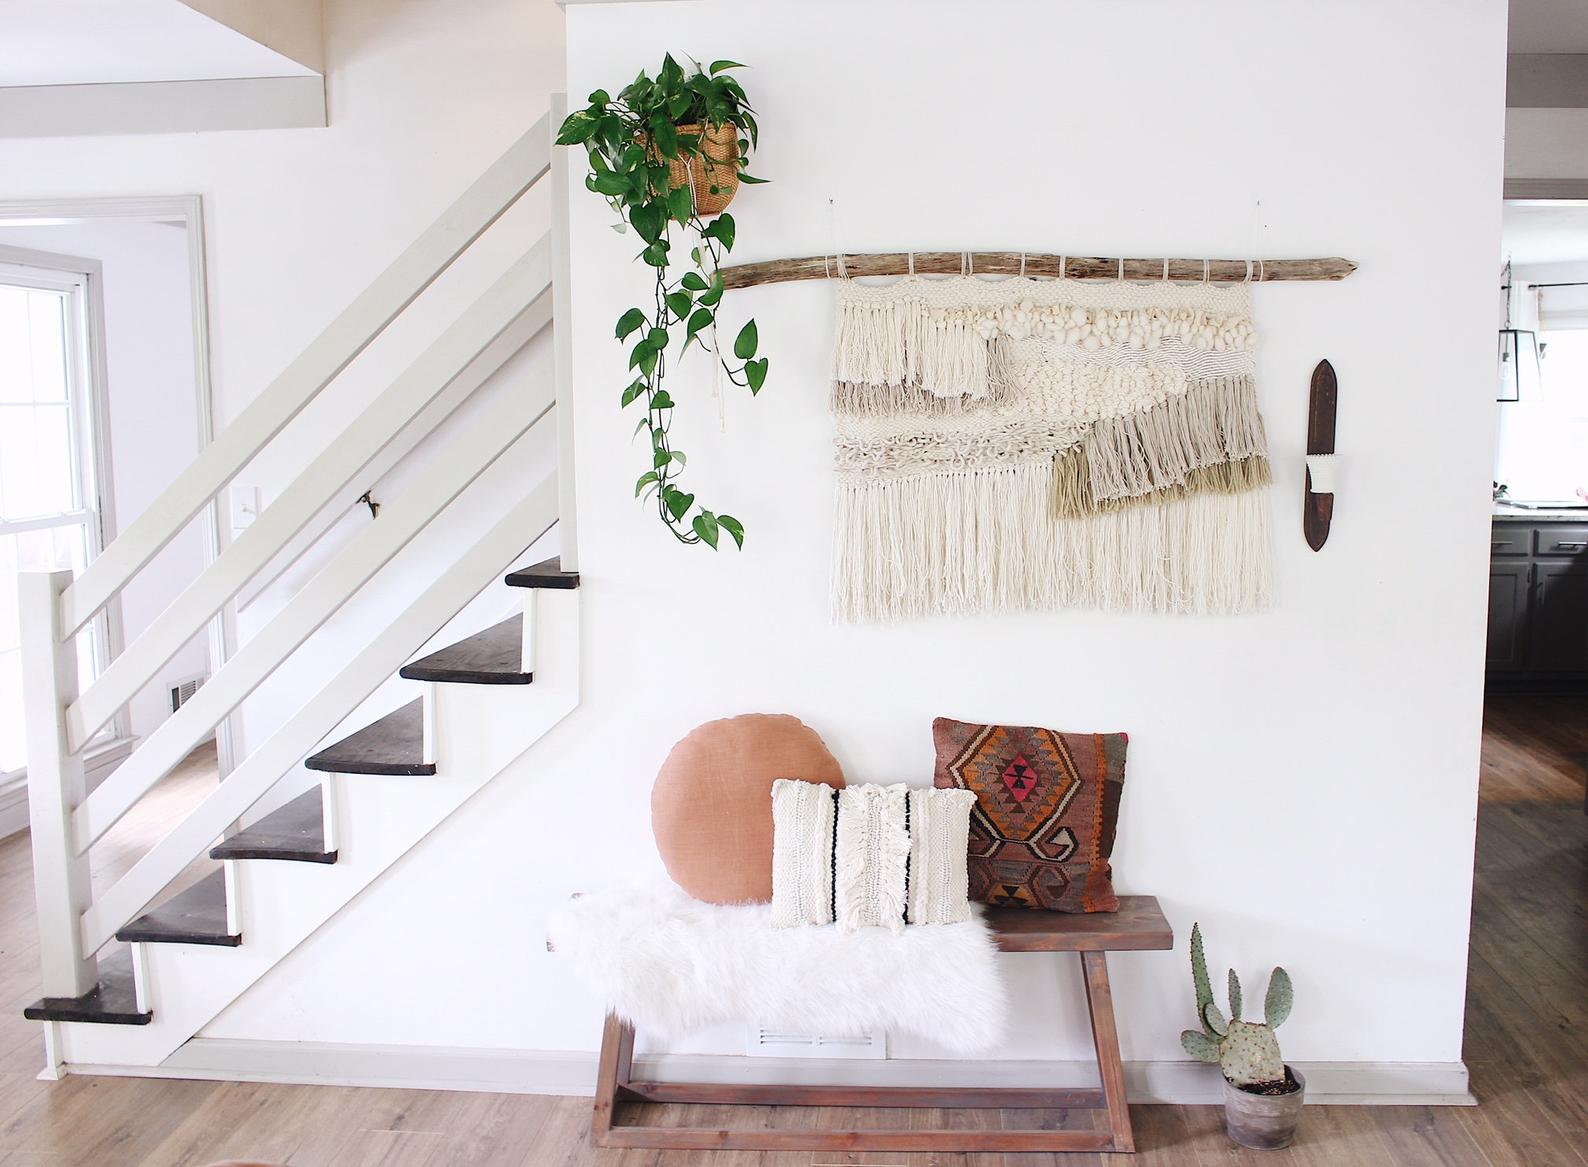
Whether you purchase on Etsy, or make your own, the options are endless when it comes to macrame and weavings. Fill in a corner of your wall, or make the macrame the focal point of the wall. Either way, I’m still loving this breezy boho trend. The beautiful weaving you see here was made by my friend Happy Mountain Designs
8. Use washi tape to hang photographs

Image Via Domino
For an easy wall decor DIY, hang your photos or prints on the wall using colorful washi tape. I love how unexpected (and also temporary) this wall solution is.
9. Decorate a large wall with a mirror collage

Image VIA House Beautiful
If you want to make a dramatic impact, try collection vintage mirrors and displaying them together to create a gallery wall. An added bonus is that as the mirrors reflect light, they create the illusion of a larger room.
10. Frame fabric
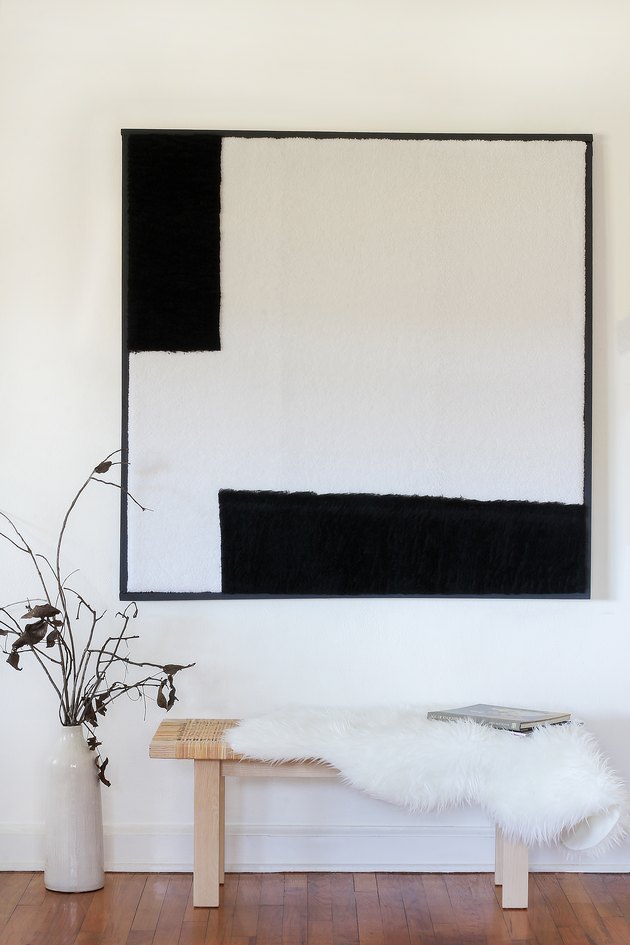
Another way to Decorate a large wall is to frame fabric. You could use a vintage piece, an authentic Batik, or try this simple DIY Mixed Media Art from Hunker Home.
I hope this article gives you some ideas of where to start next time you’re faced with that blank wall syndrome. Or maybe it’s sparked you own ideas of how to cover a large wall? If so, drop me a line below! I’d absolutely love to hear!
Interested in more decor ideas from House on a Sugar Hill? Here are some articles other readers have found interesting…
A Mother's Day Brunch with Bed Bath and Beyond
Find your tribe and love them well. When I moved to Atlanta, GA from Grand Rapids, MI 15 years ago, I was fortunate to make the move with a few of my sisters. They’ve been my dearest friends on this journey of life. These are the girls that have sat in waiting rooms during childbirth, showed up in the middle of the day to lend a helping hand, and been there for each other through life’s lowest lows and highest highs.

For Mother’s Day this year, I wanted to show them how much I appreciate who they are as women, sisters, mothers, and friends. What better way to celebrate our friendship than with some of the things we love best: beautiful aesthetics, delicious edibles, and enough time to span the conversations that are sure to ensue.

Thankfully we are all helpless gardeners, so decorating was as easy as heading to the backyard armed with a pair of garden shears. Roses and False Indigo tumbled over the table, while spring ferns flanked the centerpiece, bringing the outdoors in.

I was fortunate to be able to partner with Bed Bath and Beyond for our brunch, choosing pieces from their wide selection of entertaining dishes to create my table scape. Bed Bath and Beyond is a one stop shop for all your entertainment needs, and I was surprised by their variety of stylish choices. For me a table that mixes modern with rustic styles is such a classic combination, and Bed Bath and Beyond supplies both. I was able to order everything I needed online with one click without having to leave my house or shop multiple stores, and that to me is invaluable.

I chose a mix of black, white, and gold pieces, combining them with natural textures of wood, wicker, and marble to create a table setting that is classic and able to shine in a variety of settings and styles.

Notoriously untalented at creating beautiful cakes, I’ve finally found a style I can pull off, the rustic naked cake. Minimally iced, and flanked with garden flowers, my cake stood proudly on it’s modern stand.

I kept the food simple. Rustic bread, a selection of meats and cheeses, and fruit to grab is all we needed for a satisfying brunch.

One of my goals for 2019 is to be intentional about prioritizing the relationships in my life. I’m so grateful for this time with my sisters, celebrating who they are as women, mothers, and friends! I encourage you to make the time to celebrate the ones you love! Below I’ve linked the items that I used to create this beautiful table setting. Head over to Bed Bath and Beyond, and get inspired by all the ways you can make your next event unforgettable!
ITEMS USED IN MY BRUNCH TABLE SETTING


This blog post was sponsored by Bed Bath and Beyond, however, all views, selections, and opinions are my own.
Vegetable Garden Gift Baskets
Confession time, I am not going to win any awards for being the world’s greatest school Mom. Honestly, most days I feel proud to get lunches packed before the bus, so all the extra… the school events, the volunteer opportunities, all the teacher appreciation stuff. I try, guys, I TRY, because I really do appreciate our teachers SO MUCH, but like I said, not winning any participation awards over here.

By the end of the school year, I look back over all the time’s I haven’t quite measured up to school event status, and decide I need to try and redeem myself with a decent end of the school year thank you to our wonderful teachers. Hence, here we are again. This year we are making garden baskets for our teachers. I love to have a gift that the kids can participate in, and planting veggies is definitely a kid friendly activity.

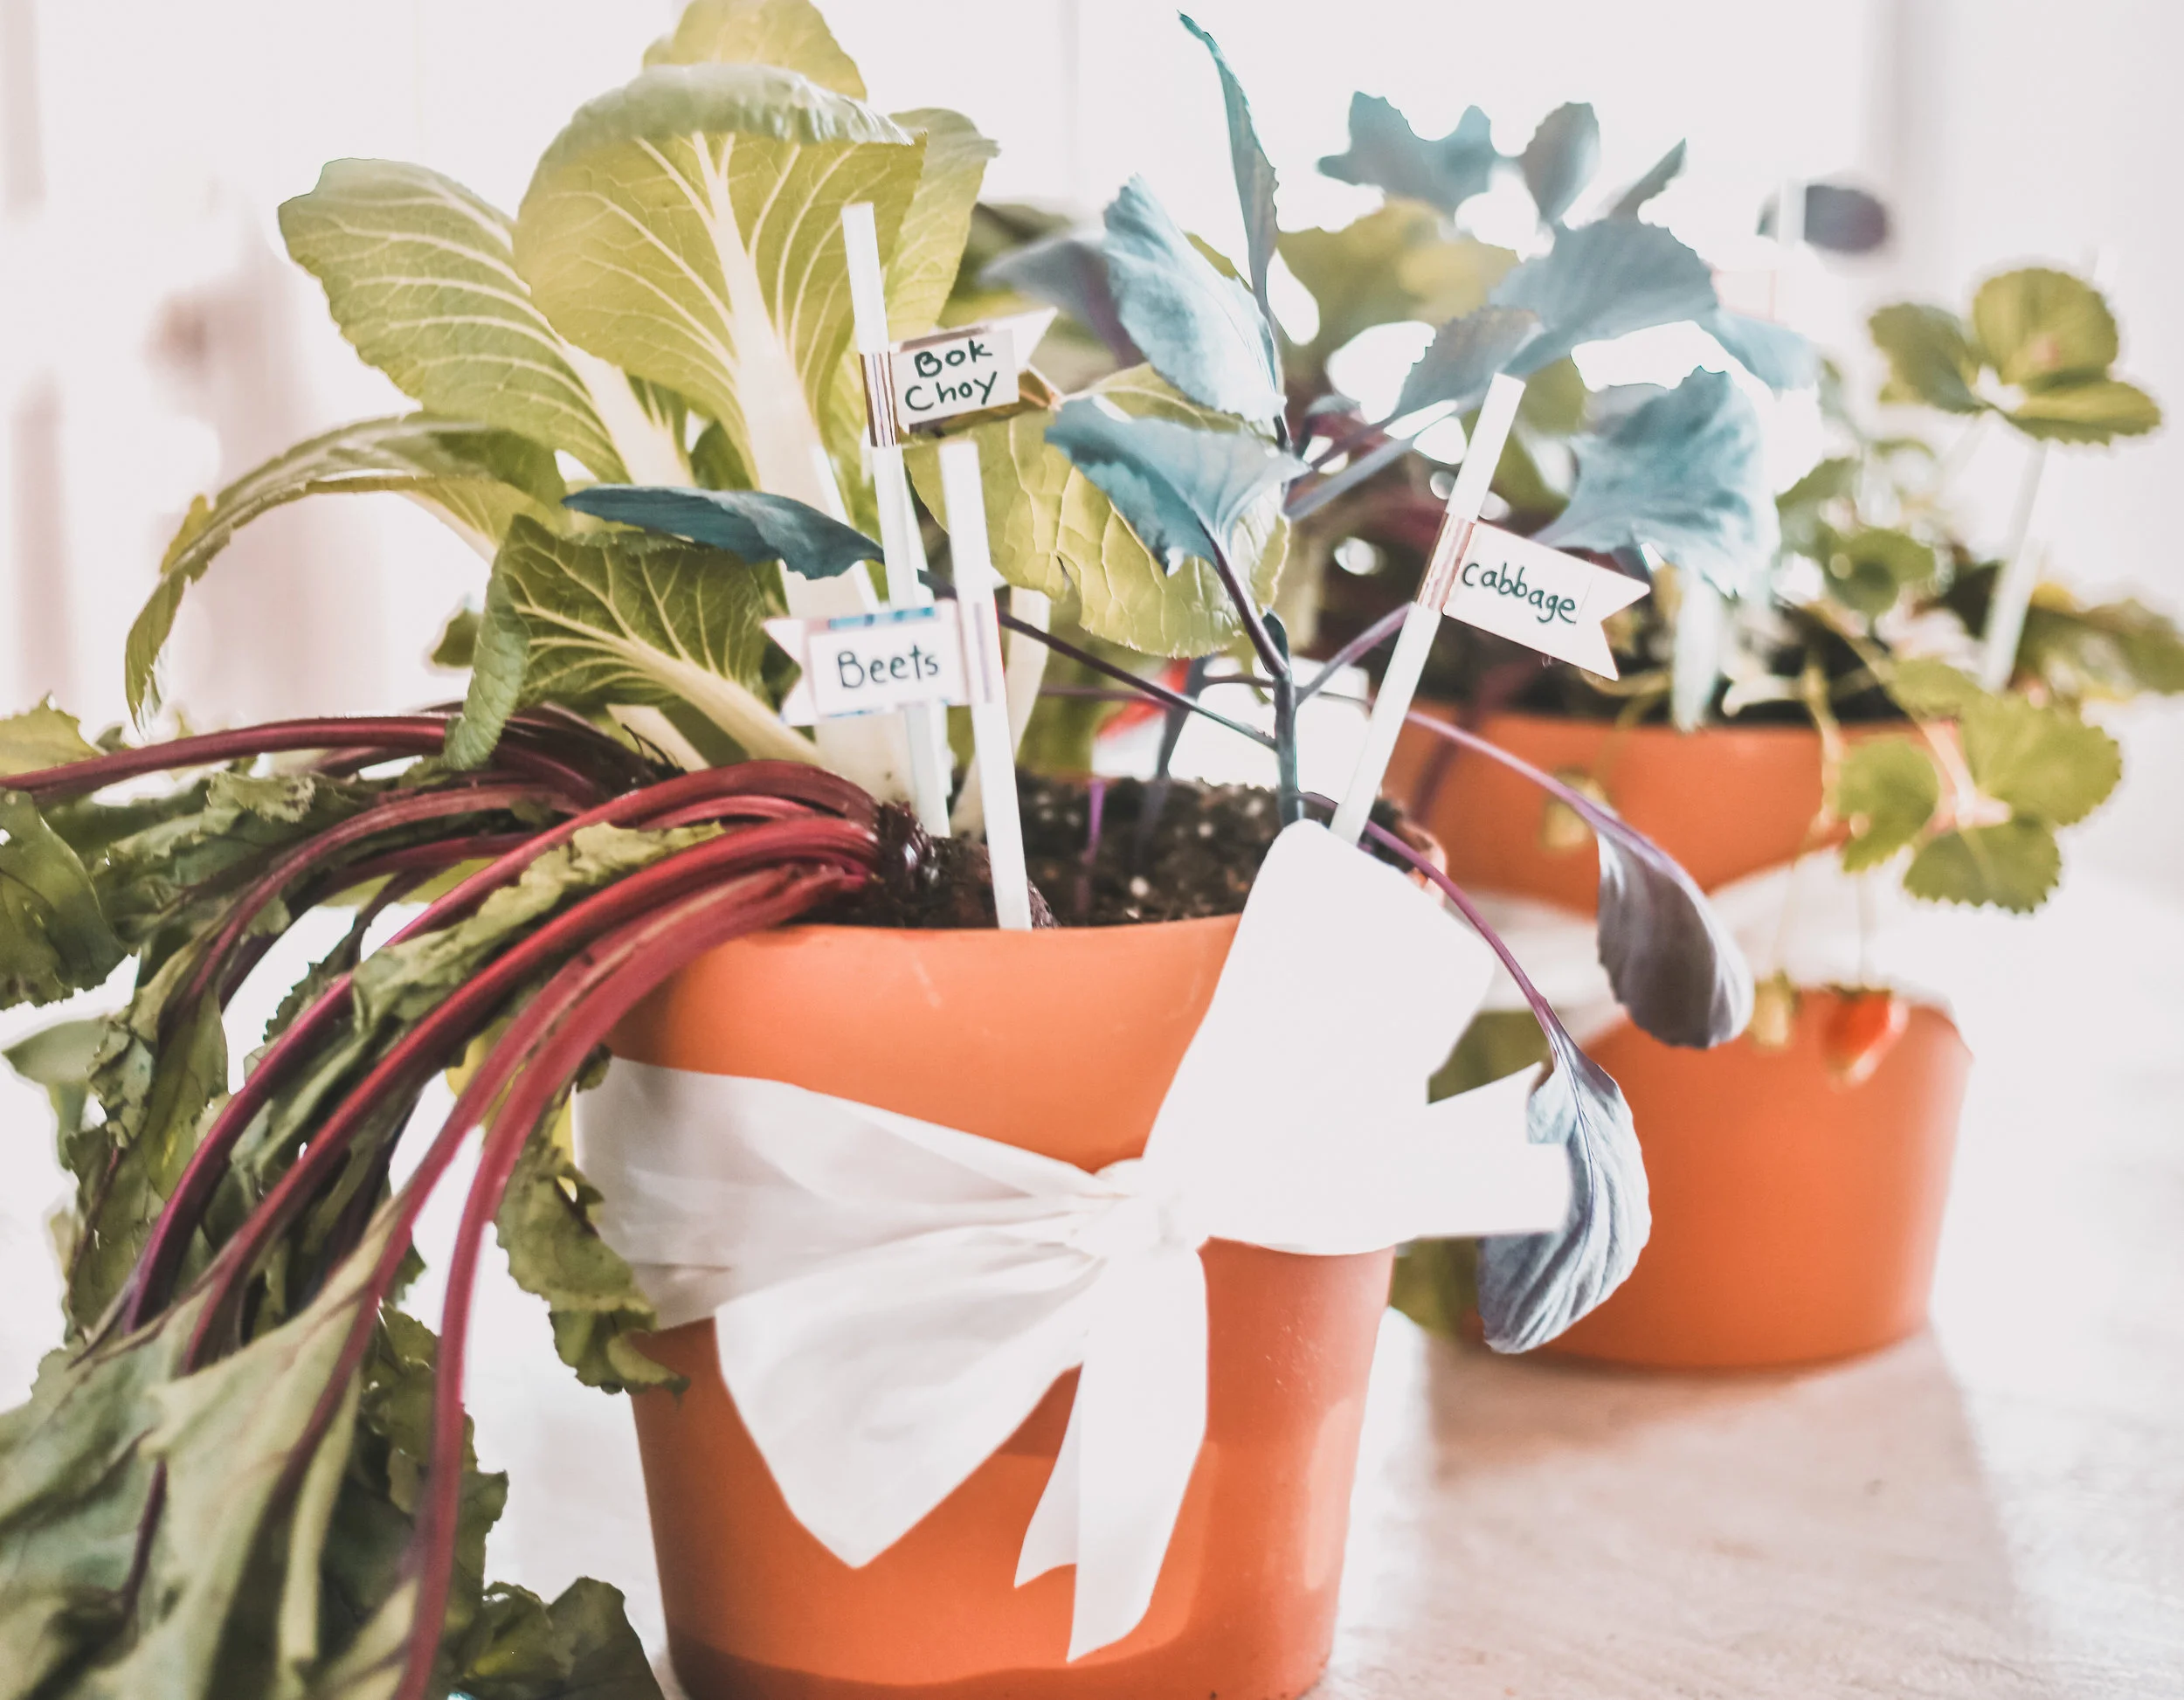
We headed to the hardware store where I let Isla help me pick out some easy to grow vegetables. With simple terracotta pots, a bit of potting soil, and some fresh spring greens, we put together Spring ‘baskets’ that will be giving back all Spring long.

For plant identifiers I used some festive paper straws I had left over from a party, gluing strips of paper with name tags on the flags.

After everything was potted, I wrapped my terracotta pots (Lowes has some FAB ones right now for $4 with sleek modern lines) with a simple ribbon.

Such a simple and fun way to spread love around. I added marigold flowers to mix of veggies, because marigolds are often planted in vegetable gardens to ward off bugs (the smell, similar to a skunk but much more forgiving, is thought to be the reason). I also cheated a bit because I was hoping to have some beets and carrots maturely bursting from the soil, so I grabbed a few from the supermarket and plopped them in the dirt instead of patiently waiting for them to grow from seeds. IF you do such a thing, ‘plant’ them right before you deliver the gift, and then let the receiver know that those particular varieties are ready for harvest immediately, and advice them to pull them up and refrigerate as soon as possible ;)


Such a fun and simple gift idea to do with my kids! These baskets would also make an equally perfect Mother’s Day gift or welcome to the neighborhood gift to a family who has just moved in!
Happy HAPPY Spring to you all!! It’s been long in coming this year, and I for one am soaking up all the vitamin D this season has to offer!
Cheers!!
Jodi

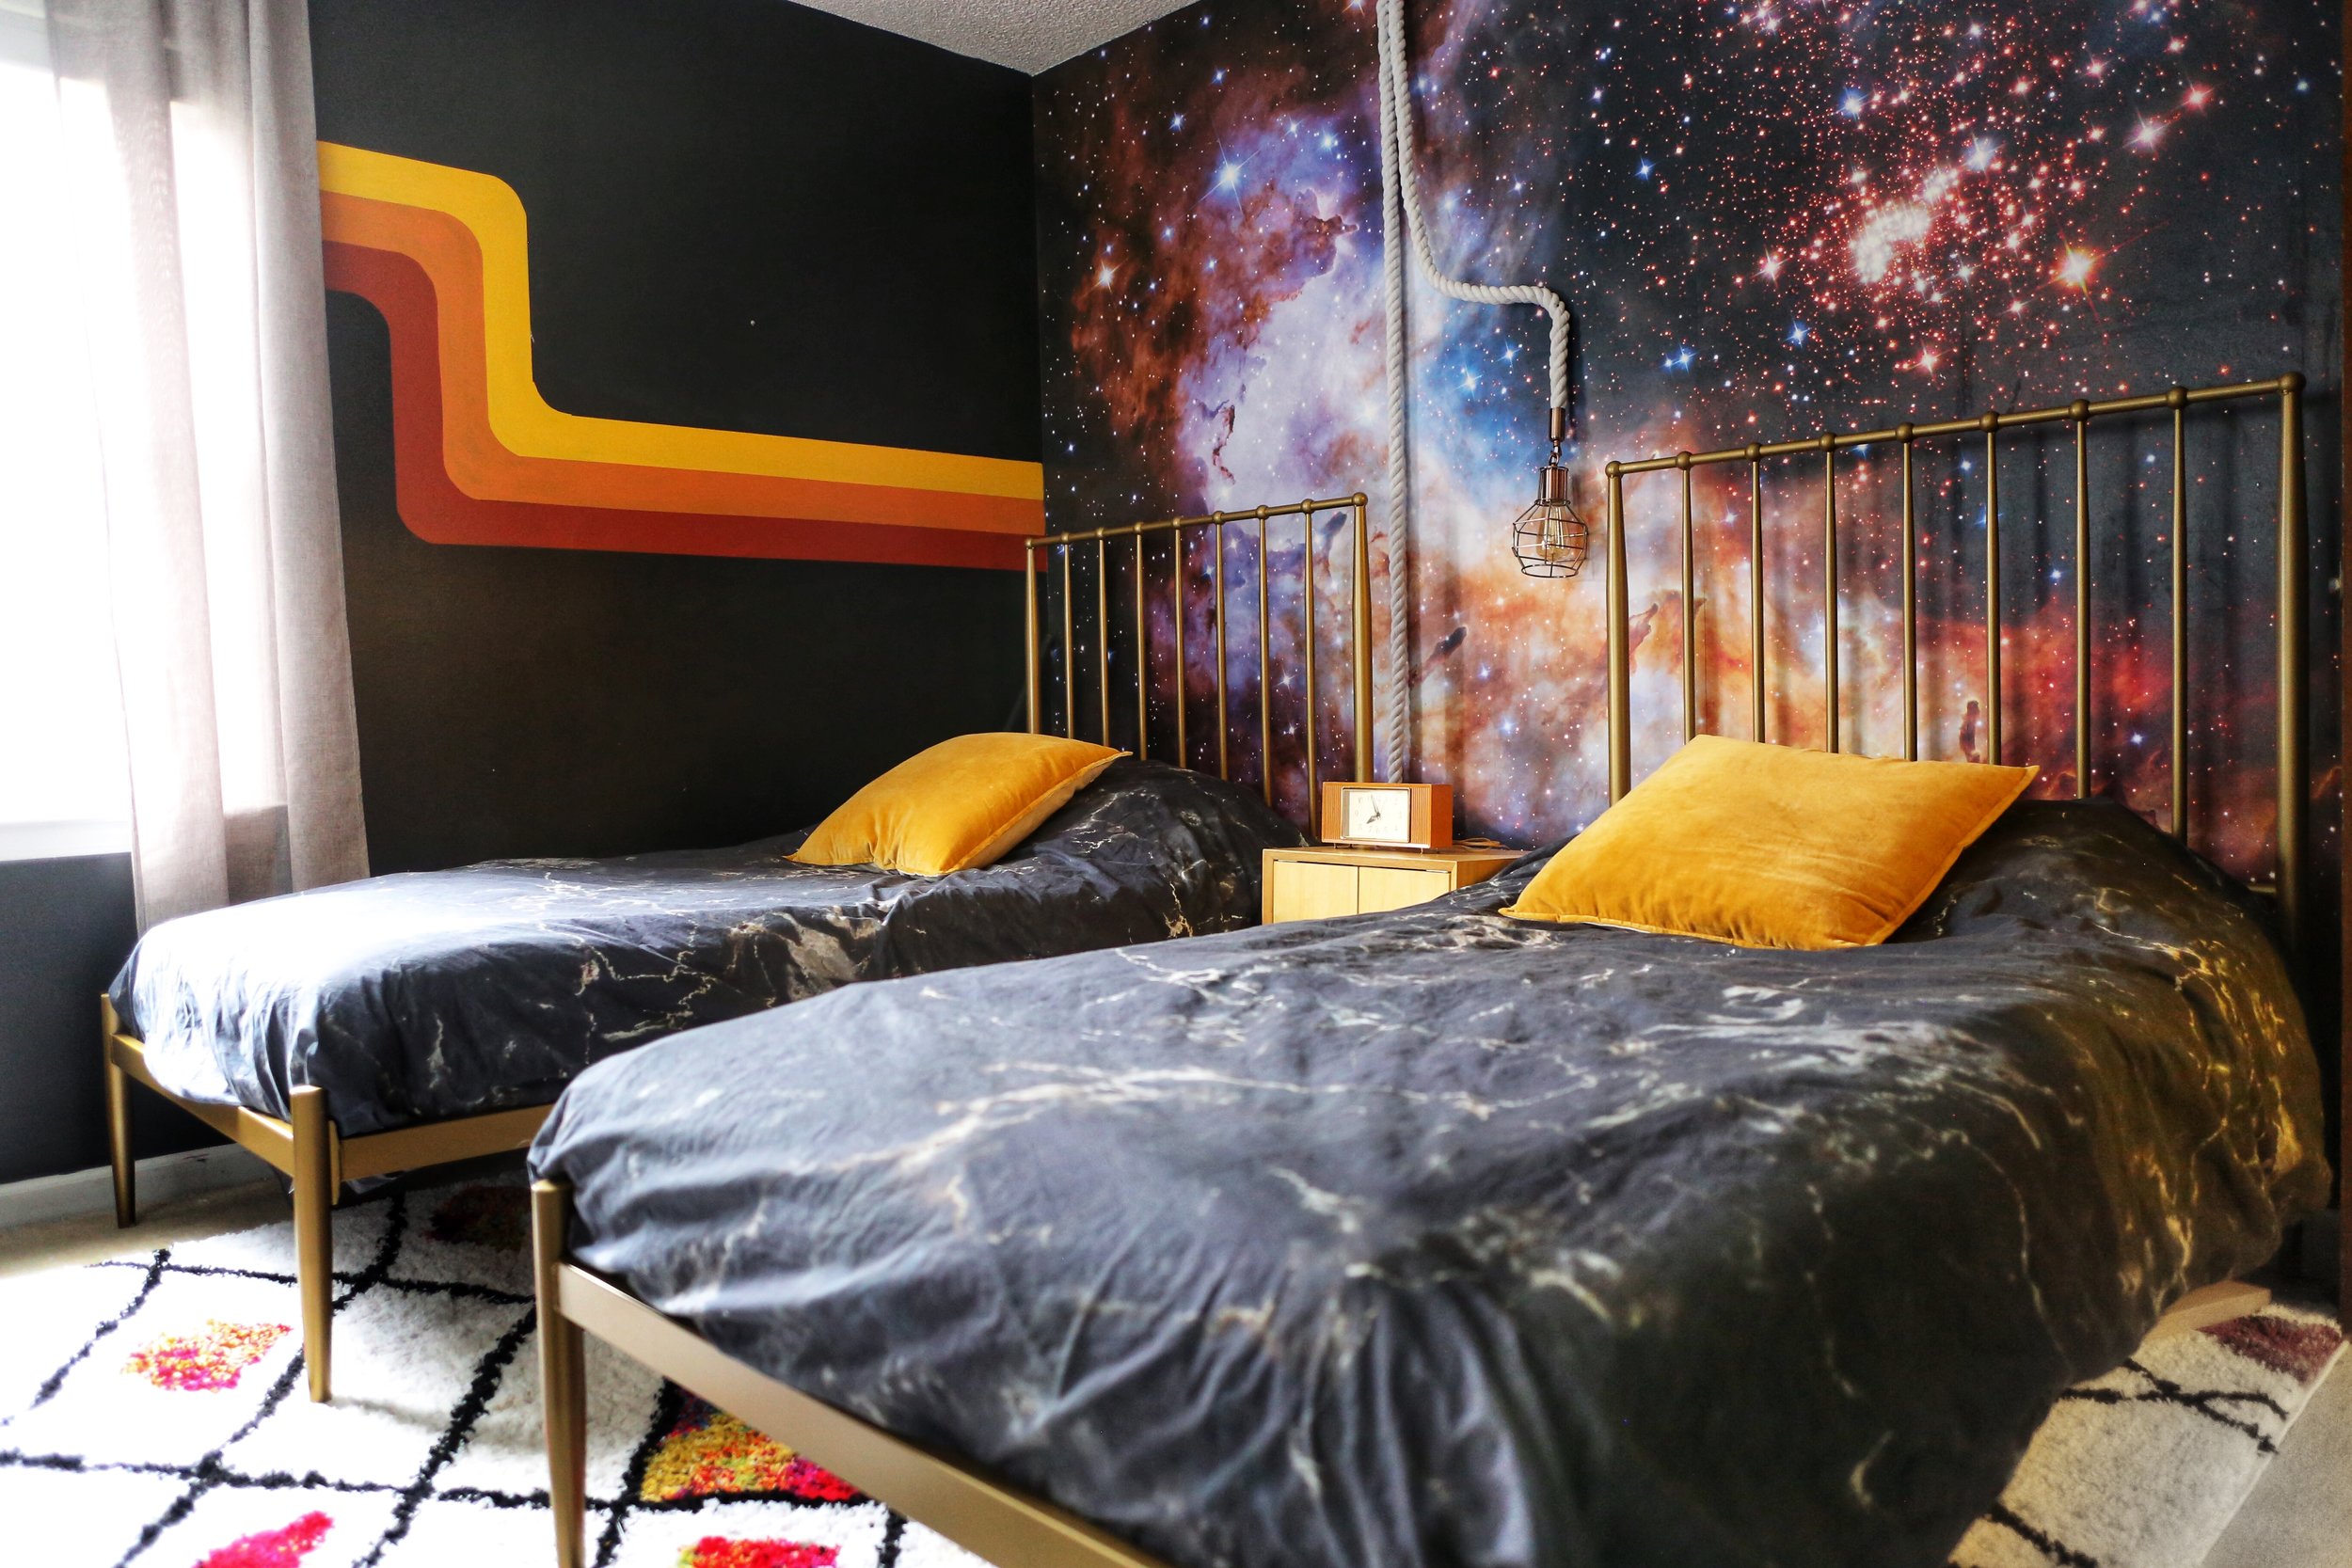
A Retro Space Themed Boys Bedroom
Over the last couple months I’ve been piecing my boys’ bedroom together, bit by bit.
It all began with my 11 year old’s fascination with Space Wallpaper. It’s all he talked about when I asked what he’d like for his bedroom makeover.
Then, he found and fell for a retro white and red shag rug. “This is the one I NEED to have Mom! I love it!” When your 11 year old son pries his thoughts from Fortnite to browse rug selections and falls for one hard, you just say ‘Yes, we will make this all work together for you buddy!’, am I right Momma’s?

What was birthed from these selections is the happiest Retro Atomic Space Bedroom that I never knew needed to exist. I’m so glad I worked WITH my boys to come up with a bedroom, one that they are excited to spend time (play video games) in.

We began the room makeover with THIS fabulous mural from MuralsWallpaper, and then wrapped the rest of the walls in inky black paint to create the feeling of actually being out in space.
The rug my boys found and fell in love with is from WellWoven rugs, you can find it HERE!
I love working with small shops, so we added some pieces from some of my favorite artist.

I love the message DO RIGHT AND FEAR NO MAN, it couldn’t be more perfect for my boys. It is from OXFORD PENNANT.
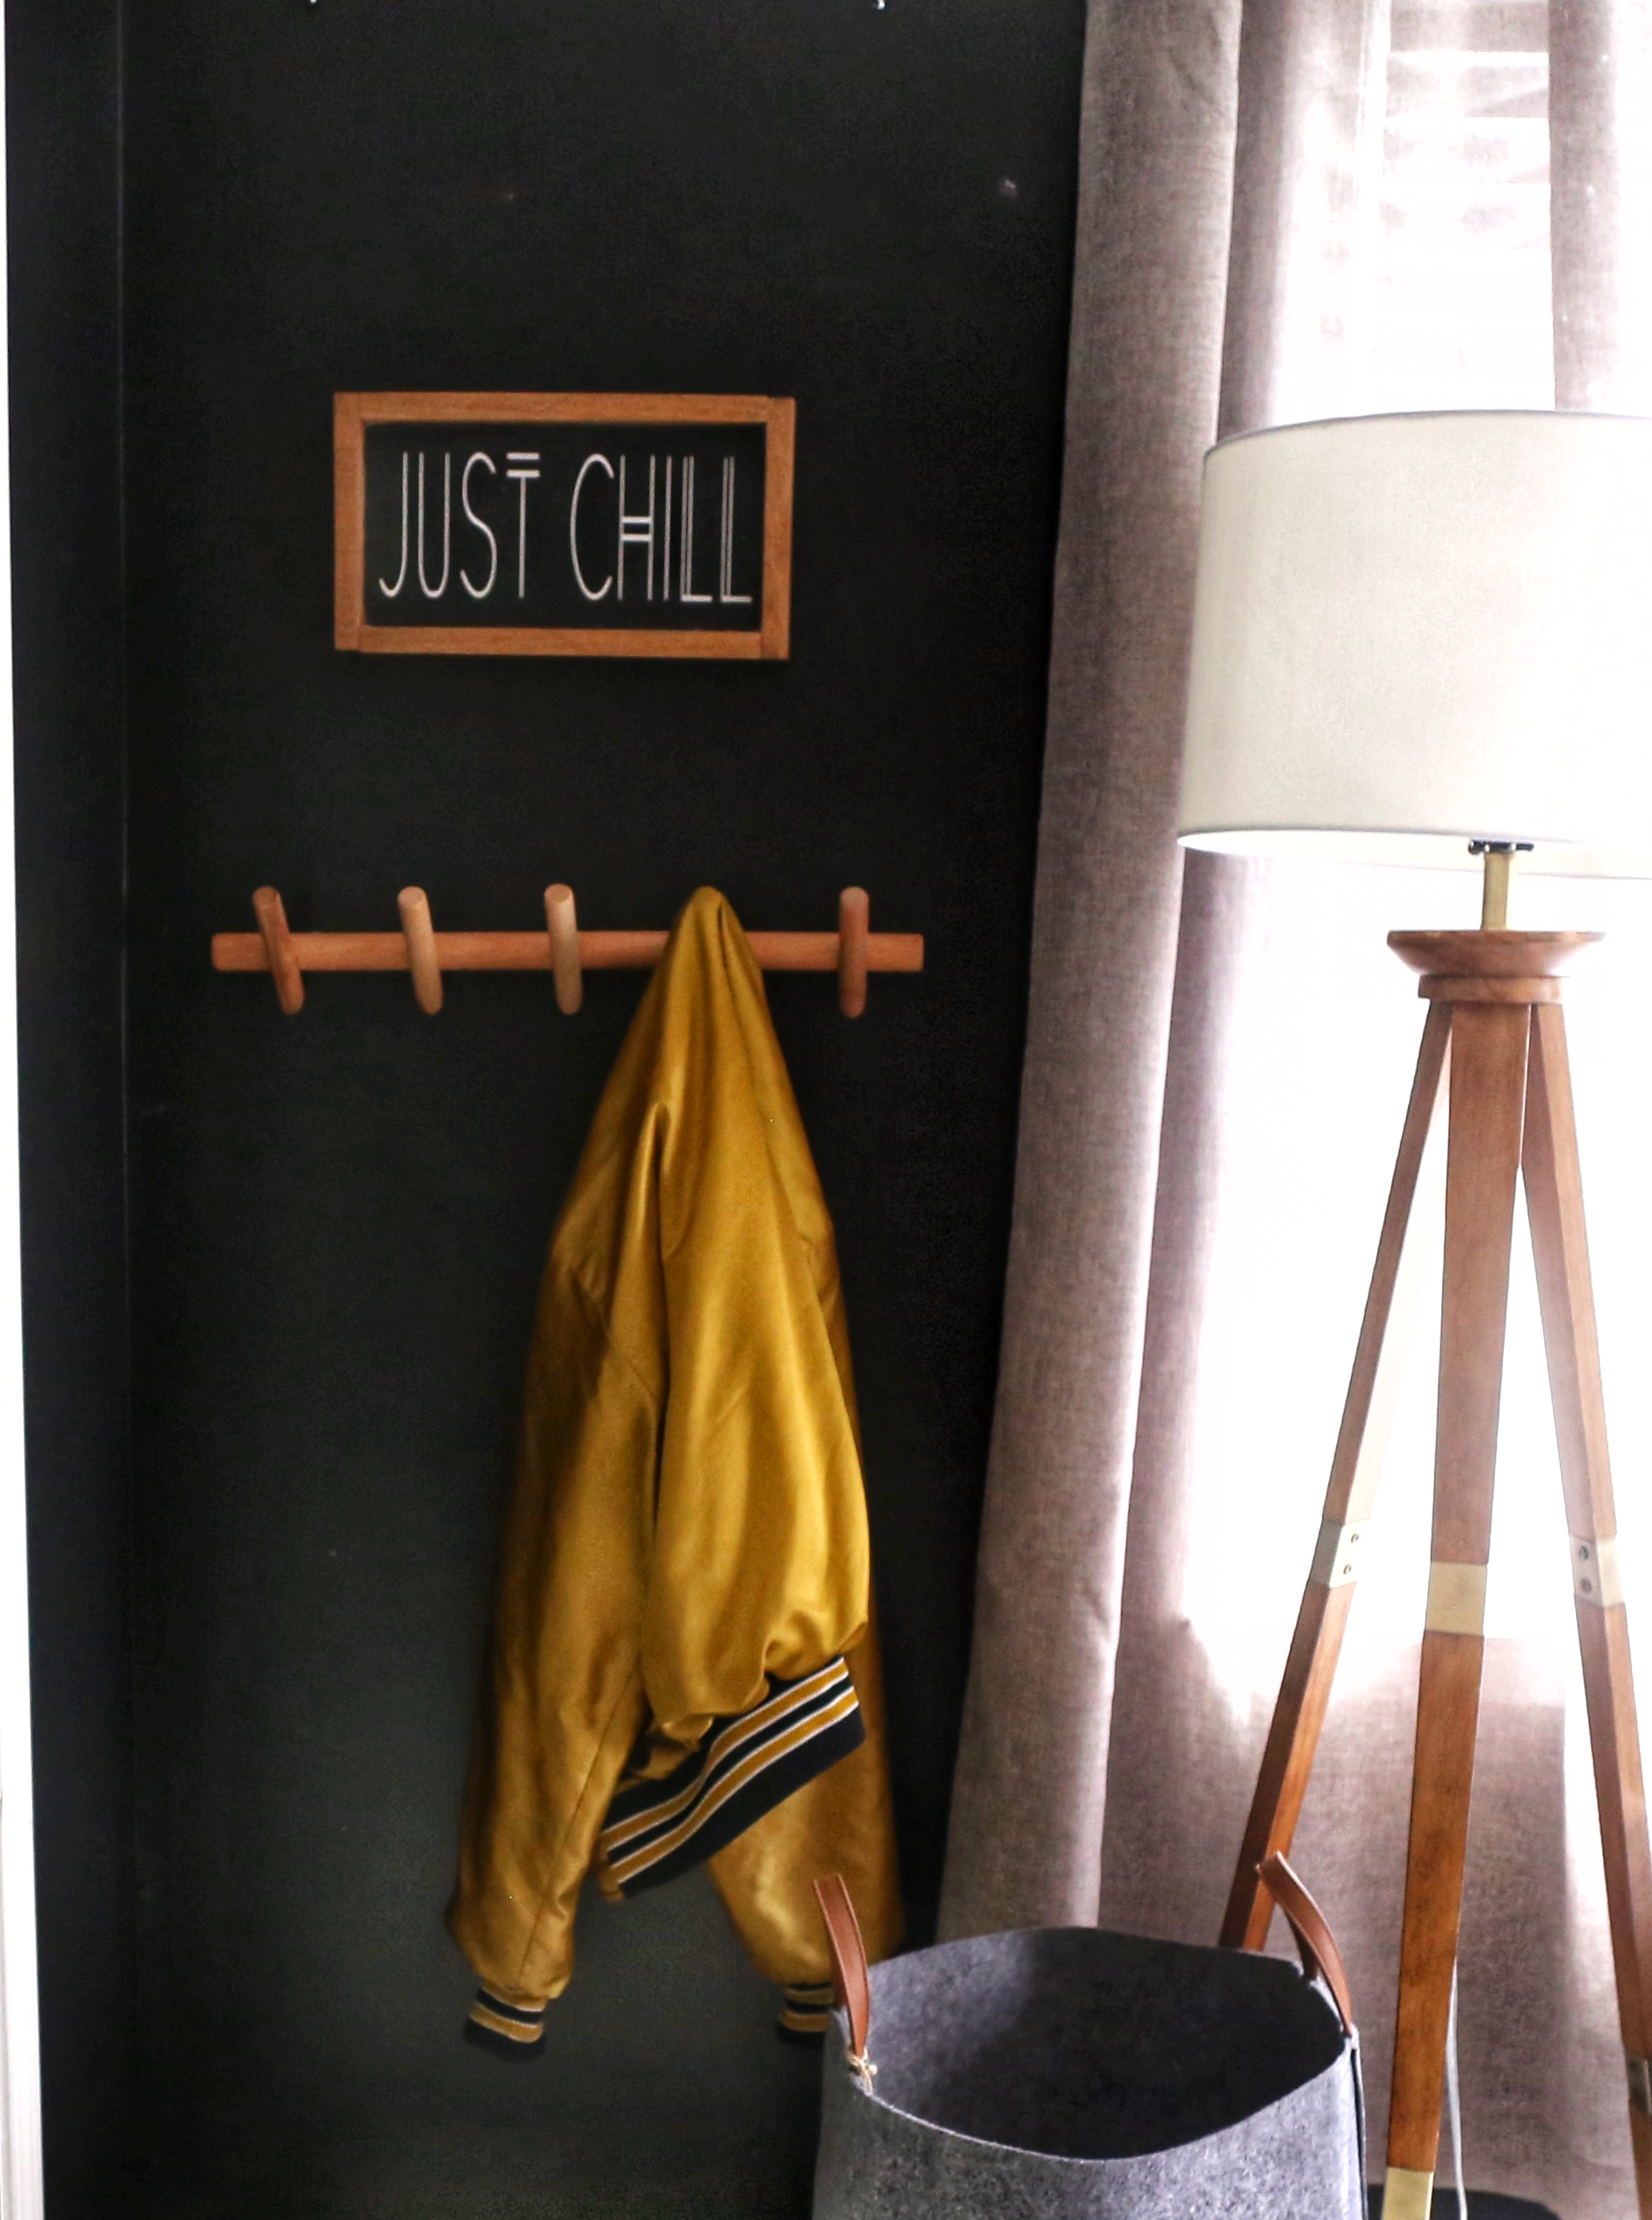
JUST CHILL (another perfect message for my boys) is made by my dear friend Christina from Southern Mesa Trading Co.
The mid-century style wall hooks are from Eden and Co, and you can purchase from Amazon HERE.

The DUVET COVER and the nightstand (a similar version is available HERE) are both from Urban Outfitters. The twin metal beds were an awesome steal from Walmart of all places. You can find them HERE.
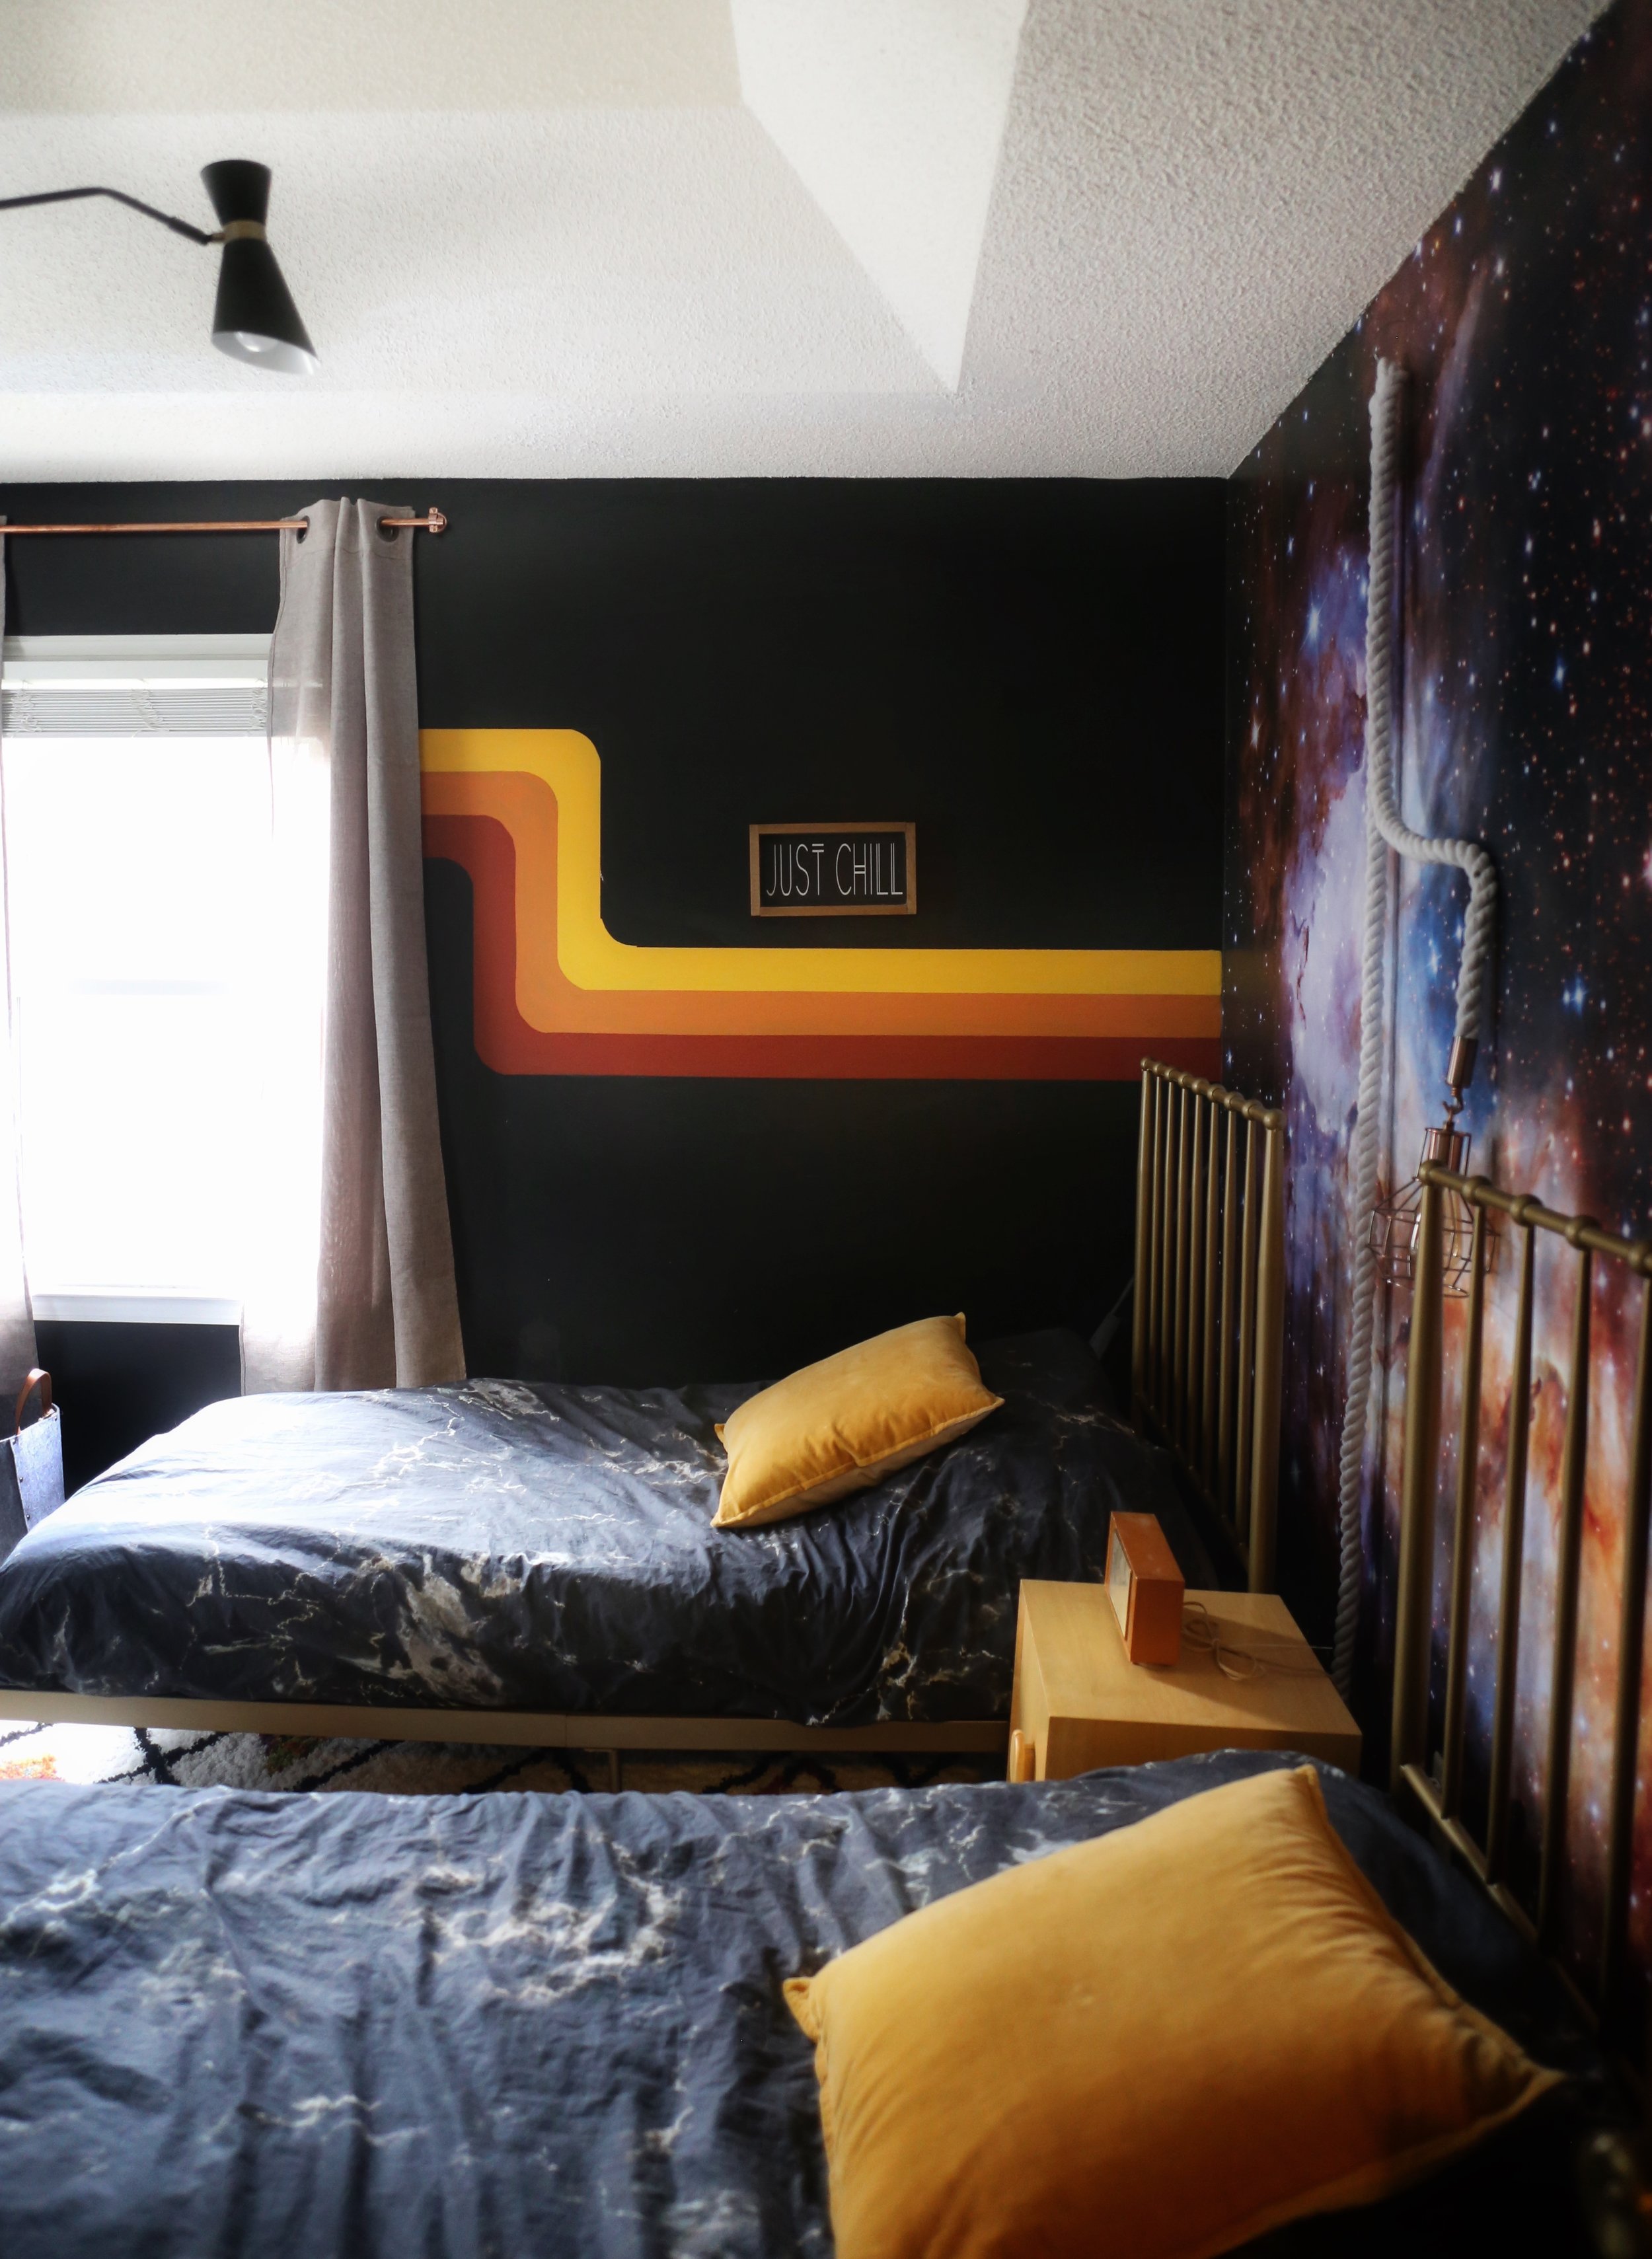
I found the perfect midcentury light from Home Depot for a fab price. It’s hard to capture in photos, but I’ll give you the link, cause it it’s a NEED TO KNOW!.

With the room nearly finished, I decided it needed just a little extra oomph! While the boys were at school I traced out some retro styled stripes on their walls, and painted them in bright yellow, orange, and red! Suddenly the whole room was broughtt to life (and I not too subtly tied in the wall mural and rug together).

I’m not quite finished with their room. Eventually the carpet needs to be replaced, the baseboards need another coat of paint, and yup, the curtains in here are the embarrassing flood length. They’ll be replaced as soon as our budget allows.
For now though, this room has turned into the most daring and fun room of the house!
I hope you guys love it as much as we do!
How to Install a corner Wall Shelf
Today I installed a Wall Shelf in my home all by myself. It was sturdy, completely level, and I’m 100% confident it won’t rip out of the drywall as soon as I place something heavy on top.
I share this, because for so many years I was too intimidated to hang anything that needed to be sturdy, whether wall shelves or curtains or lights, so I had to rely on my hubby to handle those tasks.
Not any more people! The process is simple, anyone can do it, and now I want to share it with YOU so you can have the same confidence to hang a shelf on your own as well.
Read More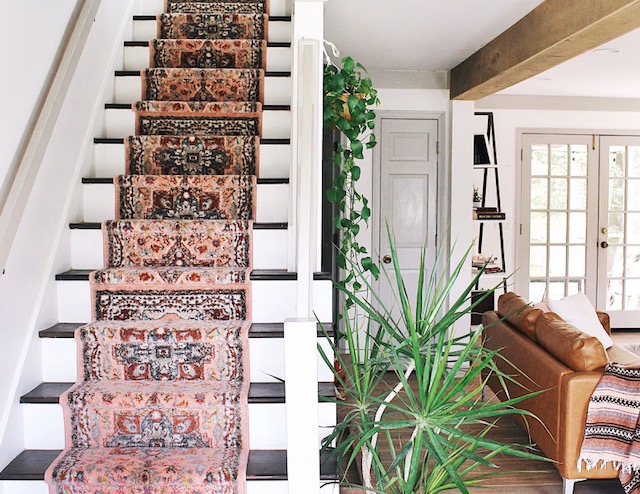
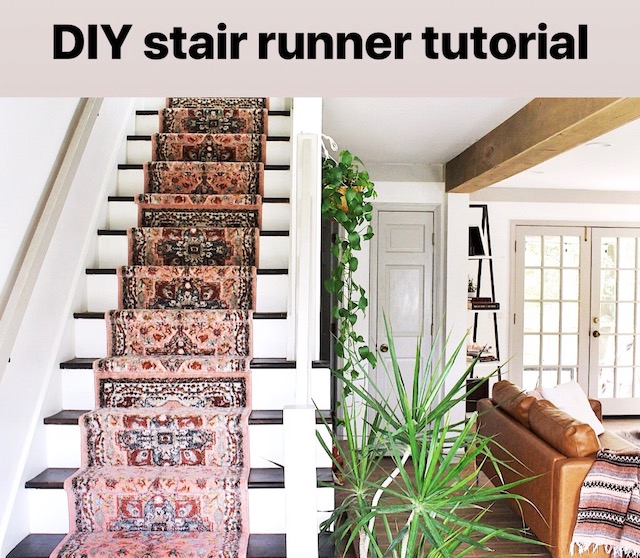
DIY Stair Runner Tutorial
I keep drooling over the new oh so plush, peach stair runner I installed on my stairs this week. Entirely on my own, mind you, AND over the 3 - 4 o’ clock hour when my kiddlings were getting off the bus from school -now THAT is an accessible DIY people.
Before beginning, I researched a few different DIY blogs and videos, and put together a plan with my favorite tips and ideas. The entire process was simple, straightforward, and went off without a hitch. I’m so very pumped to share it now with you!
A little back story first. The staircase at my front entry was my least favorite part of our fixer upper home when we first bought it. The stairs were covered in high pile beige carpet, the banisters were the sickly orange brown spindle type, and there was a patch of parquet flooring at the base of the steps.

Glory.
So my very first project of the house was to rip up the carpeting and attempt to stain the ratted up pine planks that were installed as the stairs. Y’all, it was not pretty. And it caught dirt like nobody's business. We lived with it for the last few years however, until now.
I thought through all different ways to upgrade the stairs without having to tear them out completely, and landed on the art of distraction kind -To lay a dazzling runner up the ugly duckling so that no one will notice her flaws. Oh, it totally works!
So without further ado, here is my simple method for laying a runner up your staircase.

SUPPLIES
1. You'll need a carpet runner in the length of your stairs.
To find that amount, measure a stair, under the nose, and down the tread, to get the measurement of each stair, and then multiply that for as many stairs as you have. Order the appropriate length or amount of runners that you’ll need to cover it from top to bottom, remembering to add extra just in case! I needed 4 runners to complete my stairs. Don’t forget to consider the width of your rug, I liked the look of having 5 1/2 inches of stair showing on either side, so I went with a 27” wide rug. I choose this Celestia Pink Traditional Vintage style runner from Well Woven
I wanted a print that would hide as much dirt as possible, and the peach was a perfect match for the rest of my home.
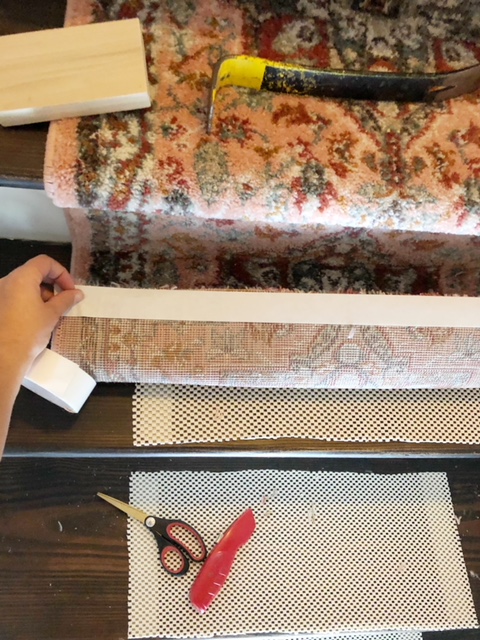
2. You'll need a non slip carpet pad. Some tutorials I read skipped adding the underlayment under the runner, but I wanted a little more cushion for my feet, so I used this cushioned non slip carpet pad. I’m so glad I did! It makes the trip up and down the stairs extra pleasurable.
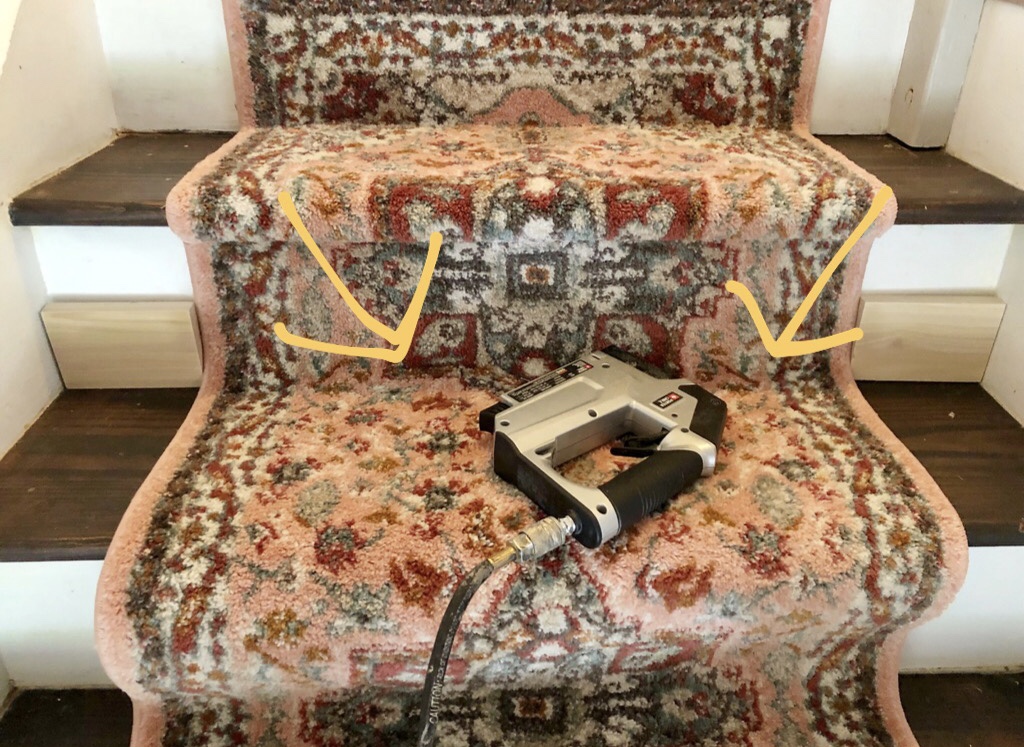
3. Staple Gun (Here's a link to the one I use, which powers with an air compressor so I needed that as well).
4. You will also need 9/16 inch heavy duty staples, a utility knife, carpet tape, measuring tape, scissors, and a pencil.
Your first step is to cut the non slip carpet pad into rectangles, slightly smaller than the width of your rug and the depth of your stairs. We aren’t going to be covering the lip of the step, so it doesn’t need to extend that far.
When all of the pieces are cut, find the center of your top stair and mark it on the riser. Then match that with the center of your carpet pad and secure in place with two strips of carpet tape.

Once all your underlayment is taped down, you’ll begin to staple down the runner. I started at the top of the stairs, centered the runner, and then attached it to the riser using a strip of carpet tape. Tim cut me a couple 5 1/2" wood blocks to use as jig’s to keep the rug centered on each side as I made my way down so I wouldn’t have to measure every time. They would have worked perfectly the entire time if my stairs didn’t start getting wider the further down the steps I went down - old house problems! But in the beginning it was really helpful to have them keeping everything in place as I stapled the carpet in place.

As you go down the stairs, you are going to want to staple at the very base of the step, pull your rug smooth and tight, and then staple under the nose to secure it. These are the least visible spots so attaching them as securely as you are able in those places will give you the most discreet staple job. I found some steps seemed to need more security, so I stapled in other places where needed. Since my rug has a bit of pile to it, the staples hide easily underneath.
I was worried it was going to be tricky matching up the different runners, but it honestly was not difficult at all. When I got near the end of a runner I would trim it with a utility knife so it ended under the nose of the stairs and then staple it in place. The carpet tape made it a breeze to secure the next runner in place before I stapled it up, and voila!! The seams look pretty great I’d say!
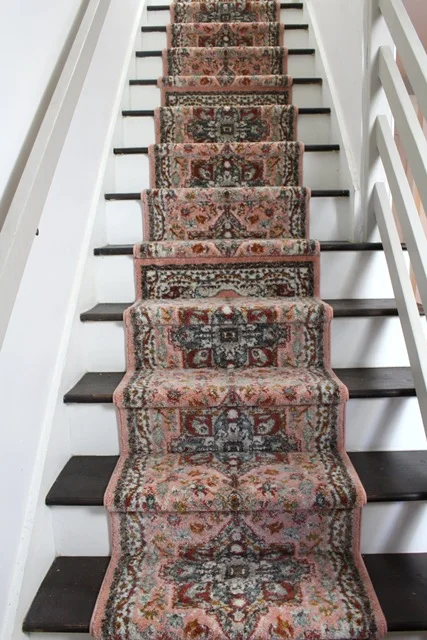
Once you get to the bottom, simply trim to size and staple it down!

I’m so glad I added this runner! It definitely works at hiding the dirt between vacuuming, it’s oh so soft under foot, and the whole project took me under 2 hours to complete -that included taking breaks to run down to the bus stop and help with homework.
Leave any comments or questions below! I’d love to hear your thoughts!
xo -Jodi
DISCLAIMER
Some products contain affiliate links where I am paid a small percentage if you purchase that item. Thanks ya'll!

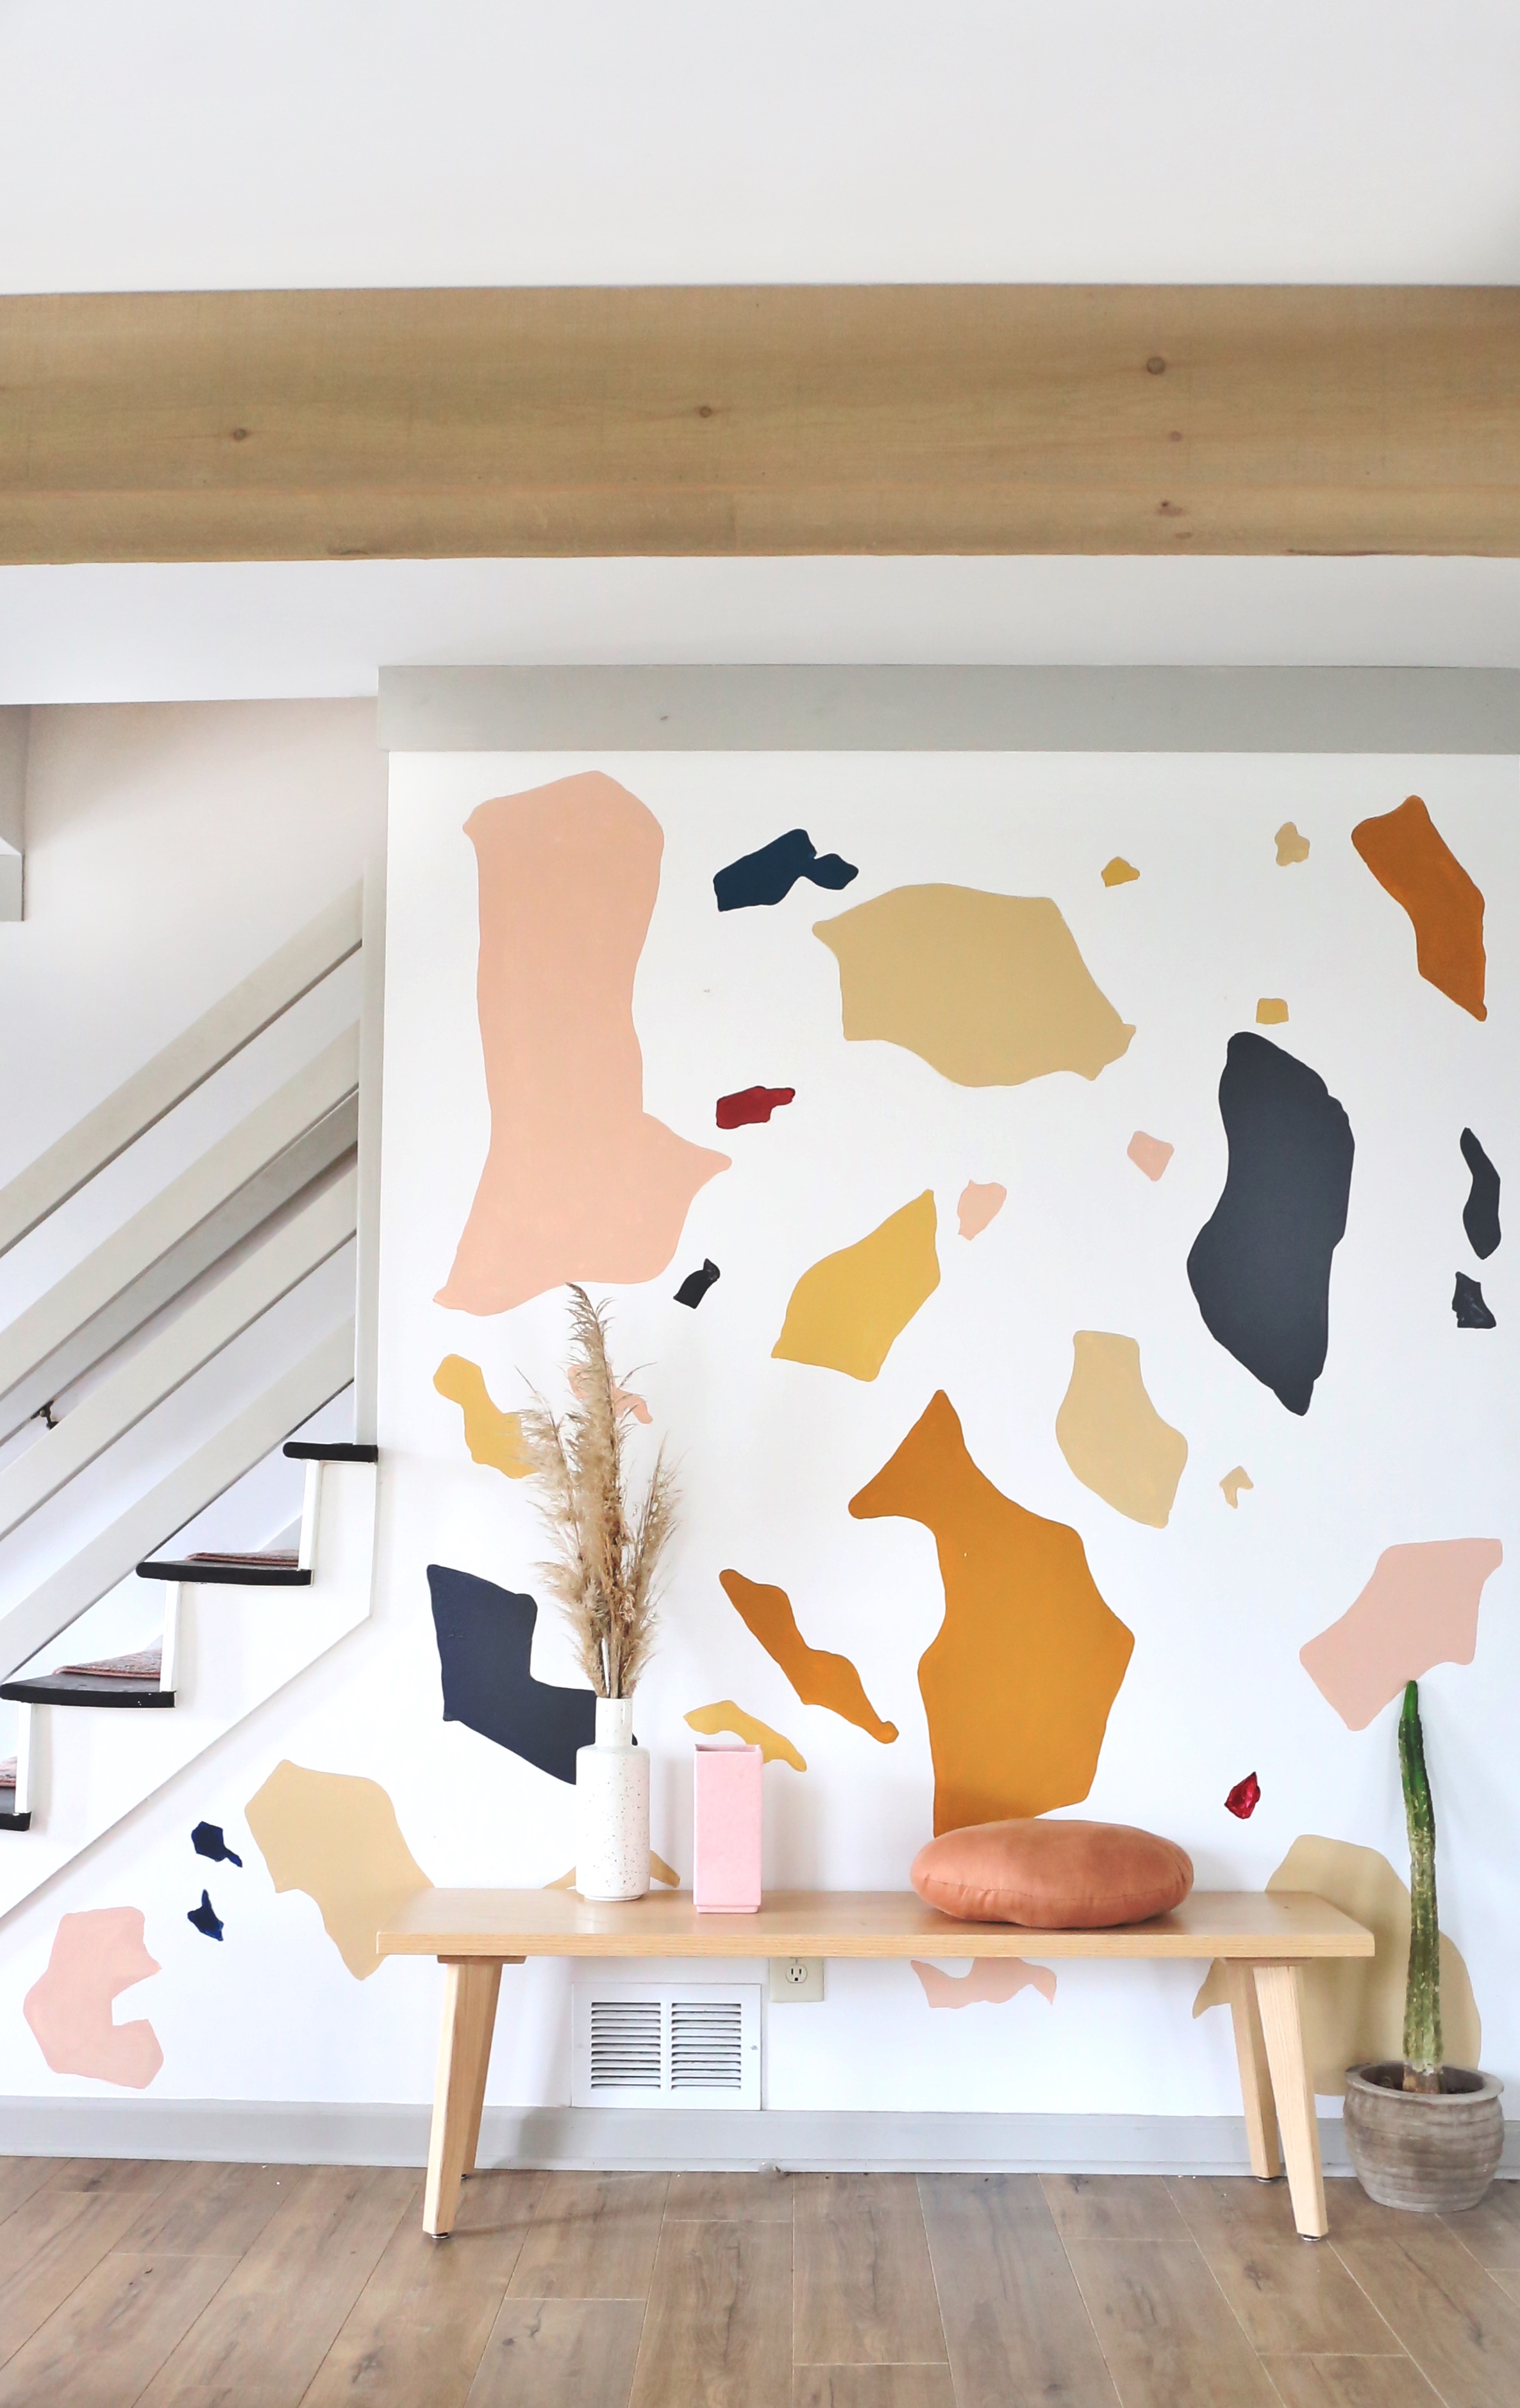
DIY Terrazzo Wall Mural
DIY Terrazzo Wall Mural Tutorial
It started with me staring at a blank wall. Then staring at it again. Then searching for the perfect art for that wall and putting so much pressure on how perfect it had to be, that I’d give up. Then sitting and staring at the wall again.
This process went on for a month.
I woke up yesterday and decided enough is enough. Instead of waiting around to find the perfect piece for that accent wall, why not just turn the whole wall into art?

I’ve been bent on adding a little Terrazzo flare to my home for some time, so I figured this was the perfect opportunity, especially using my favorite low risk medium - paint.
Having a plan, I headed to Pinterest for some inspo.


I decided large scale was the way to go for me. I wanted a color scheme incorporating pinks (to match my couch), beiges, and black.
Over the years I’ve collected quite a stash of sample paint jars from Lowes. I gathered them up and assessed the color situation. Yes, these would do. The colors I ended up going with were all Valspar brand. Chimney Smoke for my black, Amber Sienna for the mustard orange, Warm Buff for my beige, which I also used to mix with Coral Peach to make a beiger pink, and mixed with Pumpkin Butter to get a light beige yellow. I wanted a very dark blue, but only had Pacific Pleasure on hand, so I mixed that with my black. And lastly I used Spanish Tile as the dark red small accent color.

Next it was time to sketch up my shapes on the wall with a pencil. I resisted the urge to over think my placement and designs, and instead turned my music up loud, channelled my inner Picasso, and sketched those shapes in 3 minutes flat.

When I was done I stood back to see how it looked, and HA! the pencil line was too light to see from a step back meaning I had no idea how it all looked together. Now, any thoughtful person would have retraced their shapes with a darker pen, but I told myself ‘Nah, it’s gonna look great’, and got out my paint.
Ok, ok, I wasn’t AS careless as I’m coming off. I knew I had four large shapes that I wanted to accentuate, so I started painting those in first, making sure I liked the balance and composition of it all. Creating a Terrazzo art piece is rather tricky, because in art you want colors and shapes to be balanced in a certain way, but in actual Terrazzo, the chips fall where they may quite literally, so in order for the mural to look authentic, I had to allow for imperfections. Two of the same color shapes next to each other, and colors not placed equally in size and shape.

I wanted the colors to represent stone as much as possible, so instead of painting the shapes completely, I left them slightly translucent in places by dry brushing parts of the color. This made some areas look a little darker and some lighter. I used a regular Trim paint brush, and snagged one of my daughters larger watercolor brushes for the edges of the shapes.
As I was painting the shapes my husband came home and I asked for his honest opinion. In a very careful way (Ha!) he said he liked the pieces that had sharper edges best because the shapes with rounder edges looked a little Holstein to him.
Okay then. I went back in and gave the shapes a little bit pointier edges using a medium sized water color brush. It was a good call.

Over all the process was fast, fun and easy. I didn’t take myself too seriously, because any mistake is a quick sand and repaint over top. This wall mural is definitely the statement piece for the room, and we love it!
What do you guys think? Would you ever put a Terrazzo Wall Mural in your home?
Chattanooga Family Adventure
“Traveling with a family of six can be overwhelming, both logistically AND financially. However, as a family, it’s something that we value incredibly high. A couple years ago we came up with the idea of Family Adventures, short day trips to destinations within driving distance, where we could discover new territories, try new foods, and most importantly spend time and create memories together as a family.
We now have many mini adventures under our belt, and the value it’s brought to our family is priceless. In my Family Adventures Blog Series, I”ll be sharing some of our favorite experiences, as well as tips to make traveling with kids more enjoyable.”

Coolidge Park, Chattanooga TN
Nicknamed ‘Scenic City’, Chattanooga is located in Tennessee, just north of the Georgia border. Nestled on the Tennessee River, and surrounded by mountains and ridges, we choose Chattanooga as our November Family Adventure destination.
Before we even began the trip we were dealing with some preteen shenanigans. There is nothing quite like investing time and money in travel just to have it sabotaged by an adolescent attitude.

The certain someone we were dealing with that day happens to be highly motivated by money. So before we began the trip, we sat everyone down and gave them $10 a piece to spend however they’d like, whether at the museum gift shop, or to buy a treat, whatever they choose. The catch? Anytime they were caught complaining or fighting, they lost one dollar. It was a brilliant endeaver. We had zero issues on that trip, and very very happy kids to boot.
Chattanooga is an easy two hour drive from Atlanta, and we arrived in the city just in time for lunch.

GOOD DOG, Chattanooga TN
Our first stop was on the North Shore of Coolidge Park. We rolled into the kid friendly restaurant GOOD DOG. GOOD DOG whips up a variety of gourmet style hotdogs, served classic how my kids like it (and for $3 so Yay!), or topped with unsuspecting combinations like the Dutch Dog, served with curried ketchup, gouda cheese, onions and peppers, and covered in fries (oh my!!). Their loaded frites are are amazing as well. I love that they also offer vegan and gluten free options, truly making this an affordable stop for the whole family.

GOOD DOG, CHATTANOOGA TN
After lunched we crossed the Street to Coolidge Park, a riverfront family recreational area. Right there in the park sits the restored 1894 Dentzel Coolidge Park Antique Carousel. With 52 whimsical hand carved animals, lovingly restored for the city, and a calliope organ as well, it truly was a magical place to spend a part of our day. Rides are just $1.00 so you can your heart out without breaking the bank!

Coolidge Park Antique Carousel, Chattanooga TN
Also in Coolidge Park are the outdoor water fountains, which were off season at the time, but still fun to climb and and play pretend with all the large animal statues. Just beyond that is a pedestrian bridge that crosses the Tennessee River over to the South side, a great way to get in some exercise in for the day.

COOLIDGE PARK, CHATANOOGA TN

After exploring the park, we drove up Lookout Mountain to Chattanooga’s Prized landmark, Ruby Falls. Ruby Fall’s is the nation’s tallest and deepest underground waterfall open to the public. Located 1,120 feet underground, a visit to Ruby Falls includes a guided tour through the cave, and offers breathtaking views of magnificent cave formations as you walk through the narrow winding passages towards the Falls. The walk is about a half mile each way, with some of the paths getting narrow. Take note if you or someone in your party suffers from claustrophobia, they could have a problem in the cave.

For us, the trip was well worth it, especially because our boys are very much into geology. It was truly wondrous to experience nature underground.
After the Falls, we drove to the nearby Incline Railway, which is over 100 years old and whose track is on a 72.7% incline, one of the steepest passenger trains in the world. The train runs up and down the mountain about every 20 minutes and carries passengers from the top of the mountain to the bottom to explore the shops below in St Elmo. Not gonna lie, I had butterflies boarding the train as I stared down the steep side of the mountain, but the train ran slow, and soon I forgot me fear as I took in the breathtaking views of the city as the sun set and the moon rose over Chattanooga. It was absolutely worth the experience, and we’ll do it again next time we visit. The train runs daily from 10 am to 6 pm and a round trip ticket is $15 for adults and $7 for kids.


For dinner we hit up the local 5 Guys, which was very untouristy of us, but we were hungry and tired and overwhelmed by all the options. After we regained our energy we headed to our final destination, the historic Bluff View Art District, to grab a dessert and a coffee before hitting the road back to Atlanta.


We found the sweetest chocolatier shop right next to Rembrant’s Coffee House, a European style cafe offering in-house roasted coffee and hand made pastries. As the sun went down, the Art district seemed to be waking up. As much as we wished we could have explored more, our kiddos were tired out so we climbed back in the car and began the drive home.

Chattanooga had SO much to offer, much more than we could have experienced in one day. We’re already planning another trip back to see everything we didn’t have time for like the aquarium, Rock City, and the Children’s Museum.


An Attic Room makeover with Bassett Furniture
Enter through what looks like a closet door in our master bedroom, and you’ll find a luxurious (albeit inconvenient) surprise - 800 square feet of pure privacy. An attic room, tucked secretly away from the other areas of the home, full of quirky angles and little gables. With our family size, it would be far more convenient for this to be a 4th bedroom, but it would be easier to move altogether than to change the floor plan of the house to that scale.

So it’s ours, Tim’s and mine. Our own quiet space to get away from it all. We’ve always dreamed of making it a beautiful retreat, but for the last few years it’s been used mostly as storage.
That is until now! With the help of Bassett Furniture, we were able to create the retreat that we’ve always dreamed of!
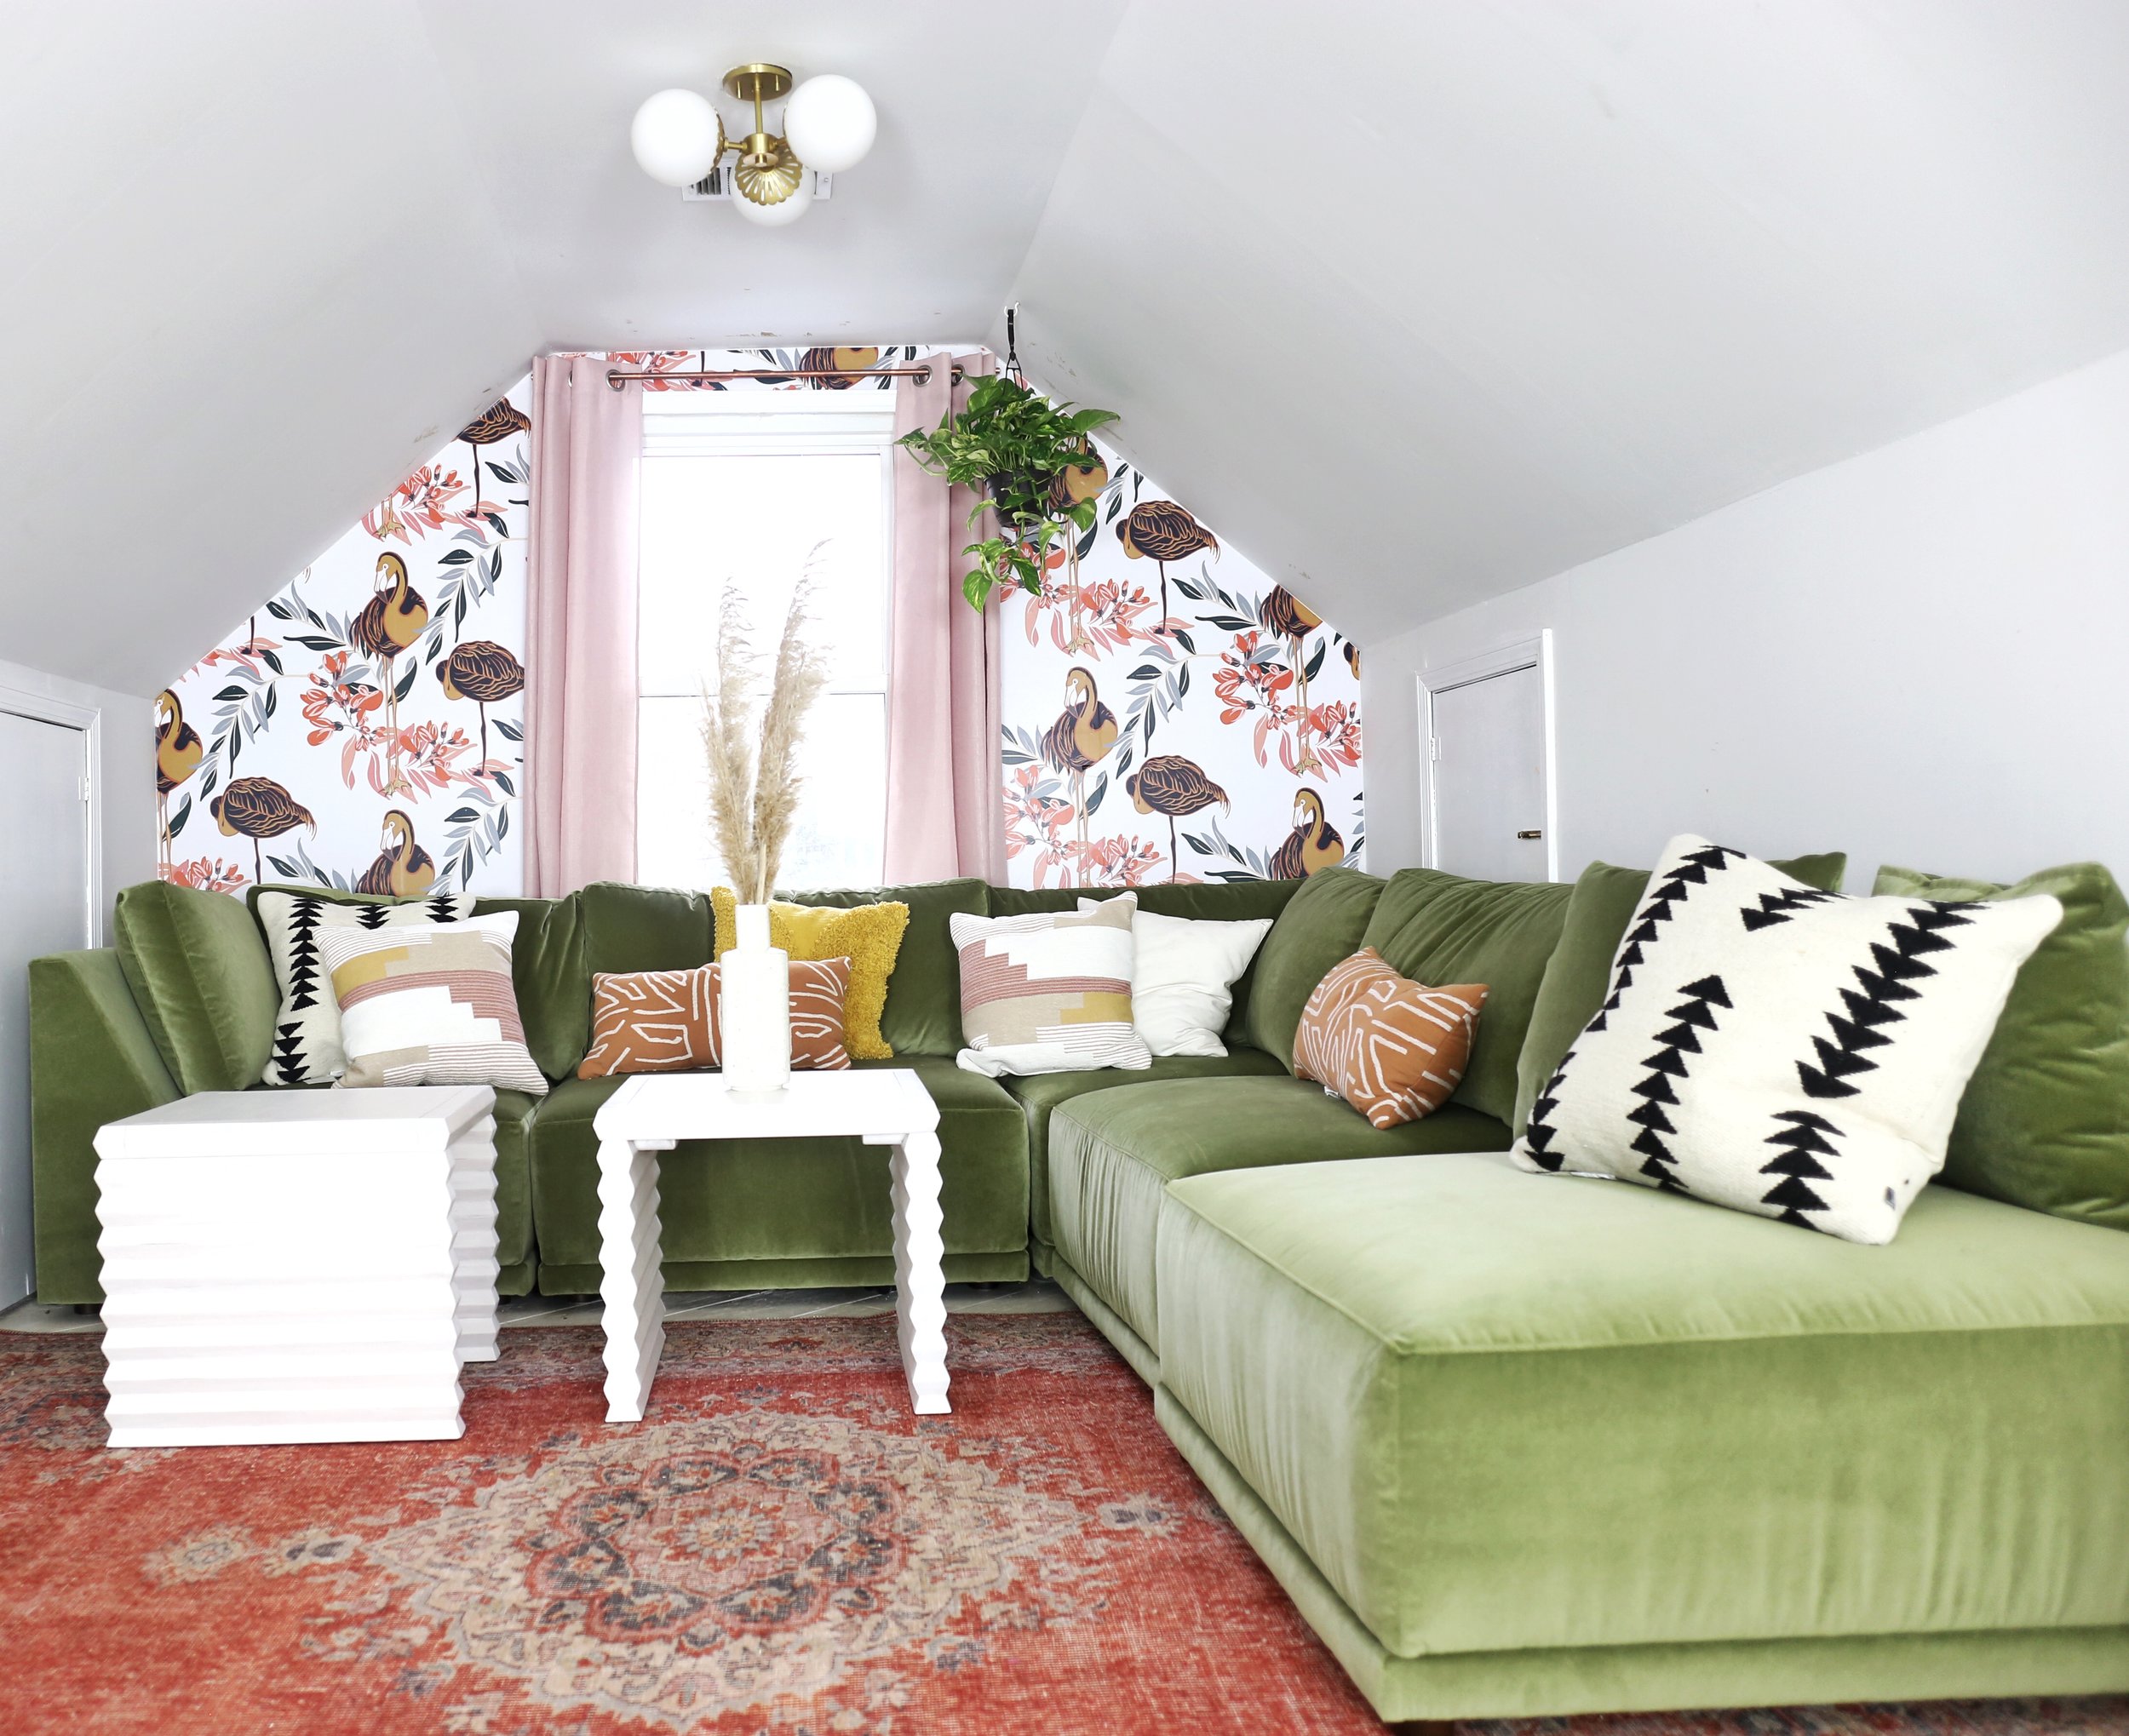
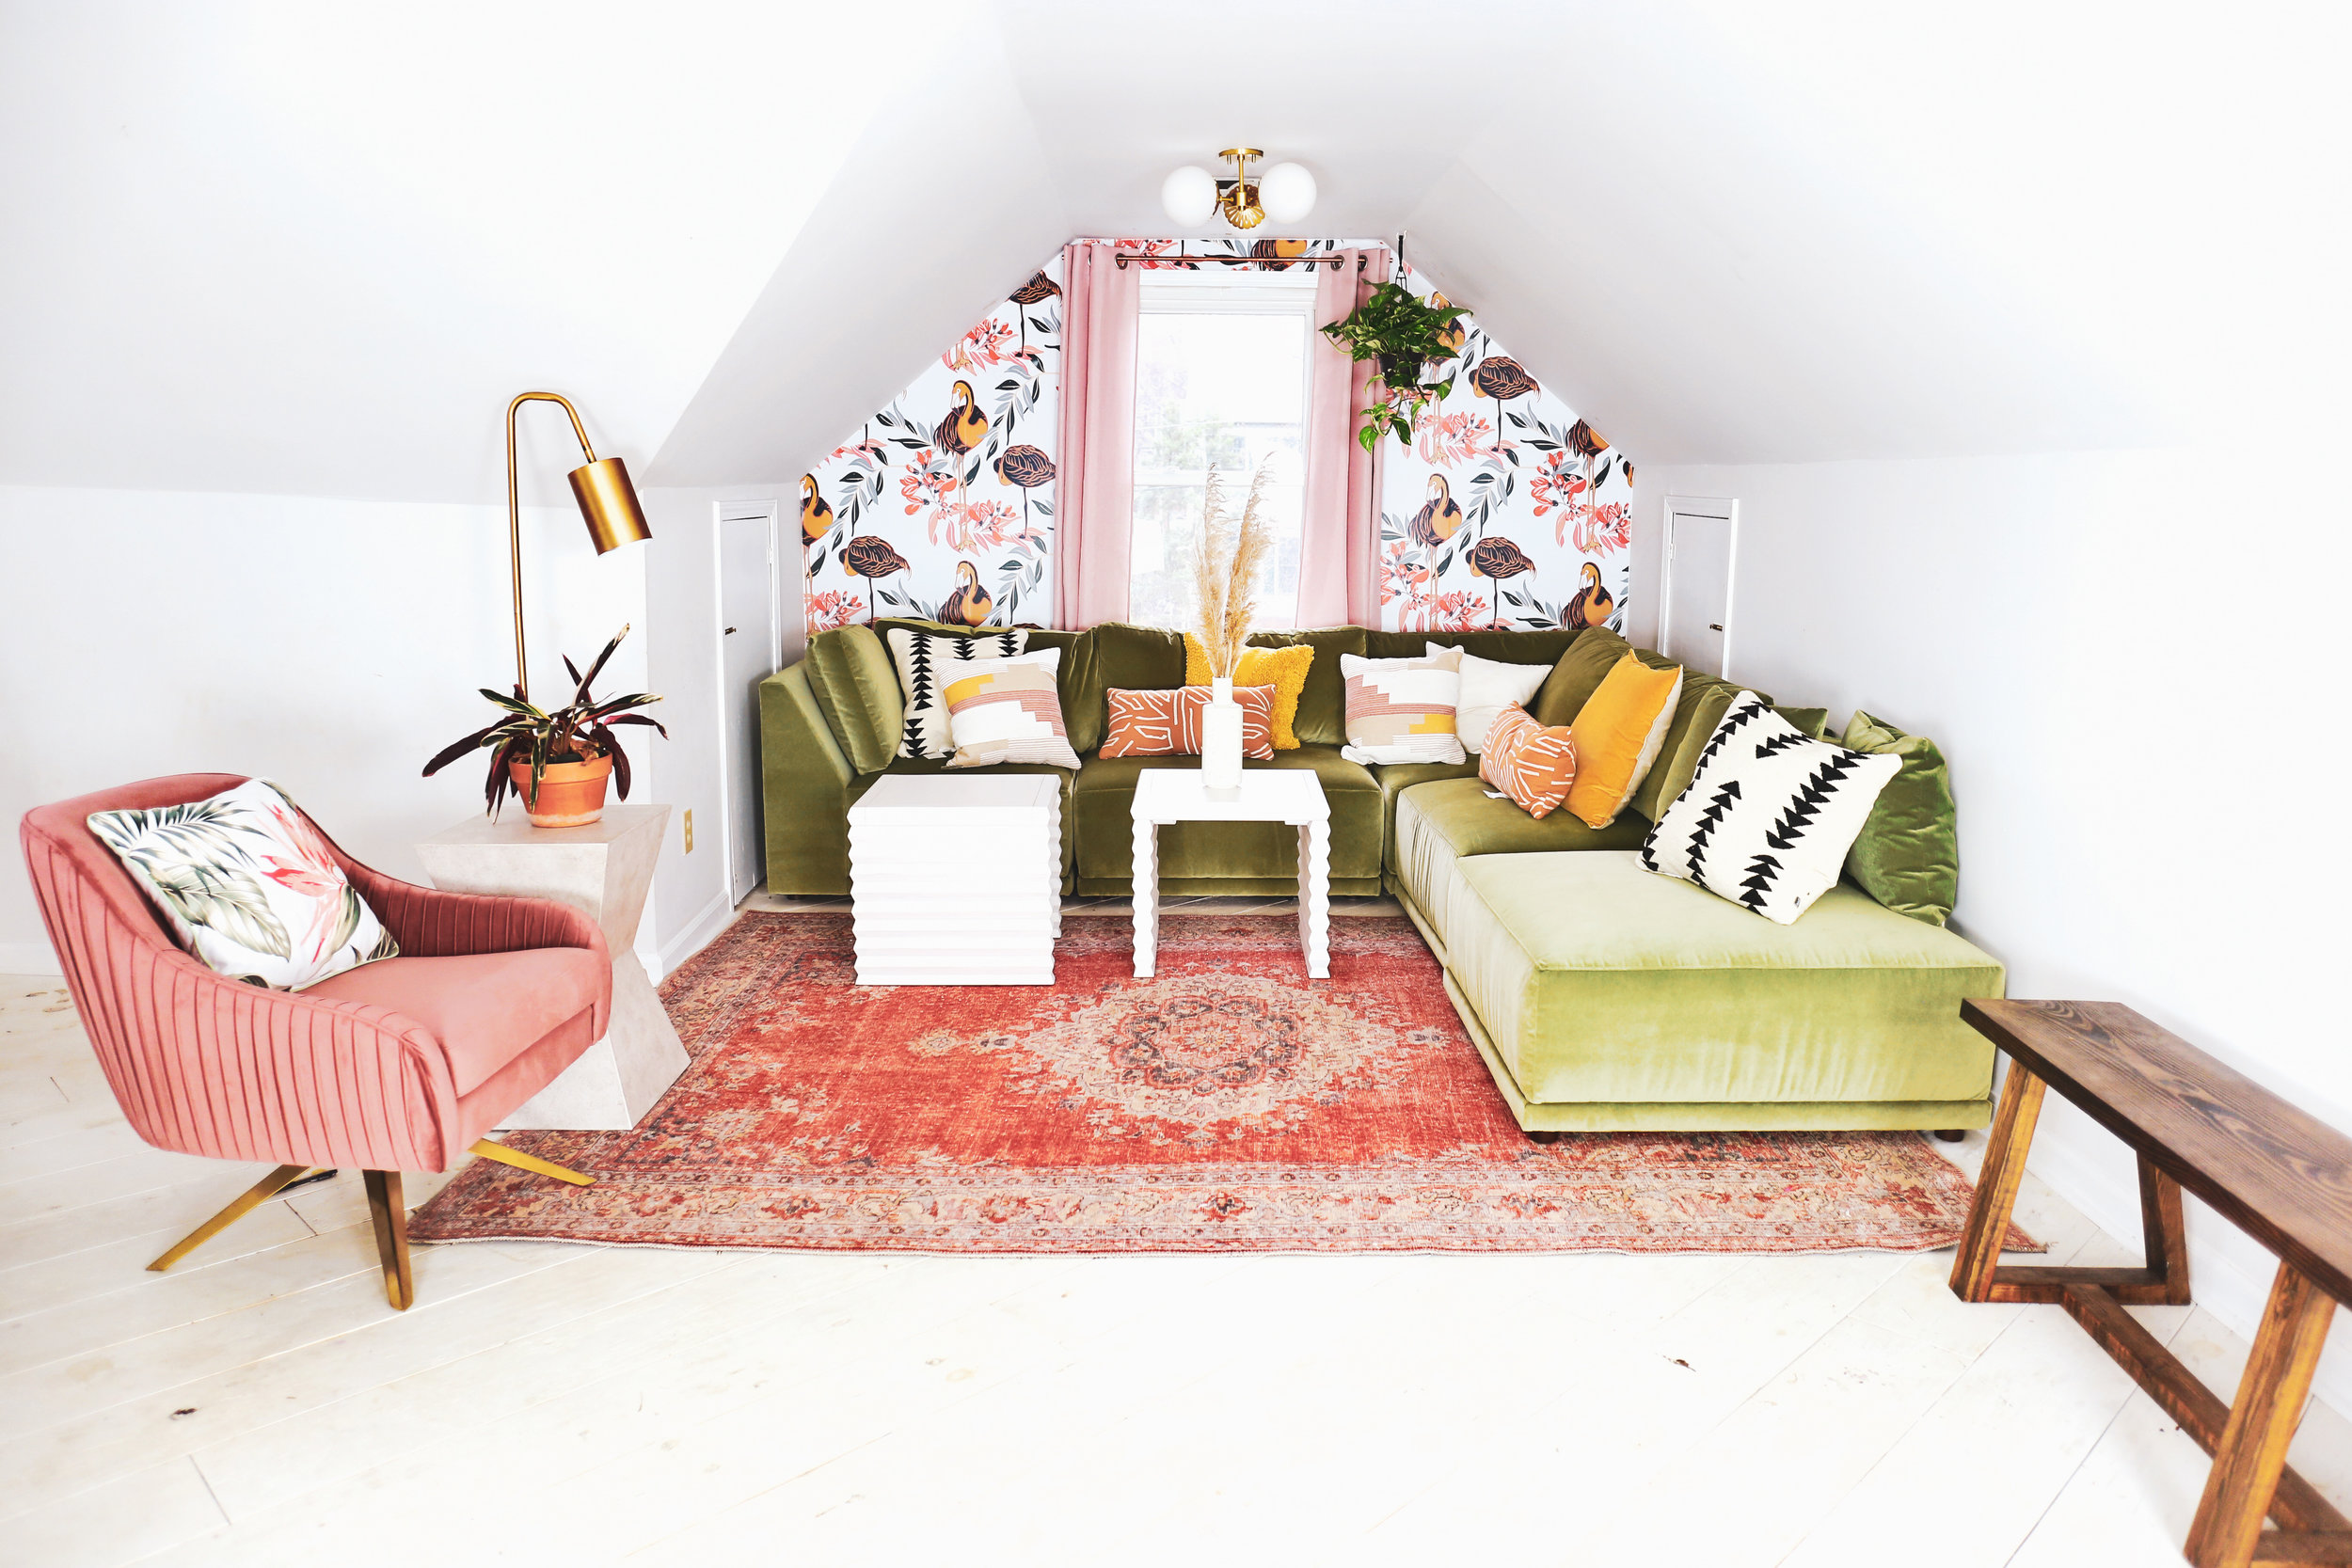
The shining gem of the room is the wrap around sofa. With clean modern lines and covered in lux green velvet, the Knox Sectional is a perfect choice for this room. With an extra ottoman, it converts to either more seating or more room to prop of your legs (making it perfect for family movie nights). The Knox Sectional is a part of Bassett Furniture’s Modern Collection, delivering an accessible and contemporary vibe to the room.

Adding two smaller coffee tables instead of one large one lends to the versatility of the room. The pieces move around easily and can also be used as large end tables depending on the needs of the moment. We choose these two Jasmine bunching tables in white.

The Boulder End Table lends height to the room, and mimics the modern clean lines of the sofa. To add some soft light to the area, we added the Skylar floor lamp (available only in stores). For some texture and pattern play we added Bassett’s Clyde throw pillows.

We anchored the room with Bassett’s beautiful Sylvie rug. The warm rust tones tie in perfectly with the wallpaper on the accent wall, and pair beautifully with the rich green of the sectional!
As always, including greenery brings life to any room, so we added a few plants to the space to make it glow.

We are beyond pleased with our new lounge space! With four very active kids, a quiet retreat is like a little slice of heaven for me and Tim. We were thrilled to partner with Bassett on this design.
Bassett Furniture has been proudly making quality furniture for over 100 years. Their team also offers professional in-store designers to help bring your dream room to life. Anyone can book a design appointment today at bassettfurniture.com for an in-store consultation.
Drop me a line and tell me what you think of this Bassett Furniture attic room makeover! I’d love to hear your thoughts!


Clay Colored Obsession
As the beginning of 2019 unfolds, we find ourselves with an undying fascination for all things clay colored. These glowing tones, ranging from orangey brick, muted pinks, and rosy terra cotta, set an enveloping mood to any room, and look smashing when layered with each other. Not only that, but a room with these colors brings out the best in our skin tones, making them that much more endearing.
Today we’re sharing 5 ways you can you can include these flattering earth toned colors to your space.

One of the most dramatic, yet affordable ways so incorporate a new color is with paint.
A room draped in these warm pinks feels like it’s glowing from the inside out.

Covering not only the wall, but also all the moulding detail, gives the room a romantic French Loft feel.

Maybe you are hesitant about going all the way, don’t feel like you need to paint every wall. I simple accent wall, or even a half wall will lend an abundance of character without getting overly dramatic.

Another easy way to incorporate clay tones is with art.
We love these prints from Forn Art. You can download these prints for under $10 a piece, and have them printed at your local printshop, Costco, or Walgreens. Mix and match to create a high impact, low cost way to give your walls some earthy love.

These hand painted canvases from Upton Home are modern and warm at the same time.

Sherwin Williams jumped on the clay colored bandwagon, naming Cavern Clay their color of the year for 2019. We’re loving this DIY divider from huntedINTERIOR which doubles as a piece of art.

For those wanting to invest a little more commitment to these beautiful colors, try accessorizing your home with throw pillows, rugs, or even large furniture pieces. The beautiful thing about this color scheme, is that they are so neutral that you can utilize them in big ways without the room feeling over done.


DESIGN BY Patricia Urquiola


One of our favorite way to use these Clay tones is in architectural details. Daring and bold, kitchen cabinets painted in accent colors give a modern yet calming feel to a room. A staircase painted neutral blush, or a fireplace in pink? - Yes please!


We’re so loving the versatility of this trend, and would love to hear your thoughts about it as well. Do you have some Clay tones planed for your future? I know I do!

A bedroom makeover for my girls - COMPLETE
VICTORY and TEARS my friends.. that's what you get when you take on a challenge late in the game when you’ve already got too much going on.
My girl’s bedroom makeover is complete! My sweet little Tom Girls, who want nothing to do with pretty and girlie. I think I’ve pulled off a room that is neutral enough for their liking.
I’m so happy I took on the challenge! I've been promising the girls a makeover for far too long, and my little heart goes pitter patter with joy every night when I tuck them in their adorable room.
If you’d like to see where we started from, head over HERE to see the ghastly before, and to read about the inspiration for this room!
Now let me walk you through the process.

First was the epic brick wall mural that we installed! The girls adore it, and it is so realistic looking, that you have to get up close to see that it’s not actually real. I’m seriously a big fan! You can find the mural HERE. Next we painted the light blue walls white so to seamlessly blend with the accent wall.

I was so happy to replaced the old dresser that was in this room. If I remember correctly, it was one of the very first pieces of furniture we bought 15 years ago (from Target, so.. yeah). It was time, my friends. We replaced it with this sleek new version from Walker and Edison. It’s a more affordable alternative to the West Elm Reclaimed wood version, and goes absolutely perfect in their girl’s loft styled space.

The beds are from NOVOGRATZ. I stumbled upon one of them being sold on Craiglist for an absolute steal, and ordered a matching one online. You can find them on Amazon HERE. I don’t think you’ll find a more affordable version of a bed, and they are just darling, aren’t they? Perfect for little ones!
The beautiful blue rug is from boutiquerugs.com and just as soft as can be. You can find it HERE. I layered our oversized sheepskin pelt (The one that Costco usually sells in the winter), and the room feels super textured and cozy.

I’m so in love with the girl’s bedding! I’m pretty sure it’s the coziest in the house now. I love how the duvet covers bring in a bit of color while still staying neutral. They are the from Lincove, part of the Greenwhich collection. You can find them HERE. I love the way the dark grey sheets stand out against everything else going on in the room. They are crazy soft and are from Blue Bird Linens. You can find them HERE. The velvet accent pillow is from Target.
The painting over Avia’s bed is handmade by my dear from Rebeccah over at Hoestradecor. Click HERE to see all her beautiful work.

A few ‘Shop my home, because I couldn’t find what I was looking for in time’ items are, the two reading lamps I installed between the girls’ bed. I really want the Chelsea Double Sconce from Urban Outfitters, but it wasn’t in my budget, so I improvised using the two lamps that I had in my Master Bedroom. Another thing I added last minute was the wicker table I’m using for a nightstand. I really would like a low dresser between the girls’ beds, because Isla needs a new one, but I didn’t find one in time. I’ll probably change that up soon. Isla said that her favorite part of the makeover is the little moon mirror from Urban Outfitters that I’ve hung over her bed. I thought that was sweet.

This beautiful hanging chair was a last minute decision as of this afternoon as I was finishing up the room. Yesterday, Ana, the owner of Limbo Imports, stopped by my house and hand delivered this lovely swinging chair (WHAAAA??). Ana designs these chairs herself, then has them created by artists in El Salvador, the country she grew up in. As I was finishing the room today, I realized it was the perfect final touch right there in the corner, and I was right! As soon as I hung it, Isla climbed in and fell asleep as she rocked away with her stuffed animals. It was such a sweet moment. Ana! We’re all in love! Thank you so much!!
You can find all of Ana’s beautiful work HERE
And that’s a wrap you guys! What a transformation this room has undergone. Here are a few more of the details.


I’m exhausted, but man so glad I took on this challenge!! And NEXT time people! NEXT time I’ll make sure to be prepared before I jump right into a One Room Challenge!!
As always, if you have any questions, leave them here below! I’m so glad you’ve followed along with me on this journey! And don’t forget to check out all the other amazing entries from these Fall’s One Room Challenge!
Cheers y’all!
Jodi

Bedroom Makeover week 5
Wow! What a transformation in this room! We are almost finished, and I’m so grateful for the One Room Challenge proving to me that I truly am capable of finishing a space from start to finish in a just a few weeks time. In the past I’ve let my projects drag on indefinitely, so finishing one this quickly is absolutely empowering!
At the beginning of the week, I assembled the girl’s dresser! It was quite a project and took the whole morning to put the piece together, but it’s perfect in the space, and I can’t wait to spend some time styling it this week!

Next, I painted all but the accent wall white, a sure fire way to brighten and clean up a space. The ceilings in this room are tray, and with the walls and ceiling the same color, it definitely makes this room feel taller.
On Friday, Isla and I put together both of the girl’s beds. They were surprisingly easy to assemble, and add just a touch of girliness to the space without being over the top for my two tomgirls.

Last we added in the area rug. In my idea board it was too busy, but in reality it’s not too much. Just a little bit more pattern than I would normally be ok with, but sometimes it’s good to put something in your space that’s a little ‘off’. The imperfectness of it all lends a bit of unexpected personality, so I’m quite loving it all together! Although as much as my girls may fight me, I think I might need to change our their mustard pillows for some pink ones to tie the rug color in.
I’ve had some amazing partners sponsor the bedding in this room, and I’ll be honest, these beds are so comfy they revile my own. It makes my heart so happy to tuck the girls in bed at night surrounded with the softest sheets and blankets. I cannot wait to share with you all the details.

This week is the final week of the challenge. I’ll be busting my tail trying to finish up the space.
I’d love to instal a wall sconce between the two beds, as well as some art. Style off the big dresser, and also add a small dresser in between the beds for extra storage.
My plan was to have a bench at the foot of the bed, but I don’t think there’s going to be enough space, so I’ll be skipping that for this project.
I’m already in love with the space, and absolutely cannot wait to share the finished product with you all next week!
Cheers!
Jodi


Bedroom Makeover Update
It’s week four of the One Room Challenge, which means it’s week two for my procrastinating self!
I’m actually feeling pretty darn good about everything to be honest! I’m caught up to where I wanted to be, and ready to get nutso on the rest of the punch out list when I get back in town next week!
My biggest goal for the week was hang the faux brick wall mural from Murals Wallpaper. This process ended up going so very smooth, thanks to the quality and ease of this this product. Each strip was numbered, which means I could easily start hanging from the top of the wall each pass and it lined up perfectly to the one next to it! It took me an hour TOPS to get it hung, and all on my own at that! I was pretty excited about that!

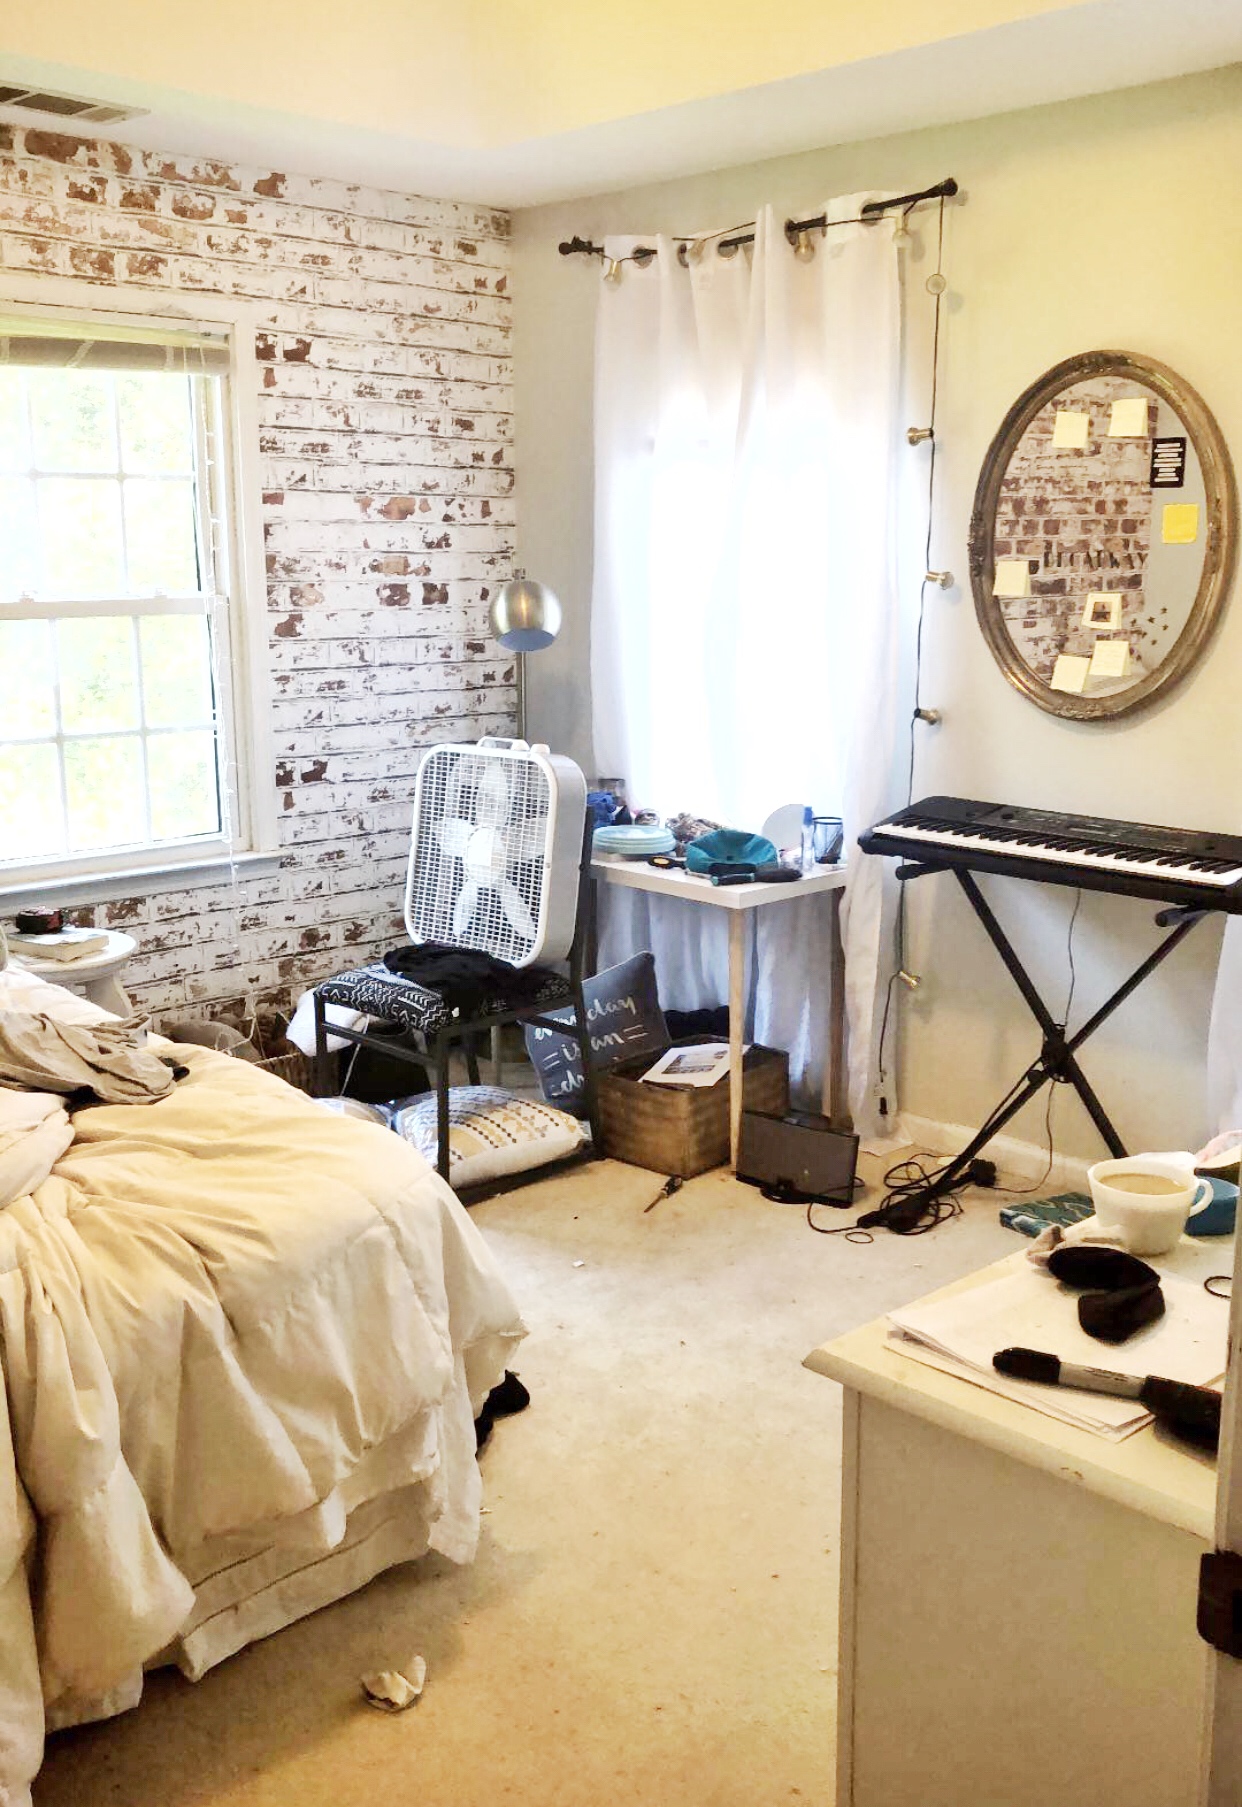
The other thing I tackled was all the clutter that has been weighing the room down! Just that has made the room feel like a brand new space! I got rid of the extra furniture in there that we didn’t need. Organized all the things that needed to be there, and threw away all the rest! What a transformation just that right?
Lastly, I roped the hubby into hanging brand new blinds for the room! We ordered these fantastic blinds from My Smart Blinds. I heard about these blinds from a friend I know through Instagram and was pretty interested right from the start! These blinds are automated to open and close on their own and controlled by an app on your phone. They are solar powered, and promise to pay for themselves in the energy savings that you will get from them helping to regulate your home’s temperature.

Ok, here’s what we’ve got left for the room…
*Order a wall sconce
*Assemble beds
*build a night stand
*Decide on Wall Art
*Paint bedroom Wall
*Accessorize!
Don’t fear guys! I’m pretty good under pressure!
XO
Jodi
Don’t forget to check out all the other amazing rooms that are being transformed, and their amazing participants HERE

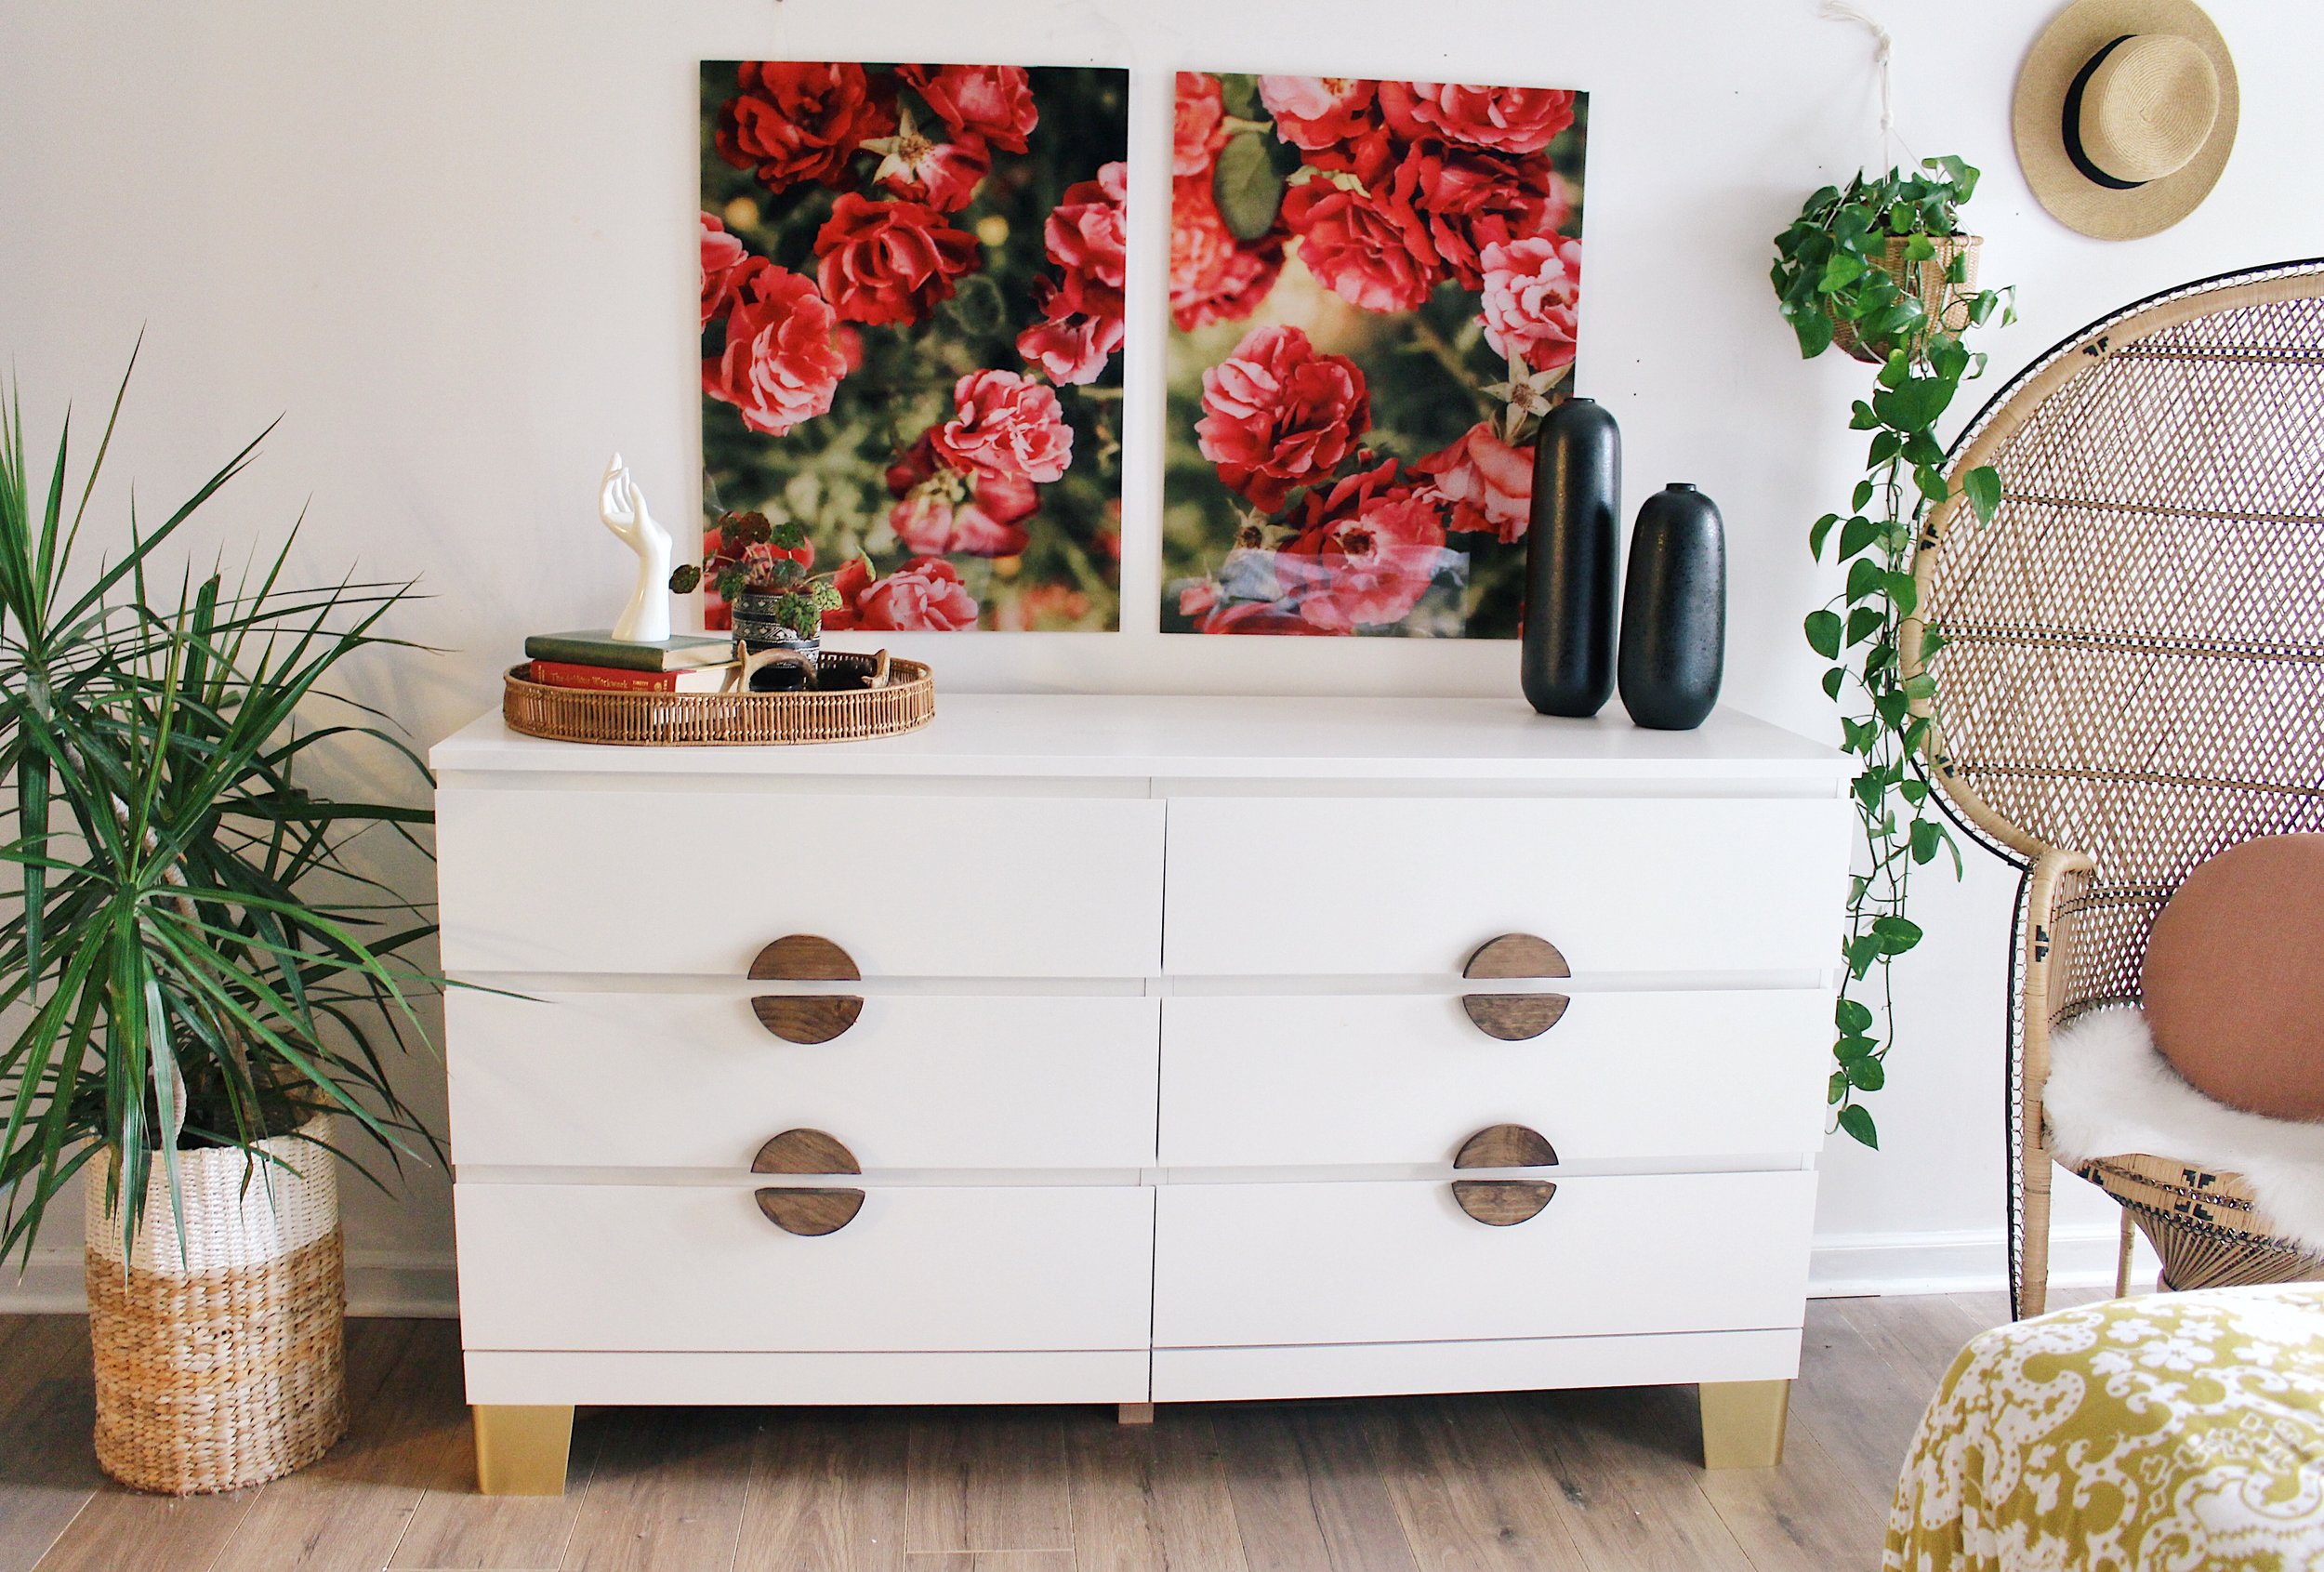
An Ikea dresser makeover
I’ve been looking for a bedroom dresser for awhile now. Initially I was thinking a MCM vintage piece, but I couldn’t seem to find one that fit the aesthetic of my bedroom. What I wanted was something a little more light hearted and unique. I decided to create a custom dresser, using some affordable pieces from Ikea and one of my favorite companies, Pretty Pegs, a shop dedicated to helping people upgrade and personalize their Ikea furniture. With a little DIY effort, I’ve created a dresser with loads of personality and lots of functionality! Read below for the tutorial!
What you’ll need:
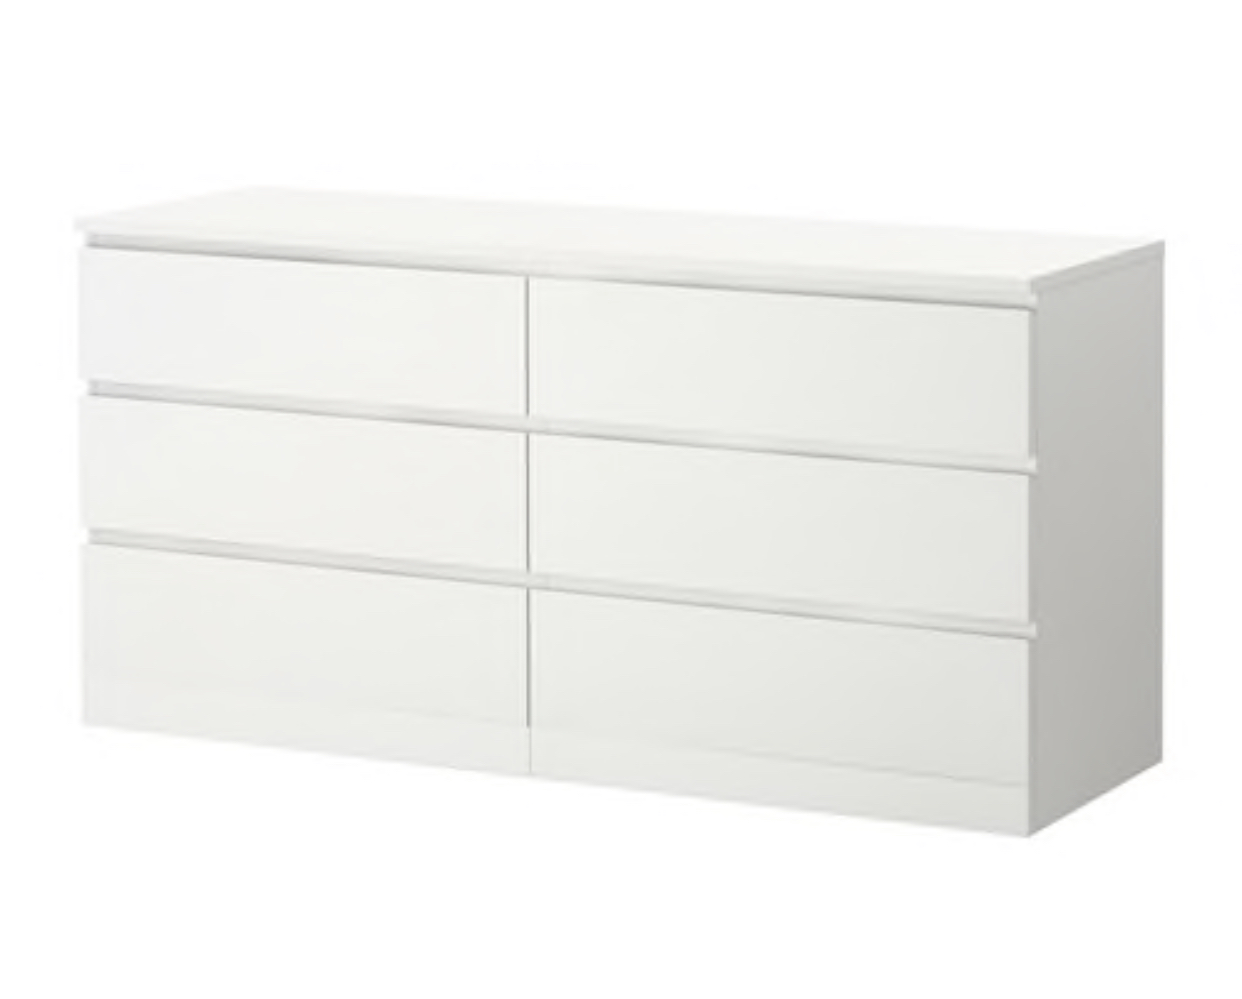
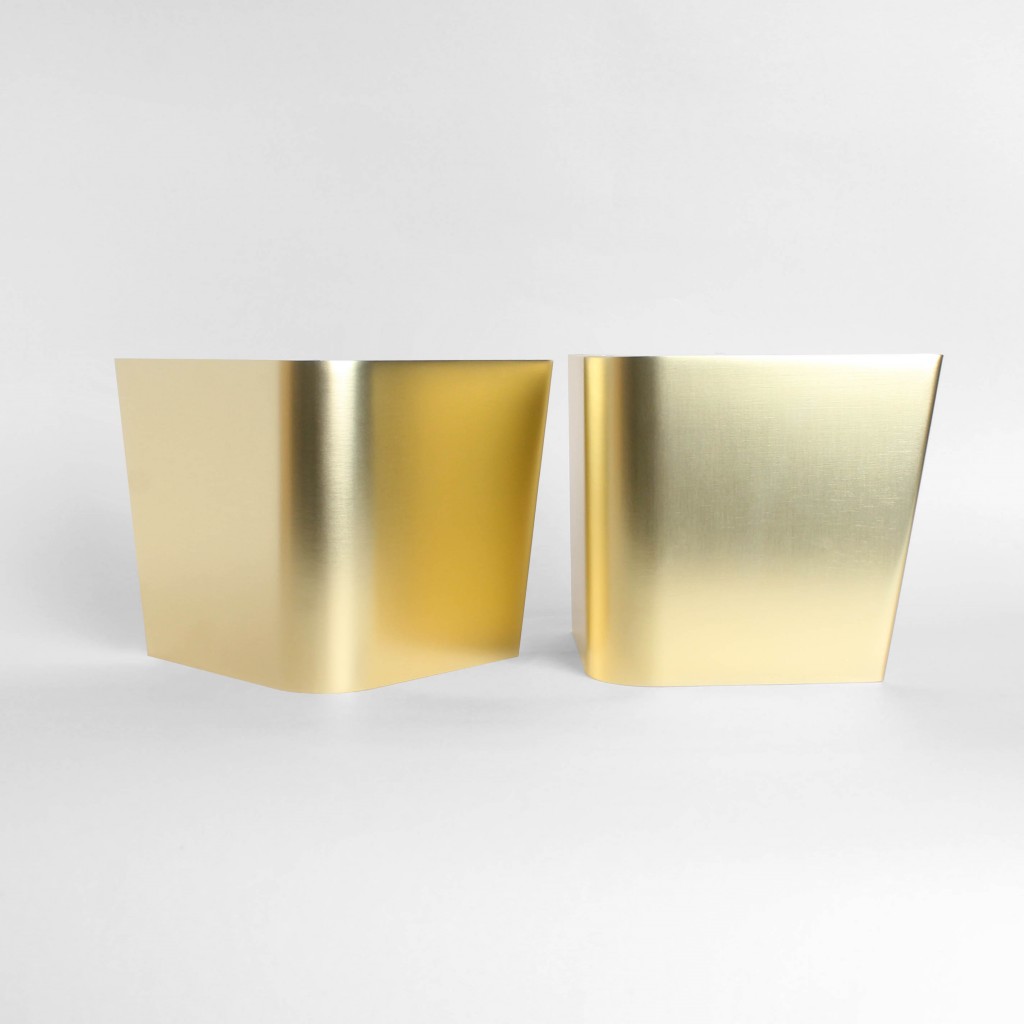
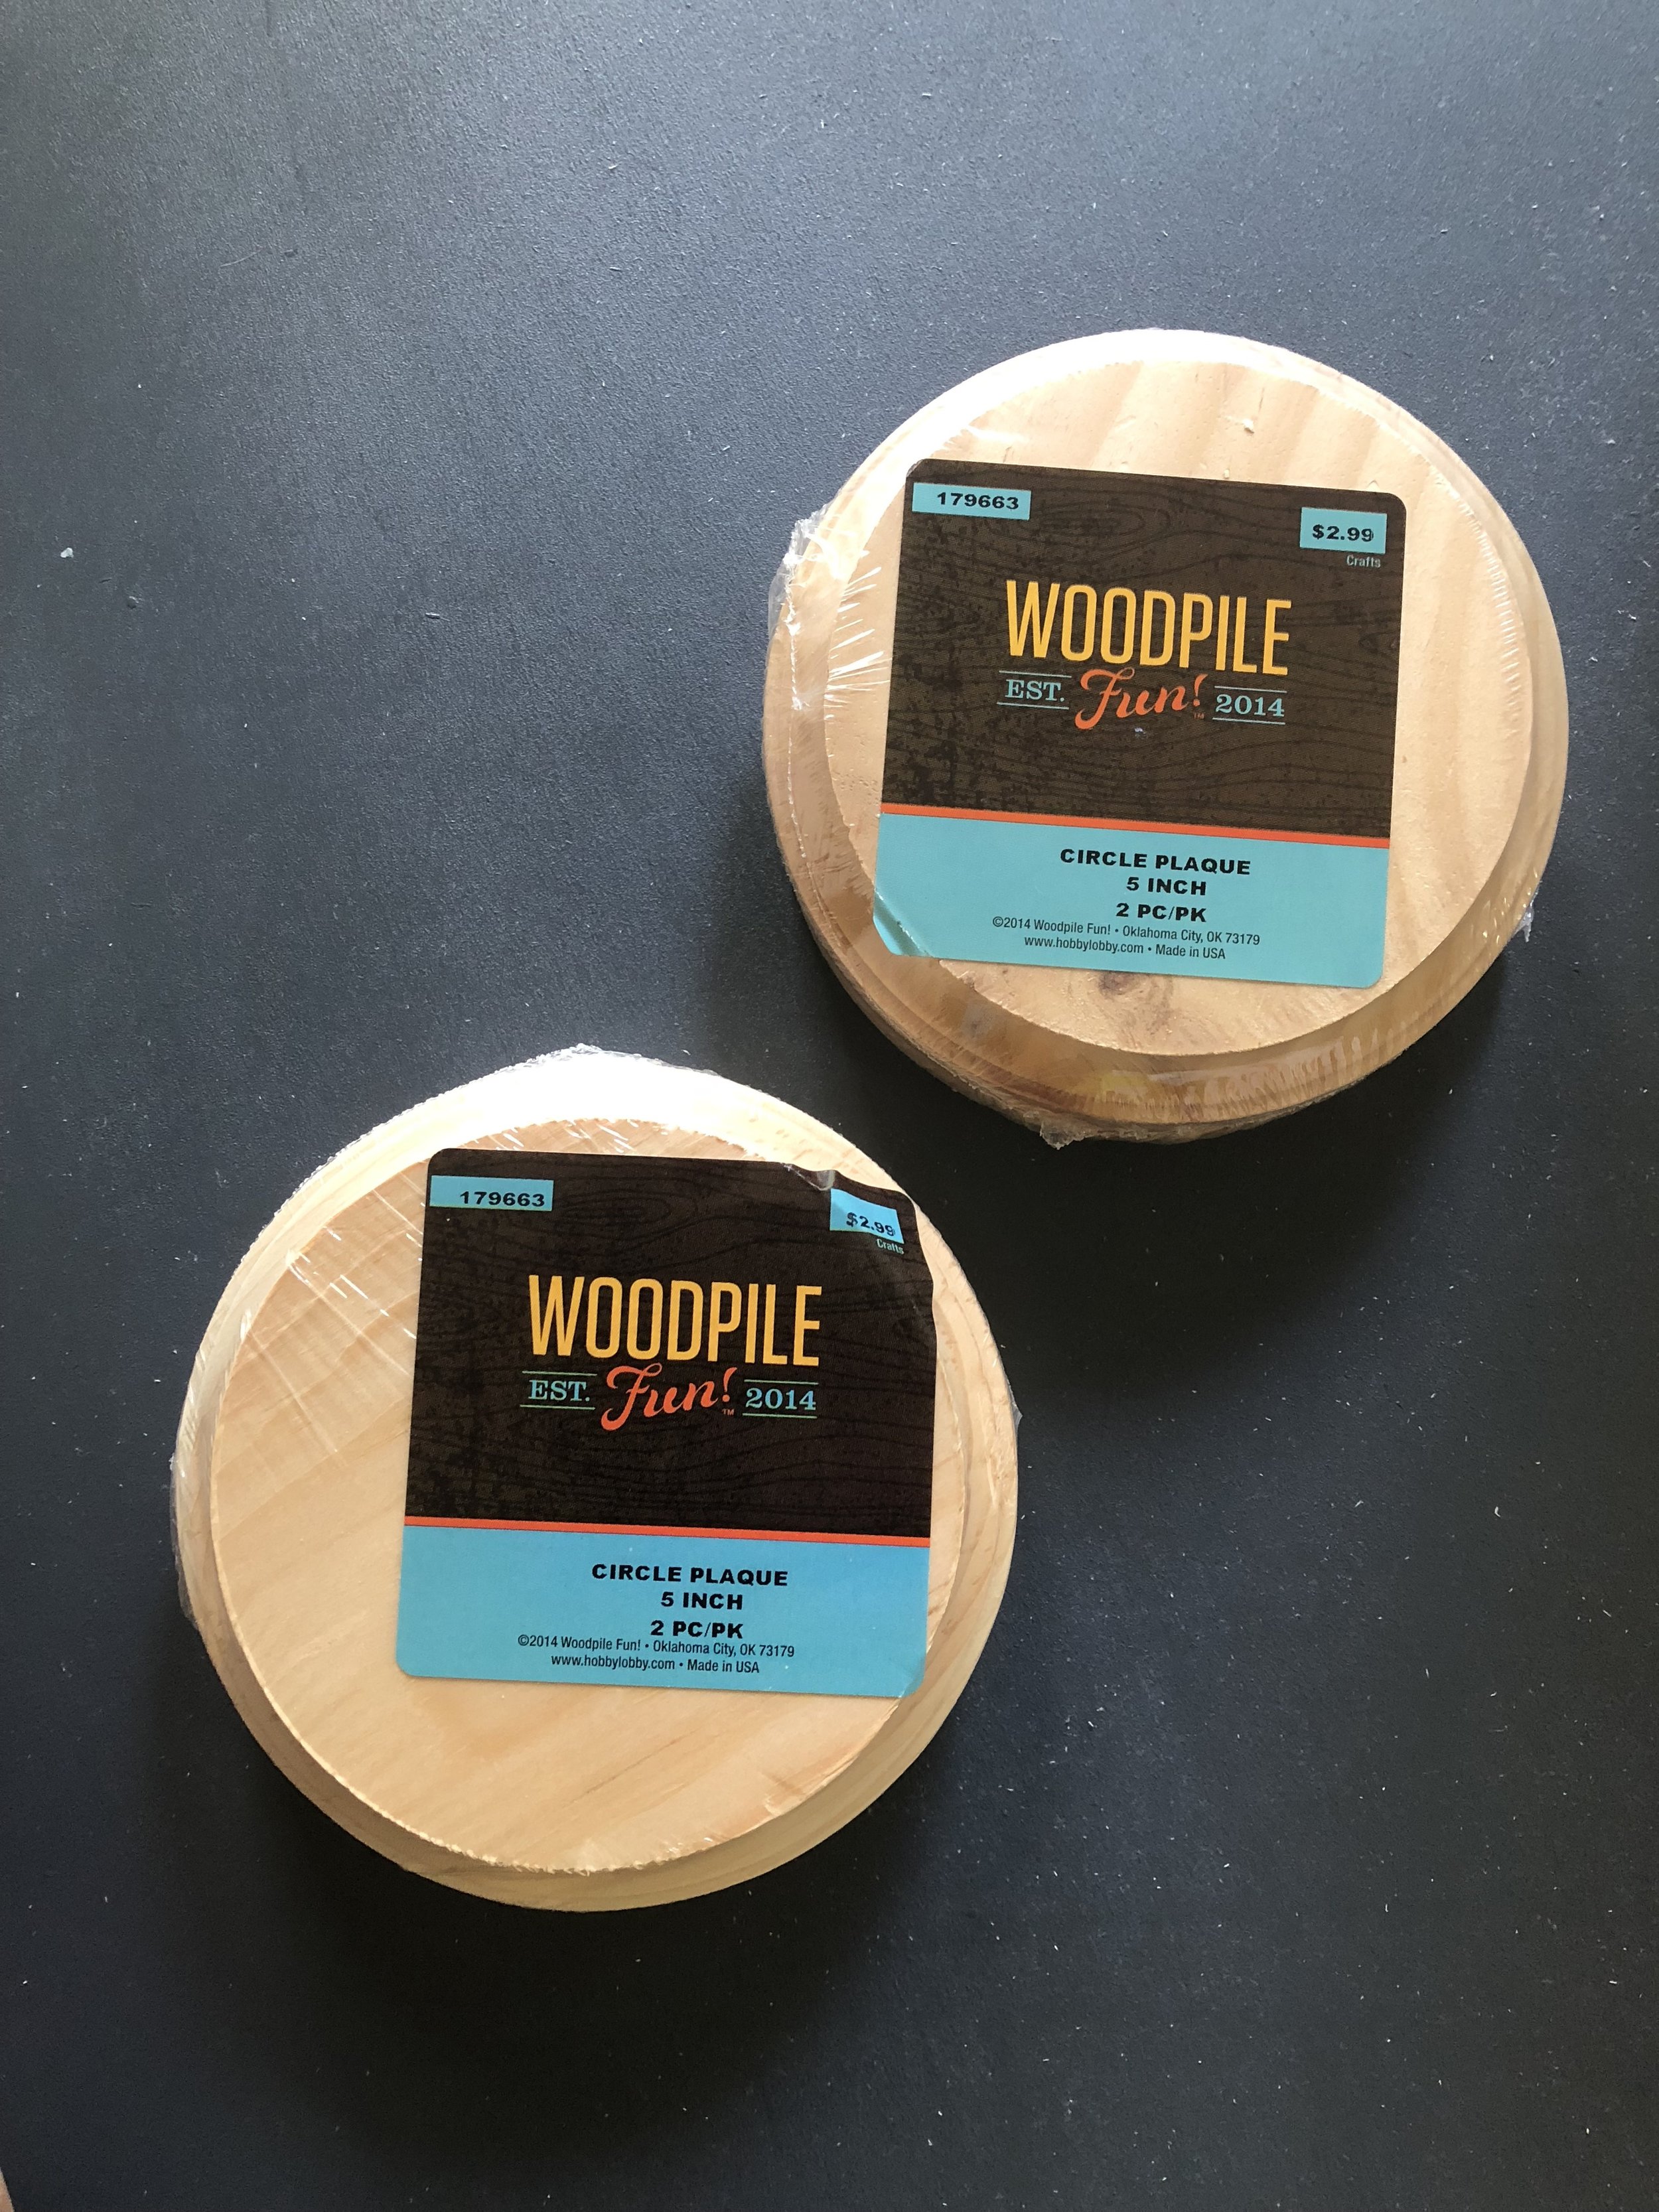
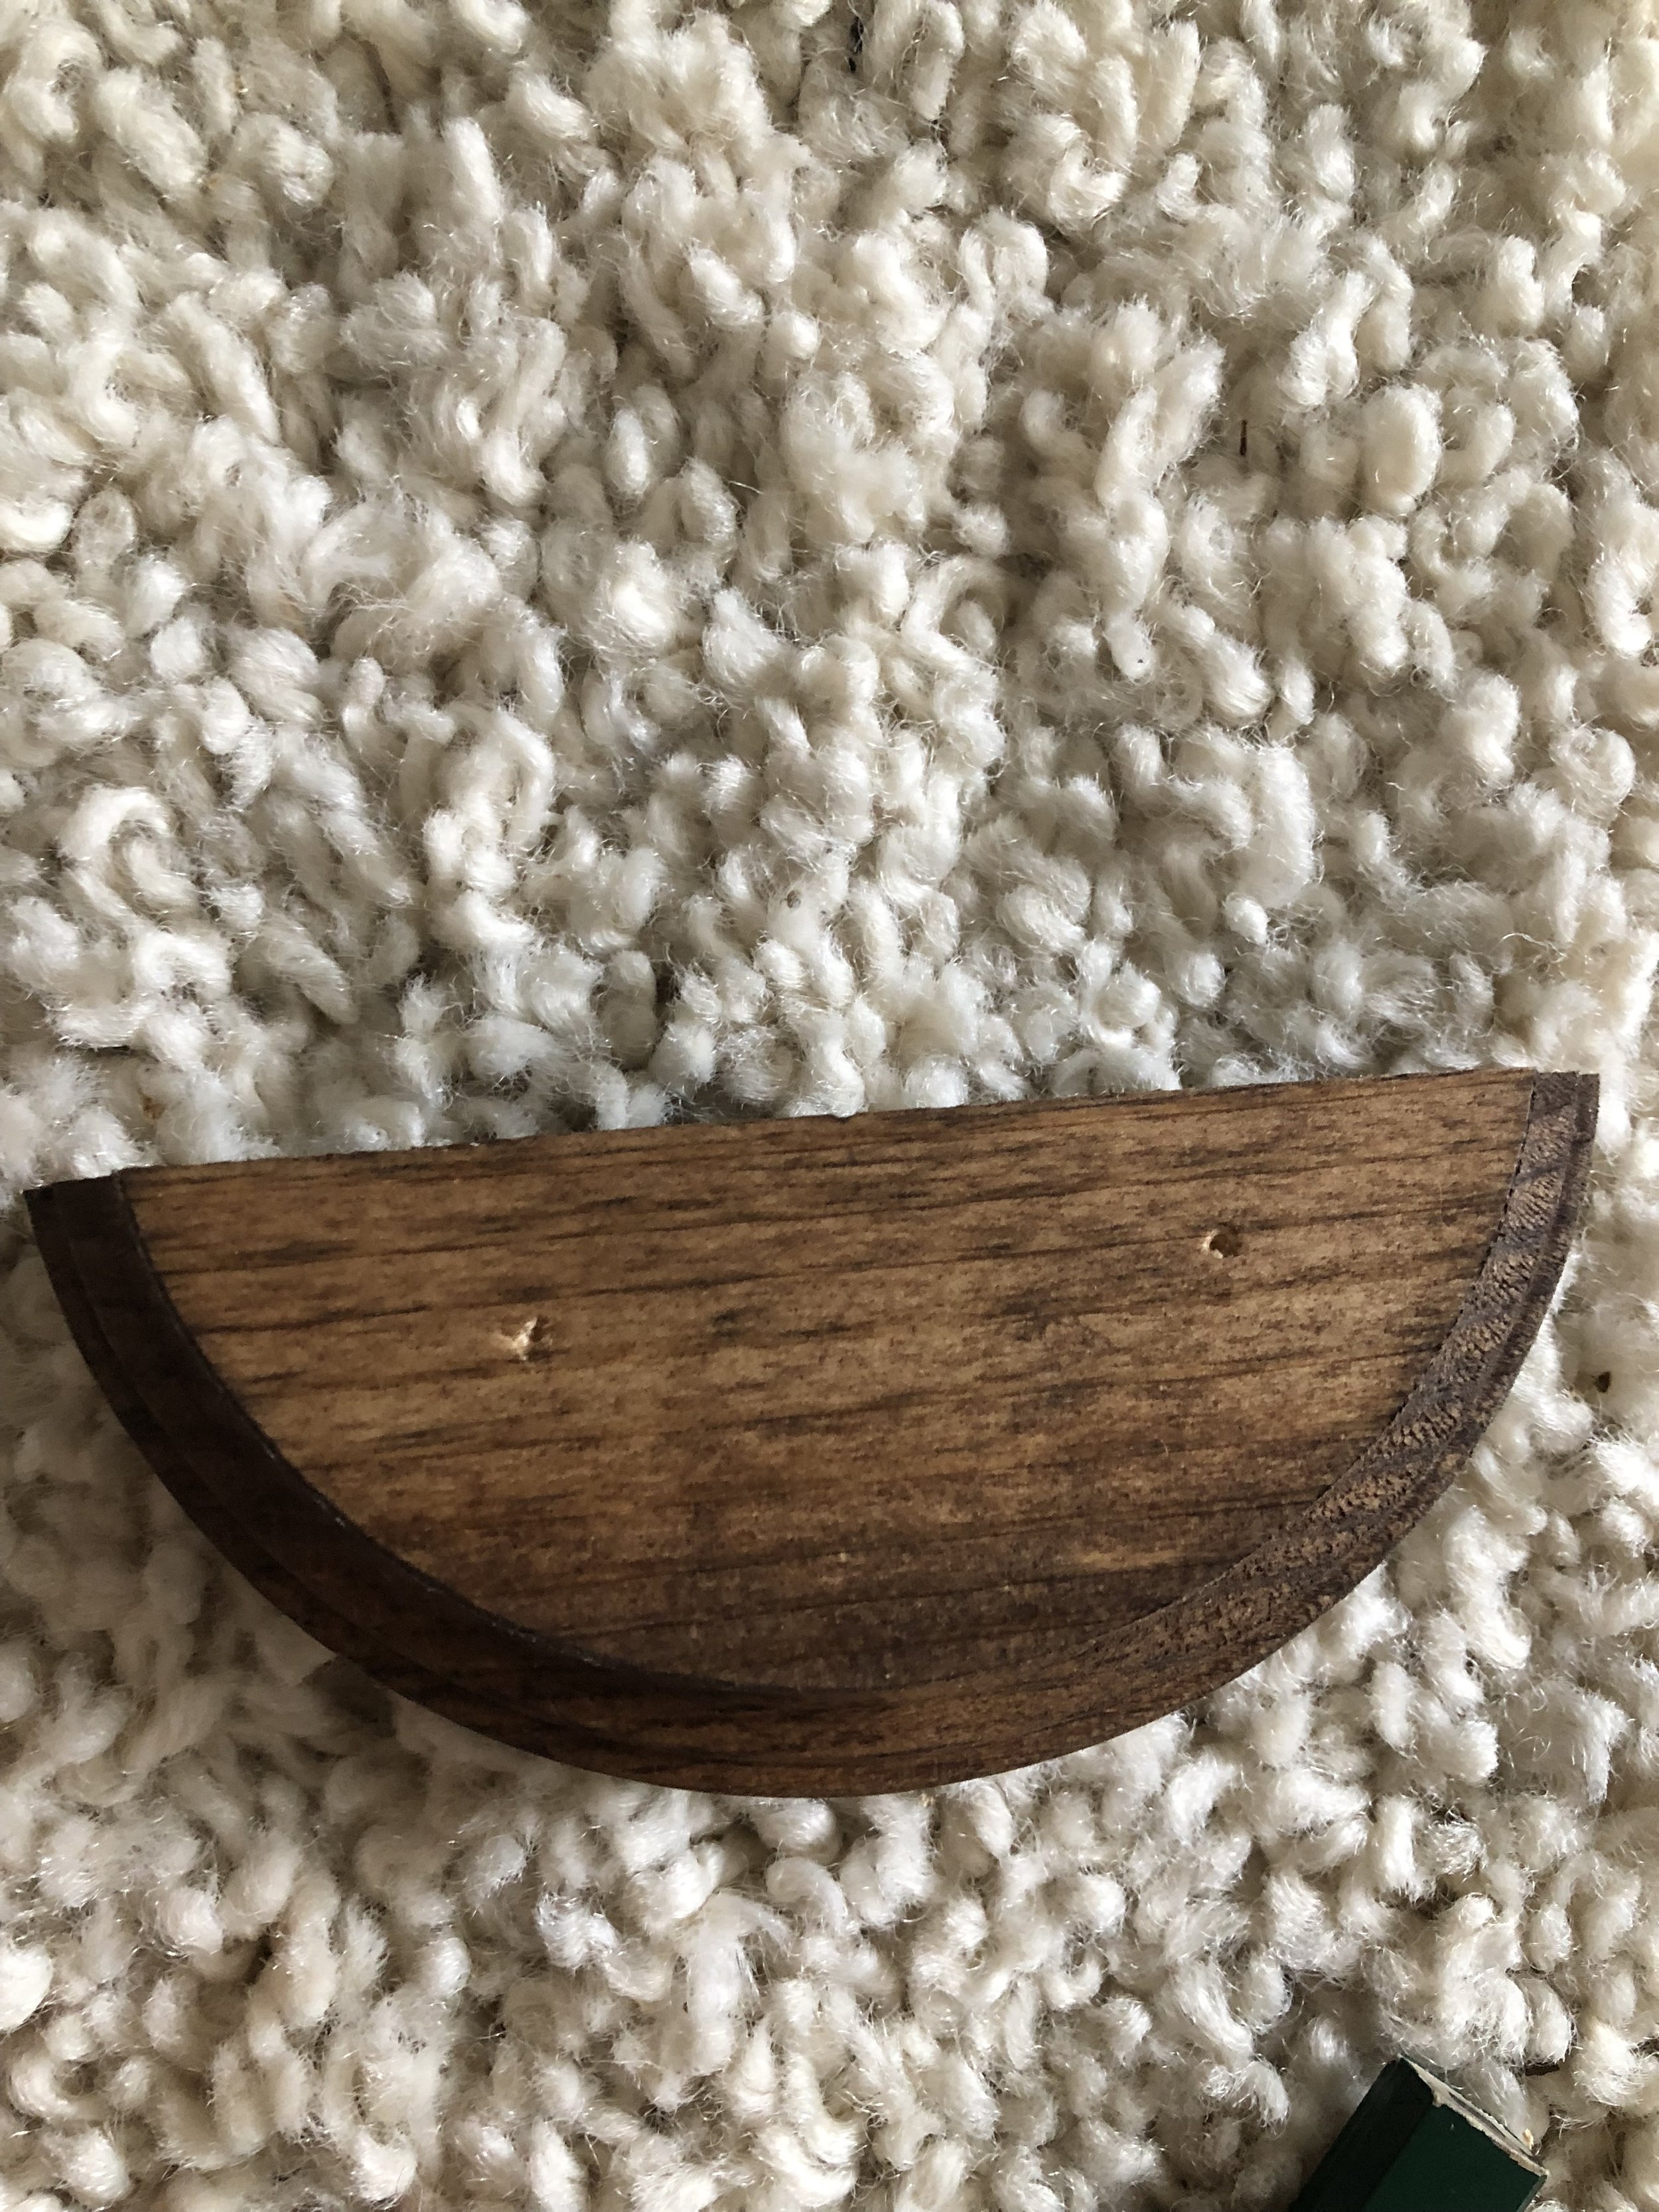
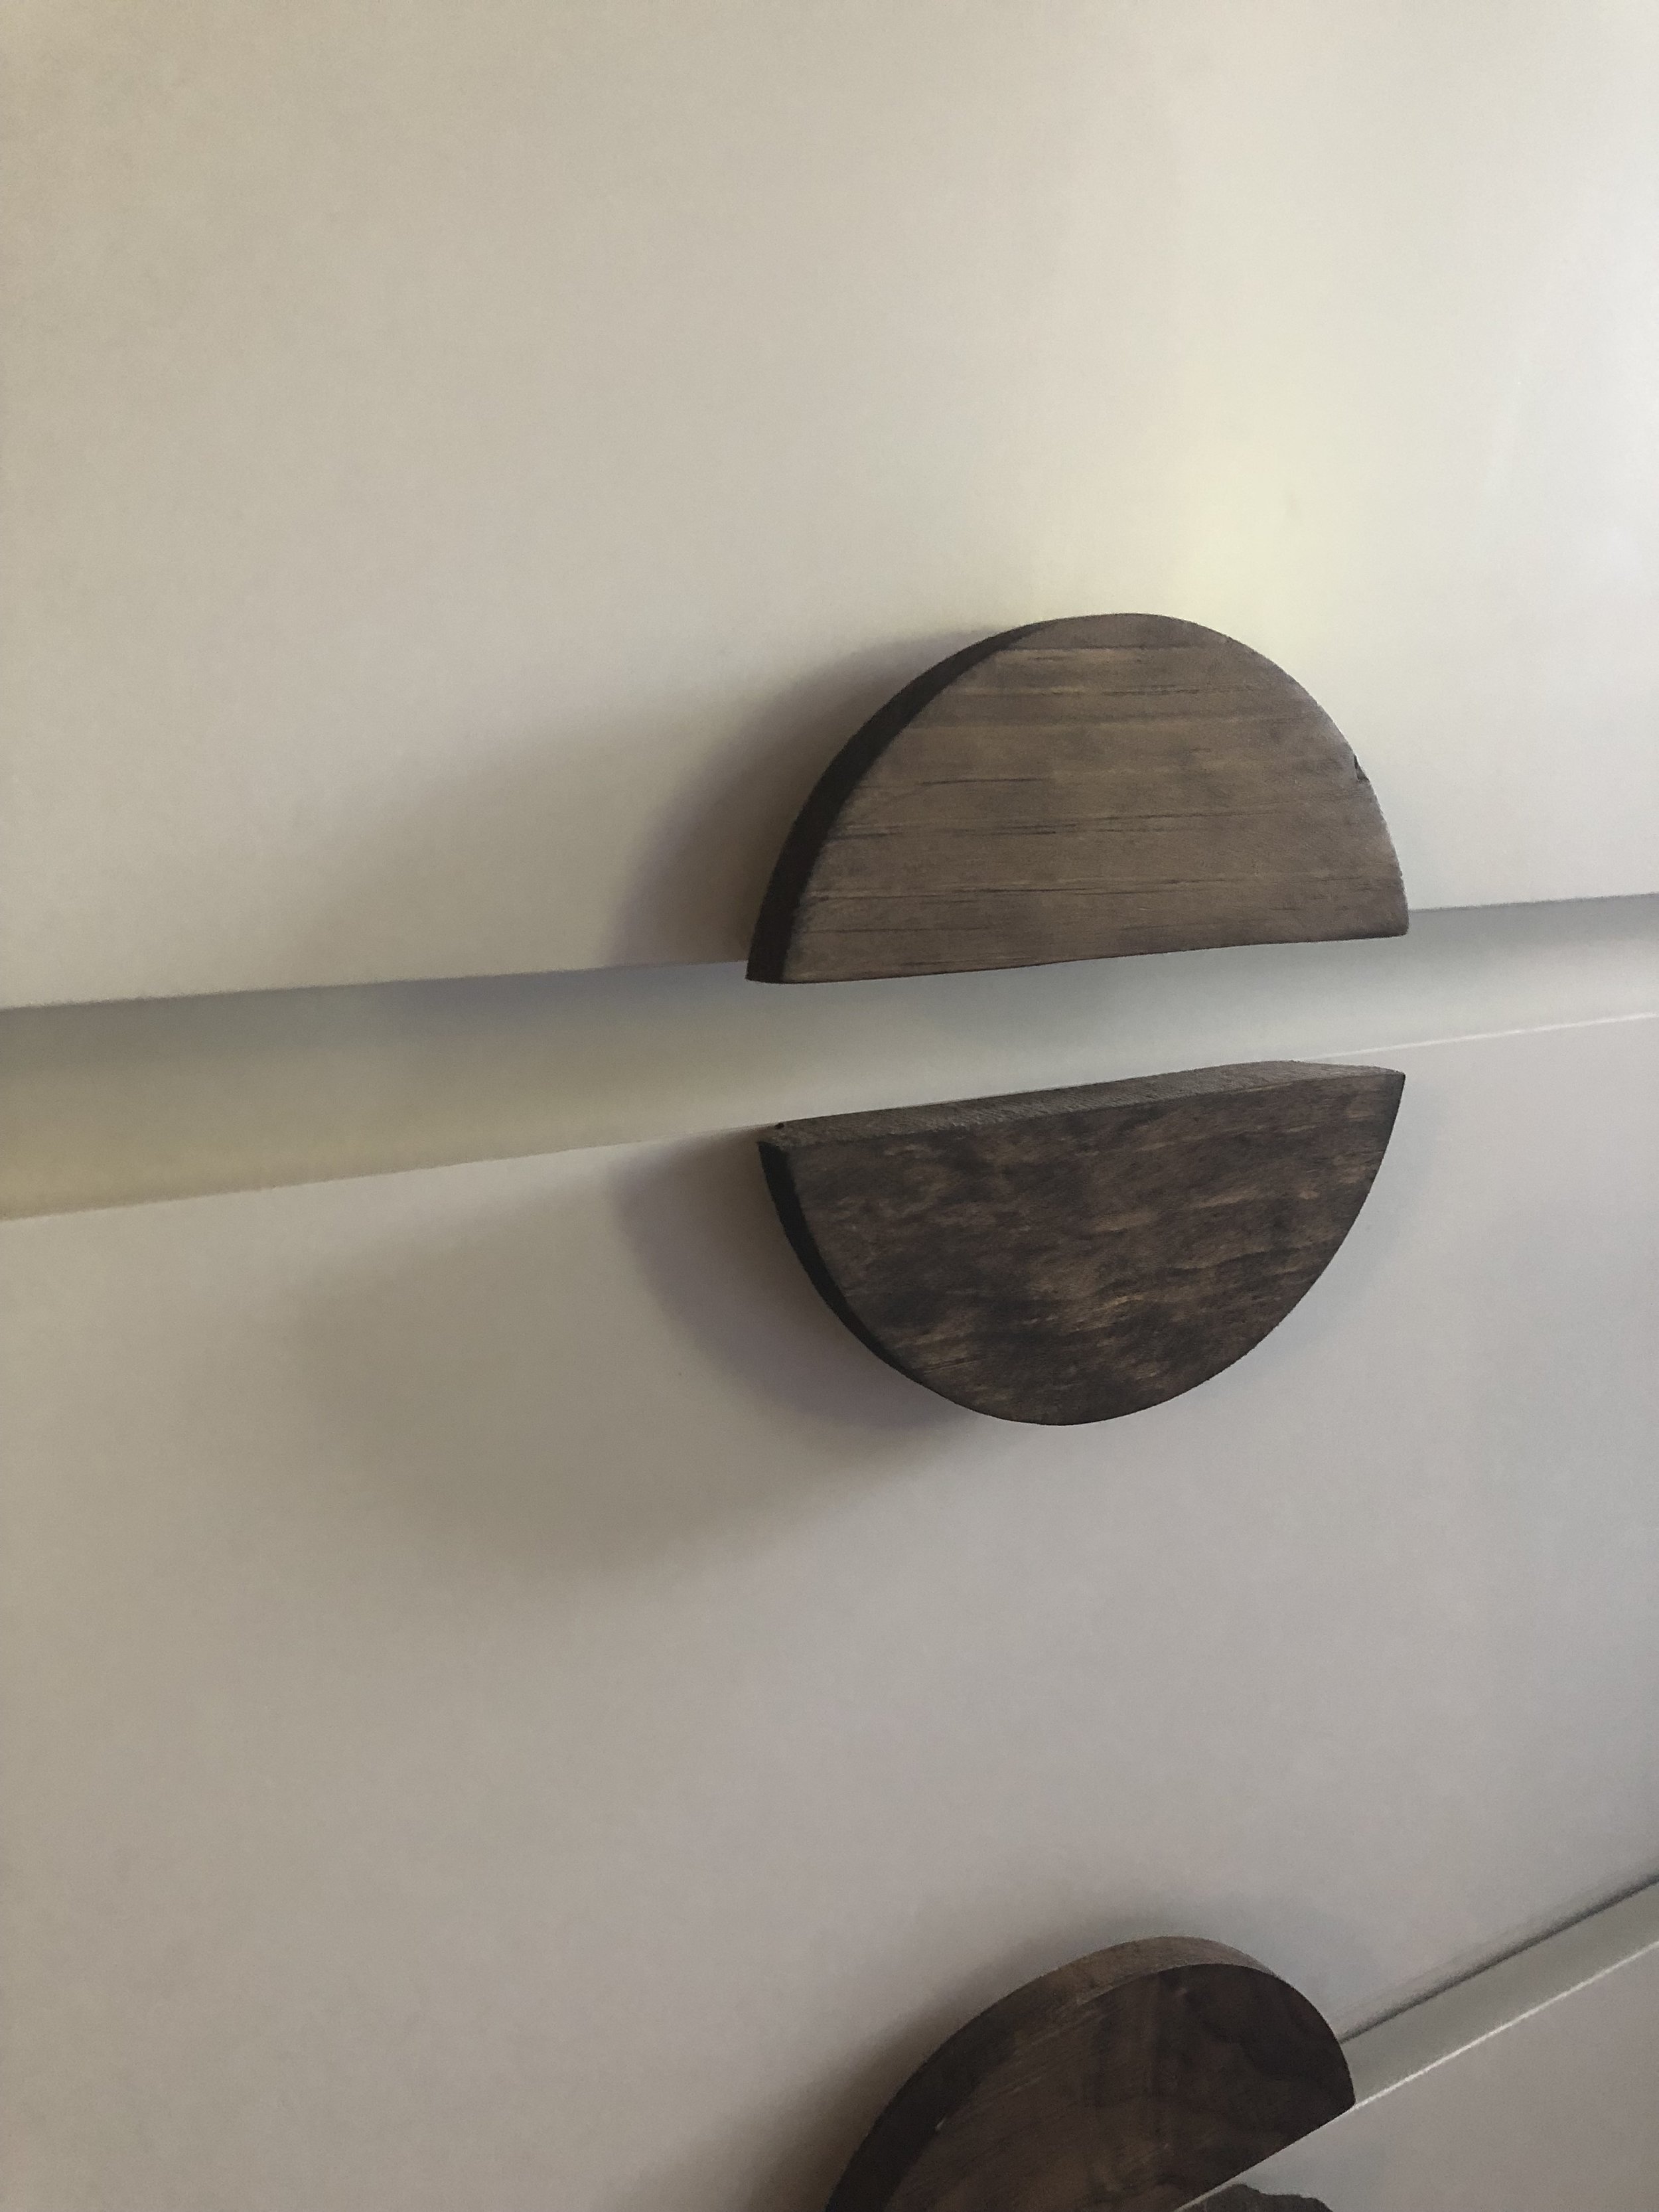
I choose the Ikea MALM dresser because of it’s minimal look and it’s low price. The Theodor legs from Pretty Pegs give the dresser some sturdiness and the gold lends a bit of glam. I found the 5-inch wooden circle plaques for the pulls from Hobby Lobby, but aren’t available online, so you can find similar here.
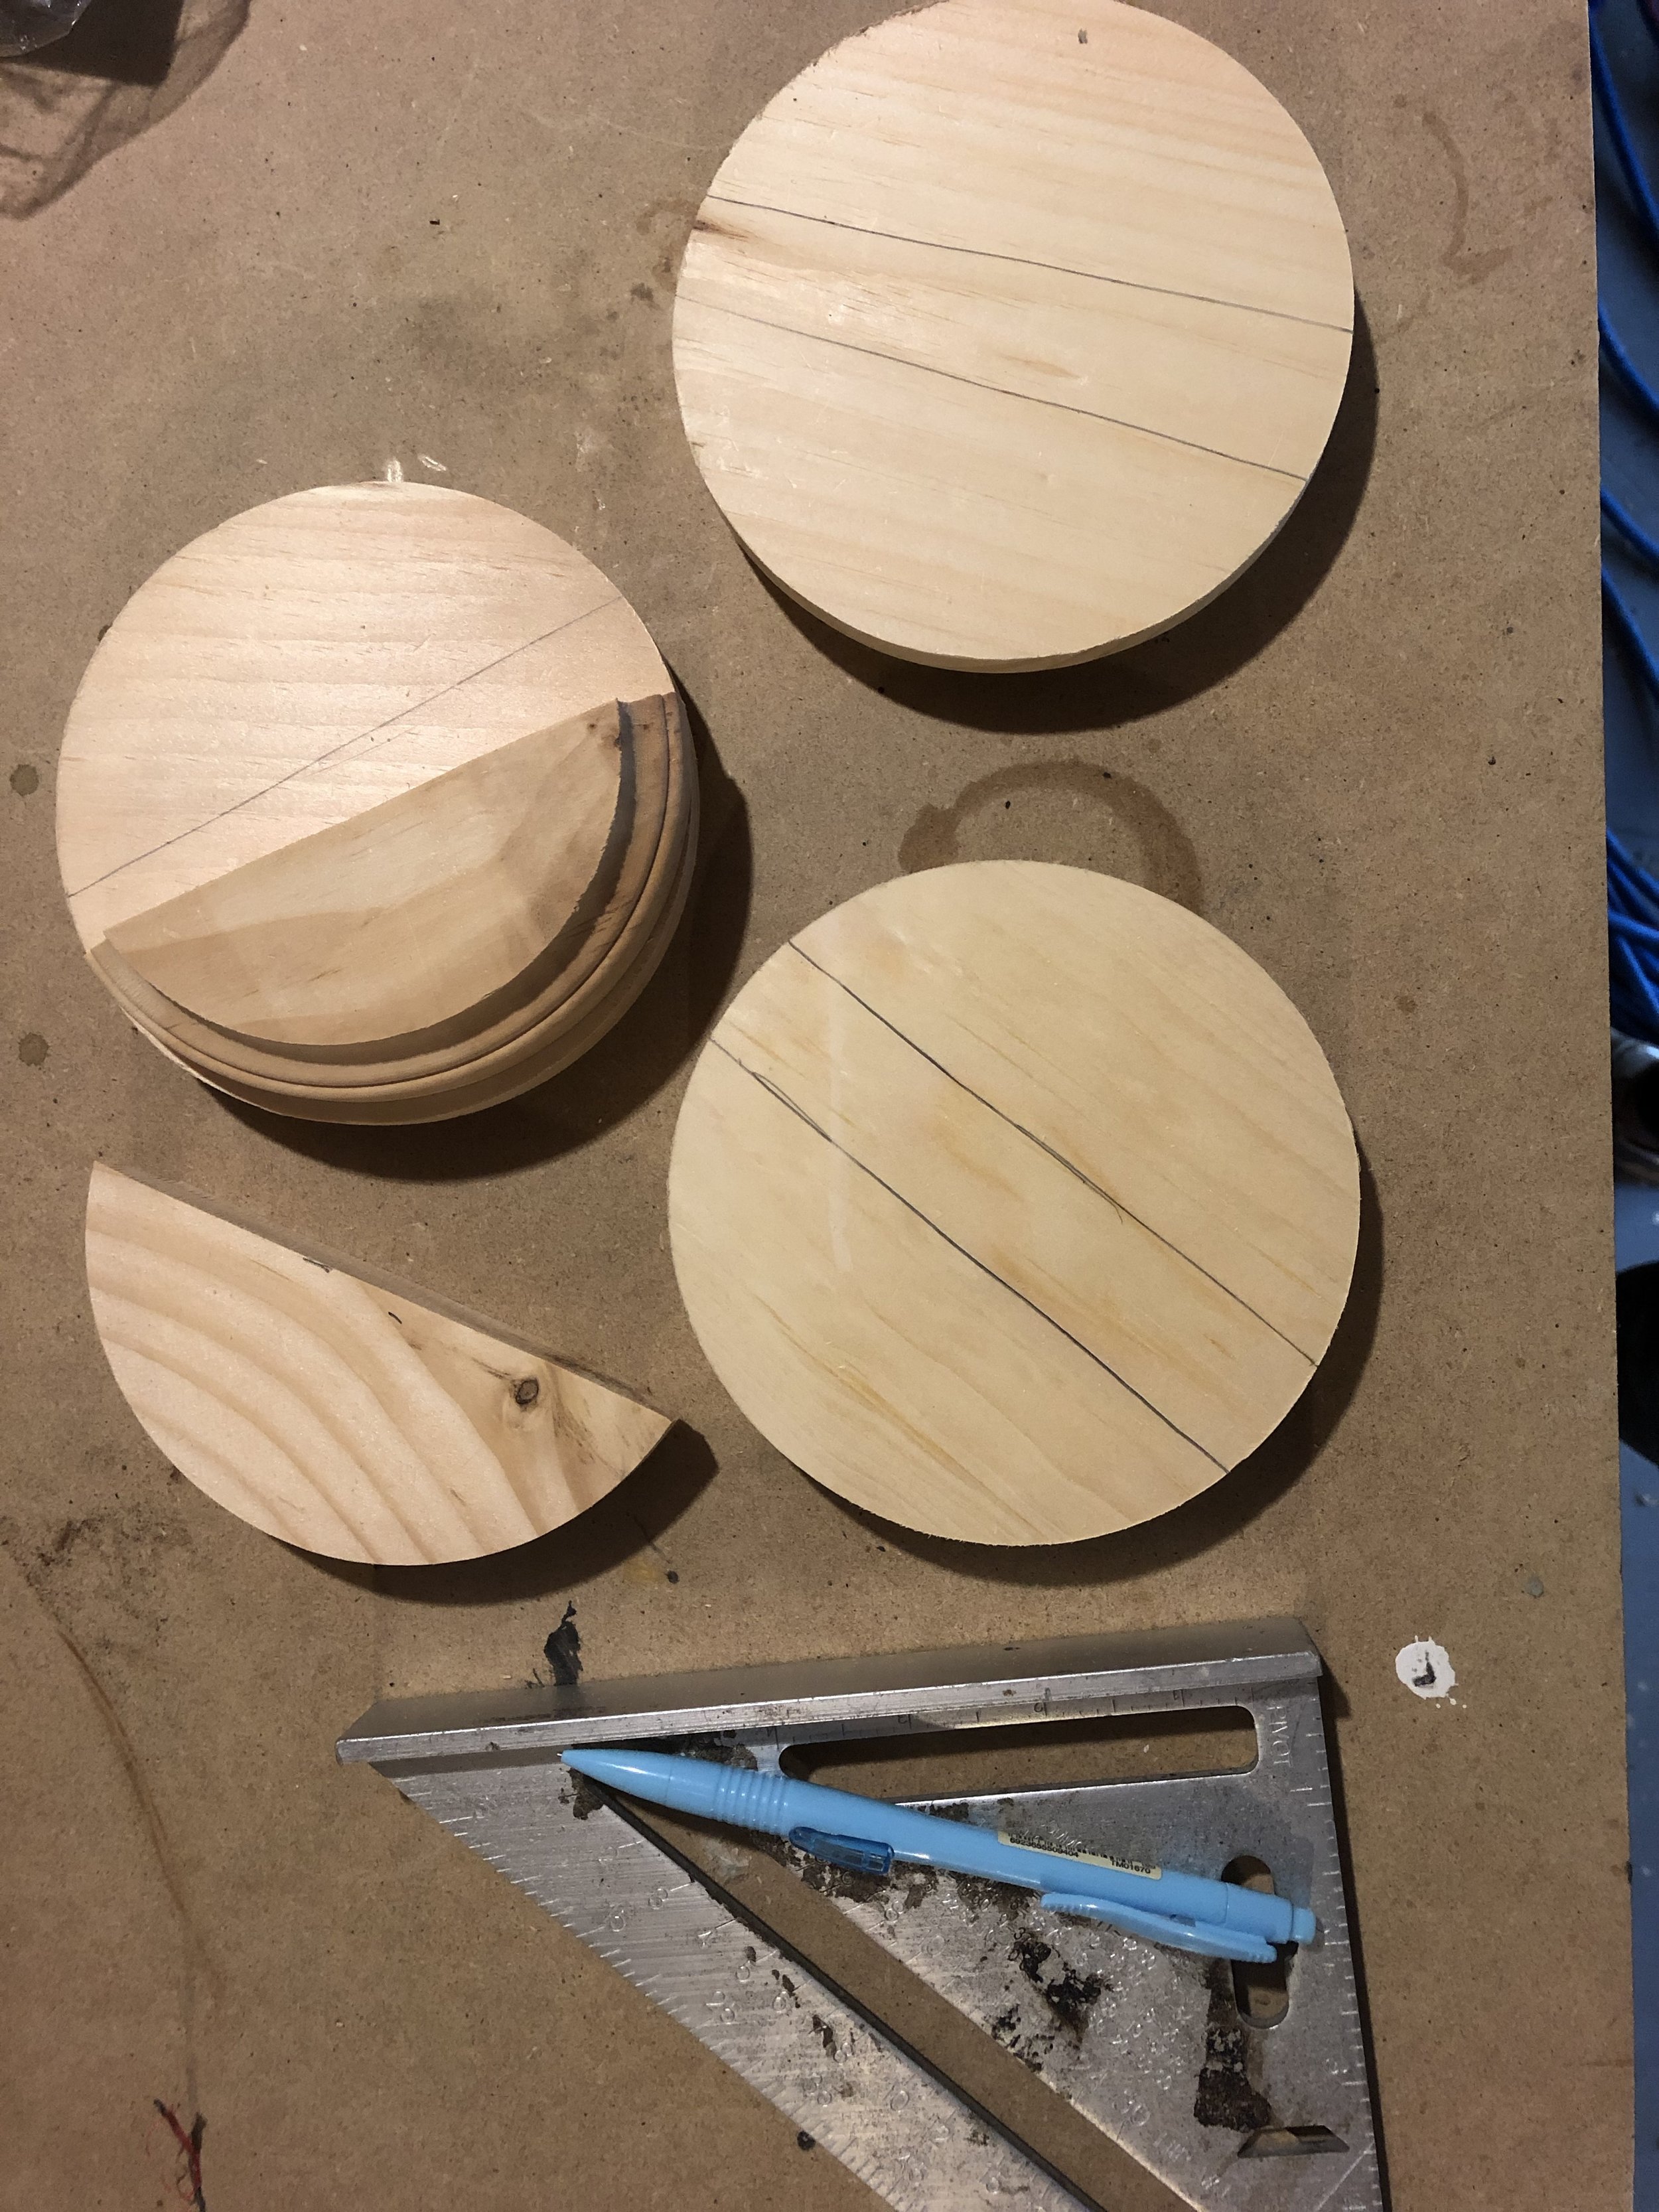
After assembling the dresser, I worked on creating the pulls. I used 4 5-inch wooden plaque circles. The groove around the edges give it the perfect grip, while leaving the front sleek. First I cut them in half using a bandsaw, measuring and cutting out a one inch gap down the center. This way when the pulls were installed, they would still create the illusion of a circle shape, instead of appearing oval.
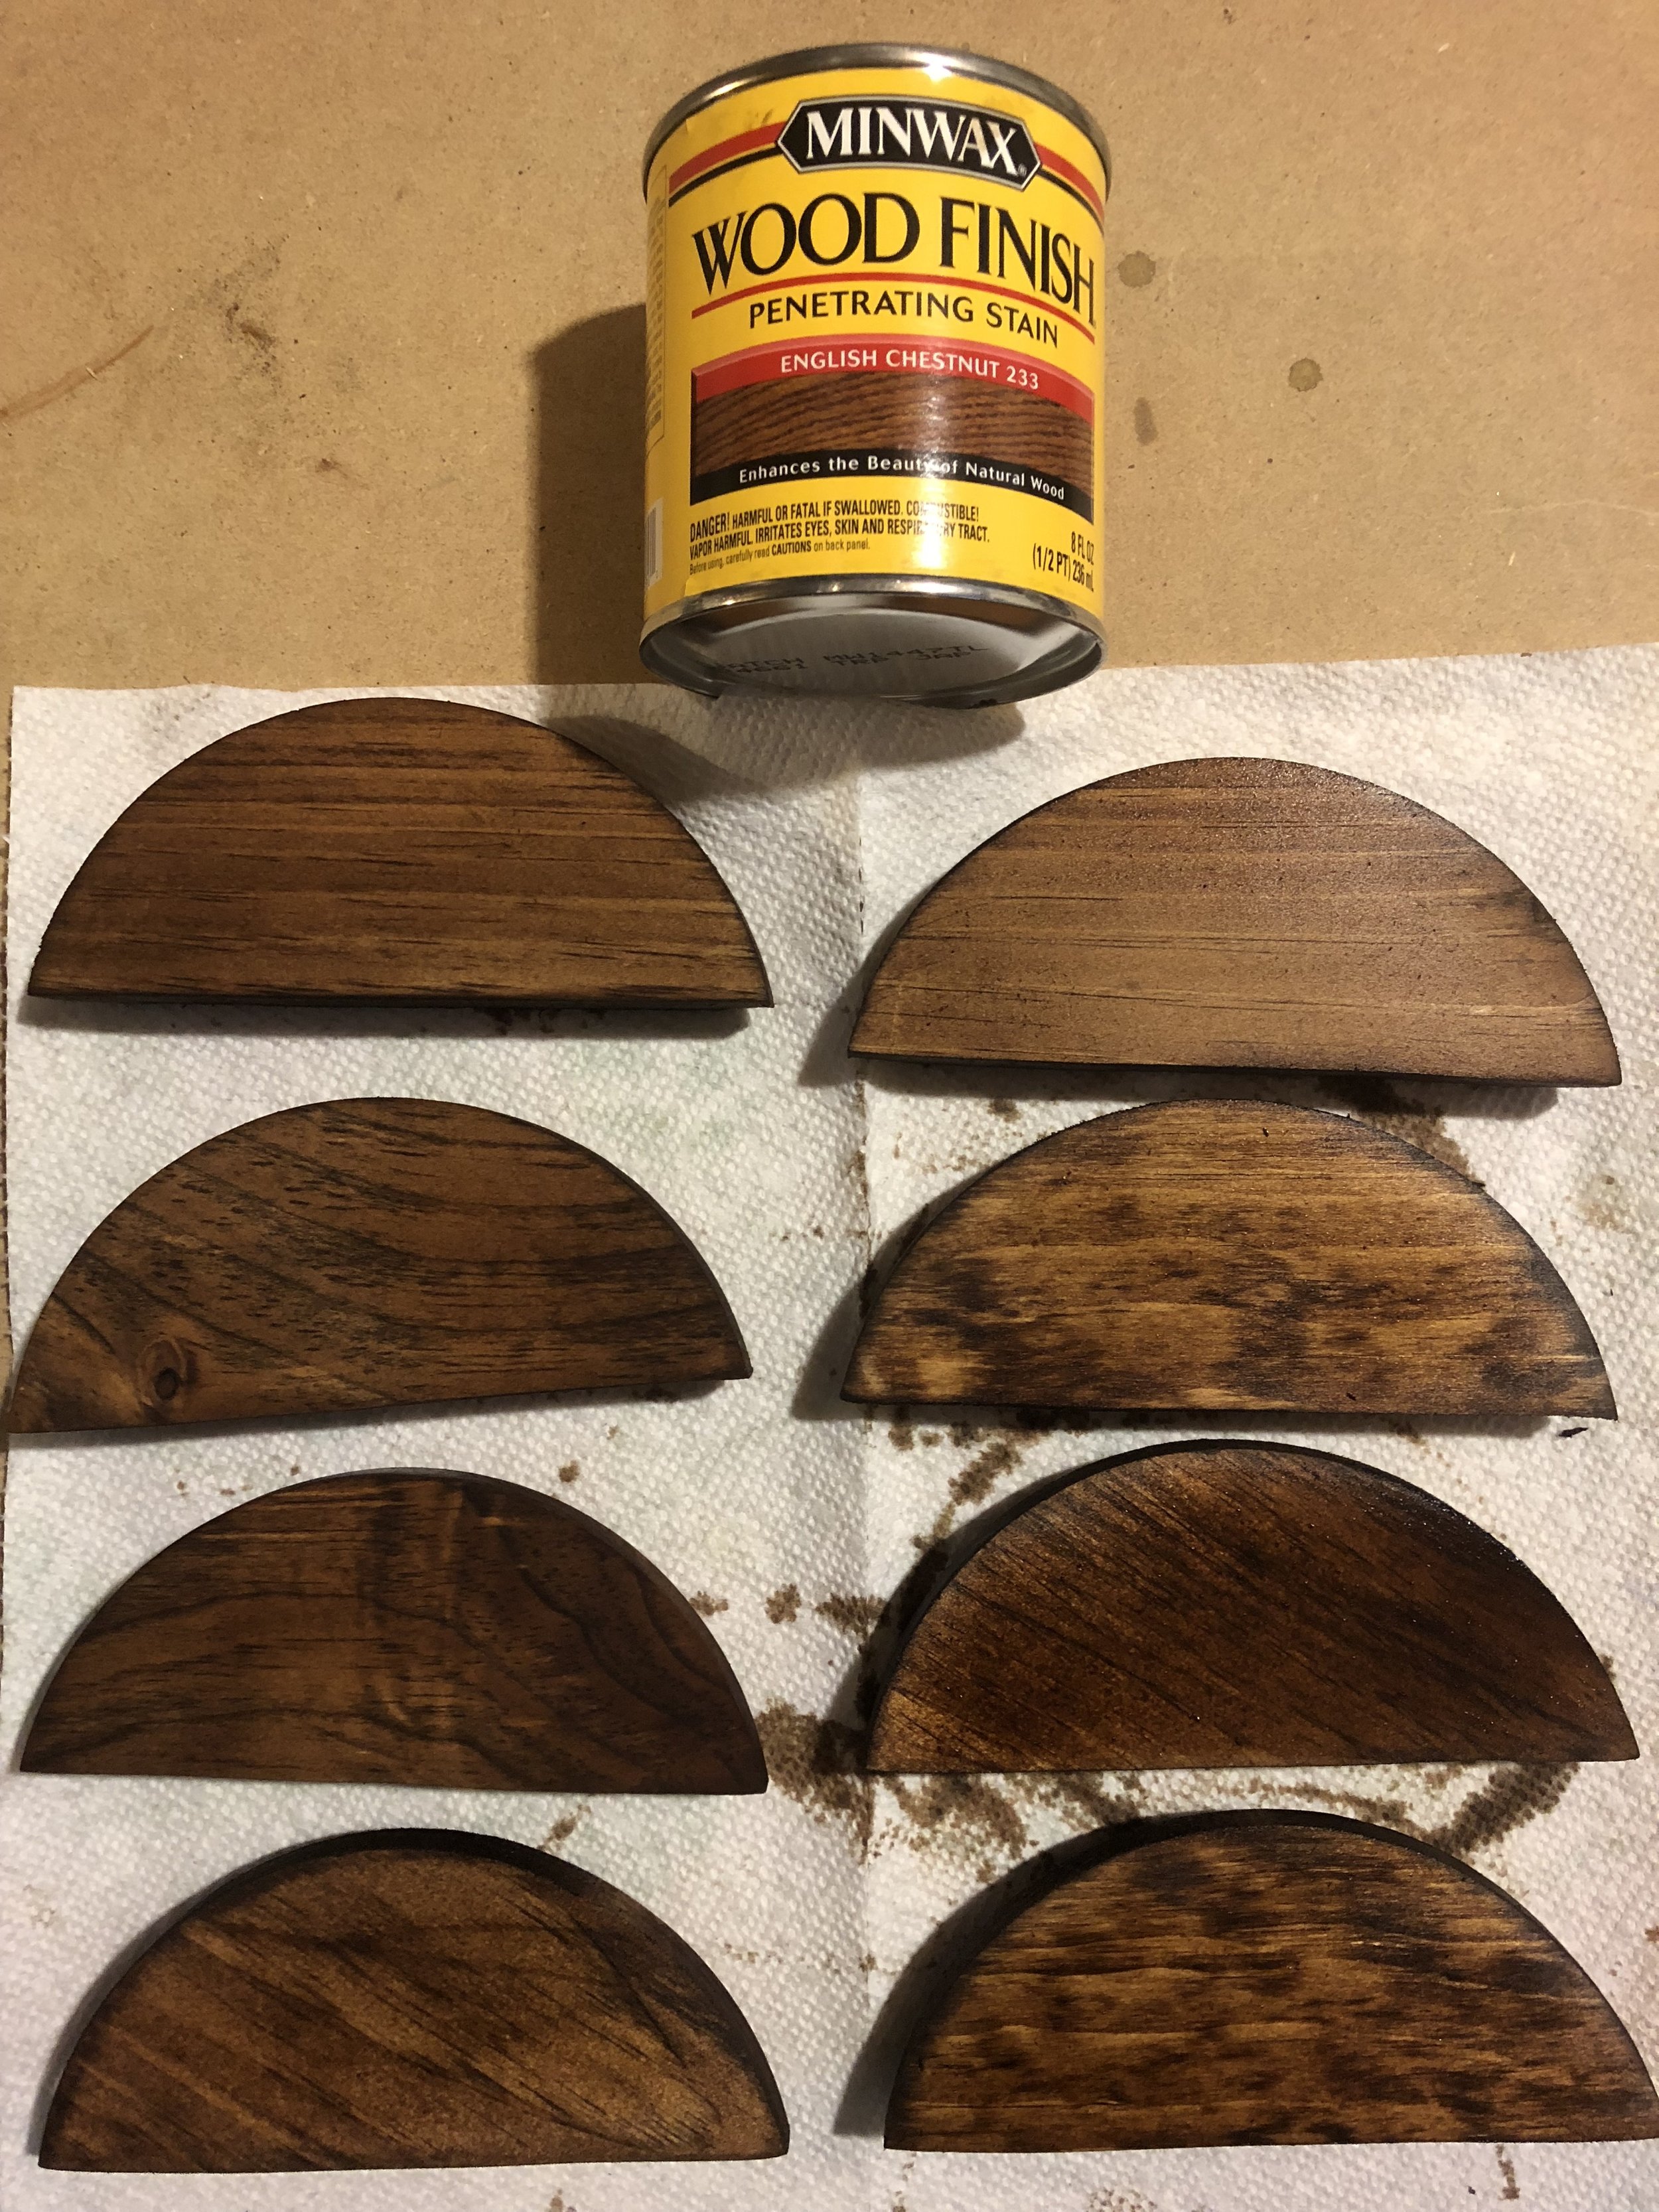
After cutting them in two, I stained the pulls using Minwax’s English Chestnut wood stain, and sealed them using my favorite one-two punch for sealing wood; two coats of Zinsser Universal Sanding Sealer, and two coats of Minwax Policrylic finish.
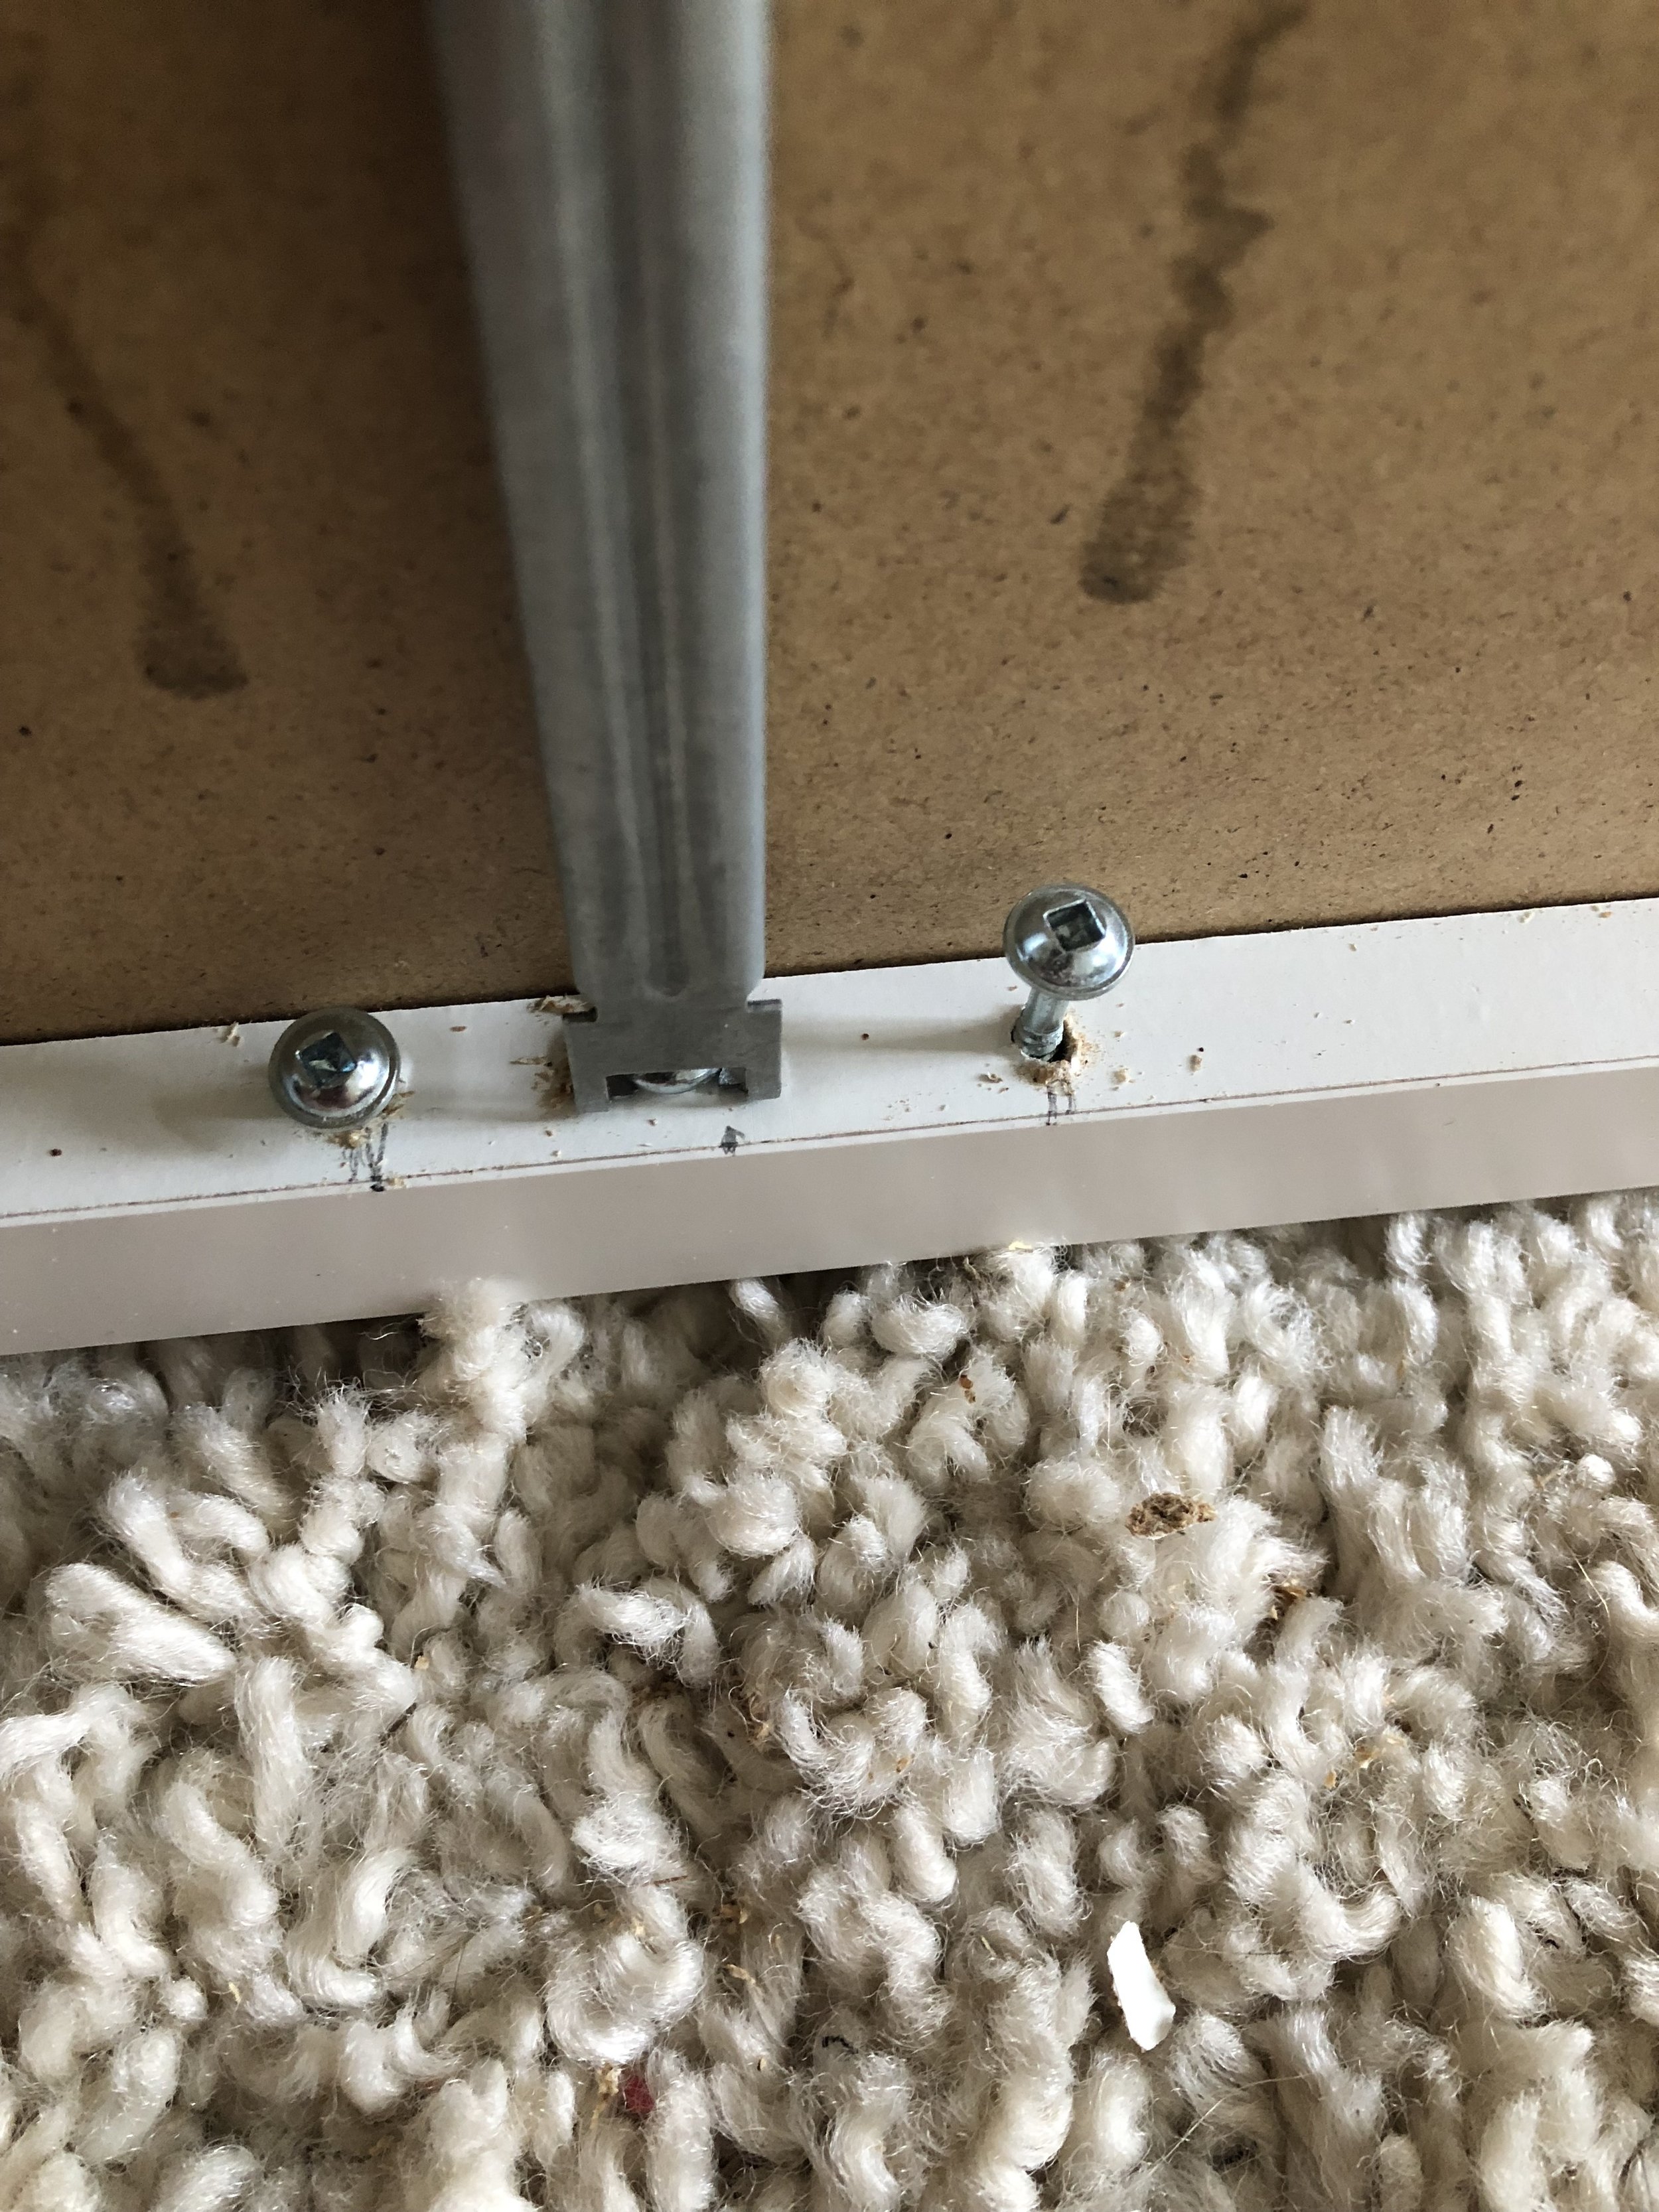
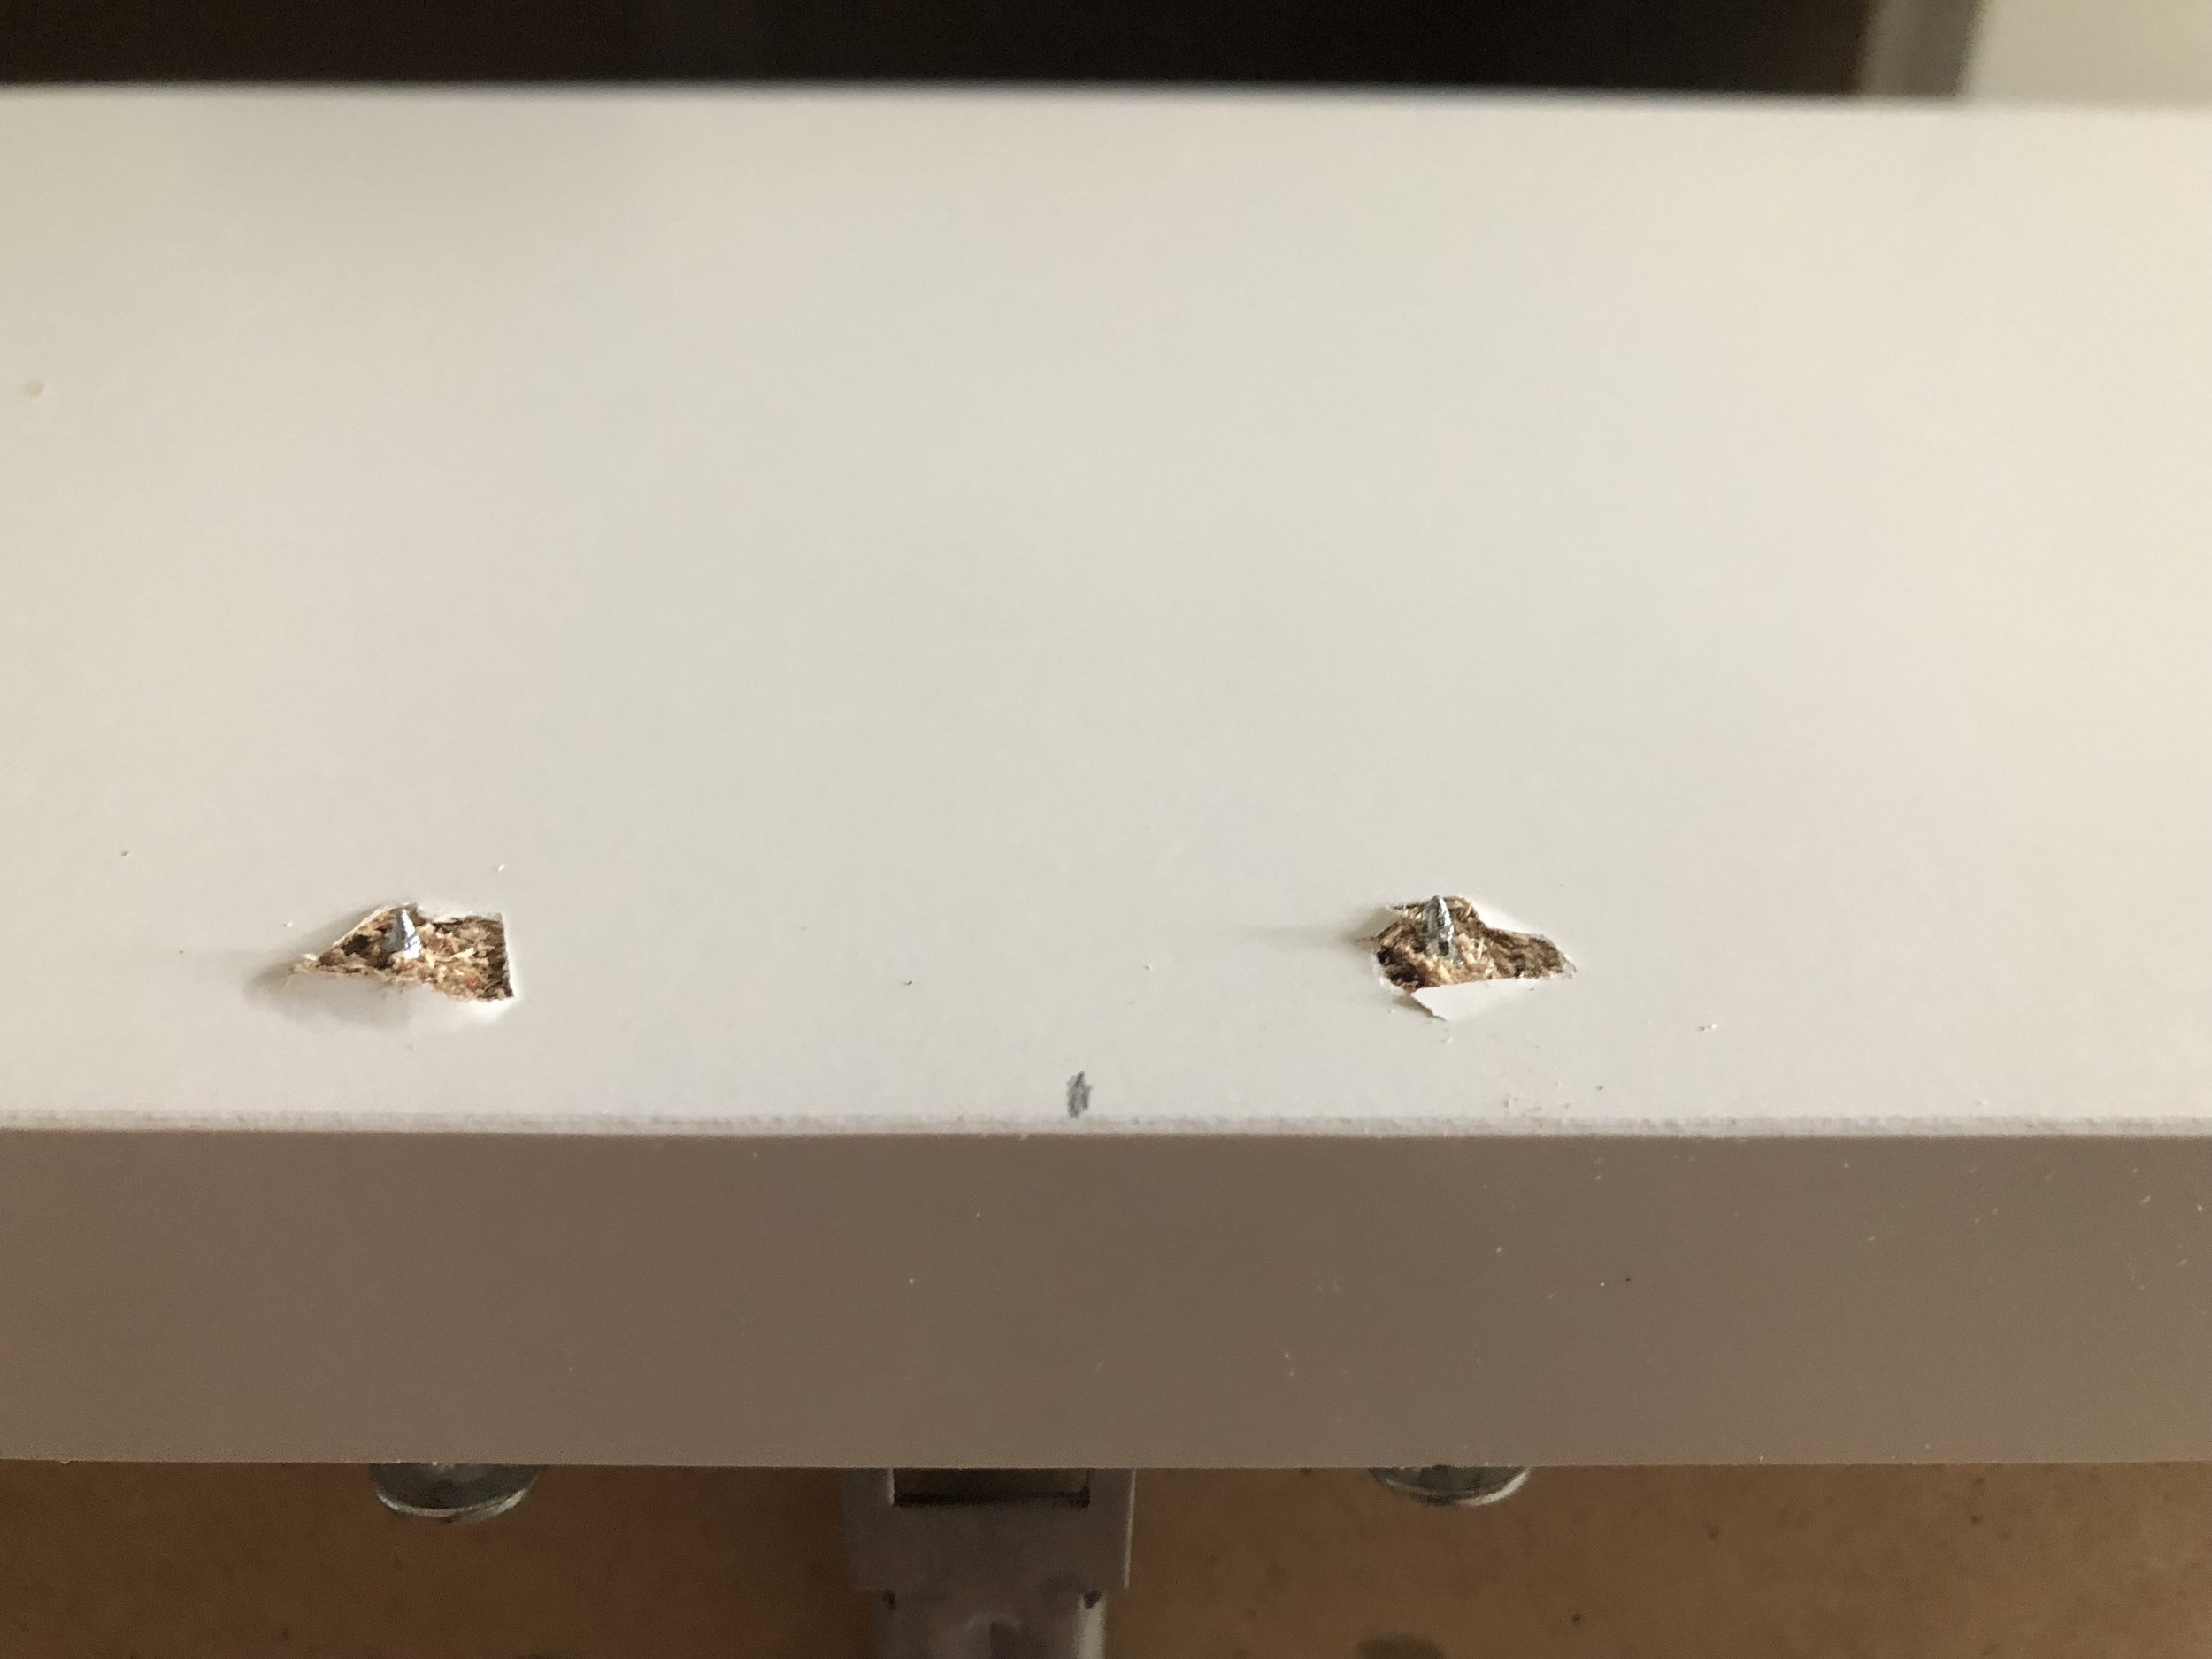
After they dried completely I attached them to the dresser. I measured and marked the center of the drawer front, and then from the inside drilled two pilot hills an inch from center on each side, and three quarters of an inch down from the top of the drawer. I inserted my screws until they just broke the surface on the front side of the dresser. Next I lined up the center of my drawer with the center of my pull, and gently pressed the two together. This left indentions on the back of the pull, right where I needed to drill a shallow pilot hole on the back side. When drilling the pilot holes on the back of the pull, I made sure not to drill so deep that it came out the other side. With the pilot holes in place, it was easy to drive the rest of the screw through both the dresser and the pull. If you’ve carefully measured and lined everything up, they should sit perfectly centered one over the next.
The last step was to attach the legs to the dresser. The base of the MALM dresser is completely open on the back, which meant we needed to add a support to the backside in order to have something solid to screw the legs in to. Tim was a dear and cut a couple pieces of pine boards for me in the right size so that the board sat flush with the bottom of the rest of the dresser. If you don’t have access to a table saw, you may be able to have someone help you at Home Depot or Lowe’s using their indoor saw.
To apply, we first used wood glue, then shot a couple nails with an air nailer to keep everything in place. Next we clamped everything down and let it sit for 24 hours until everything was solid.
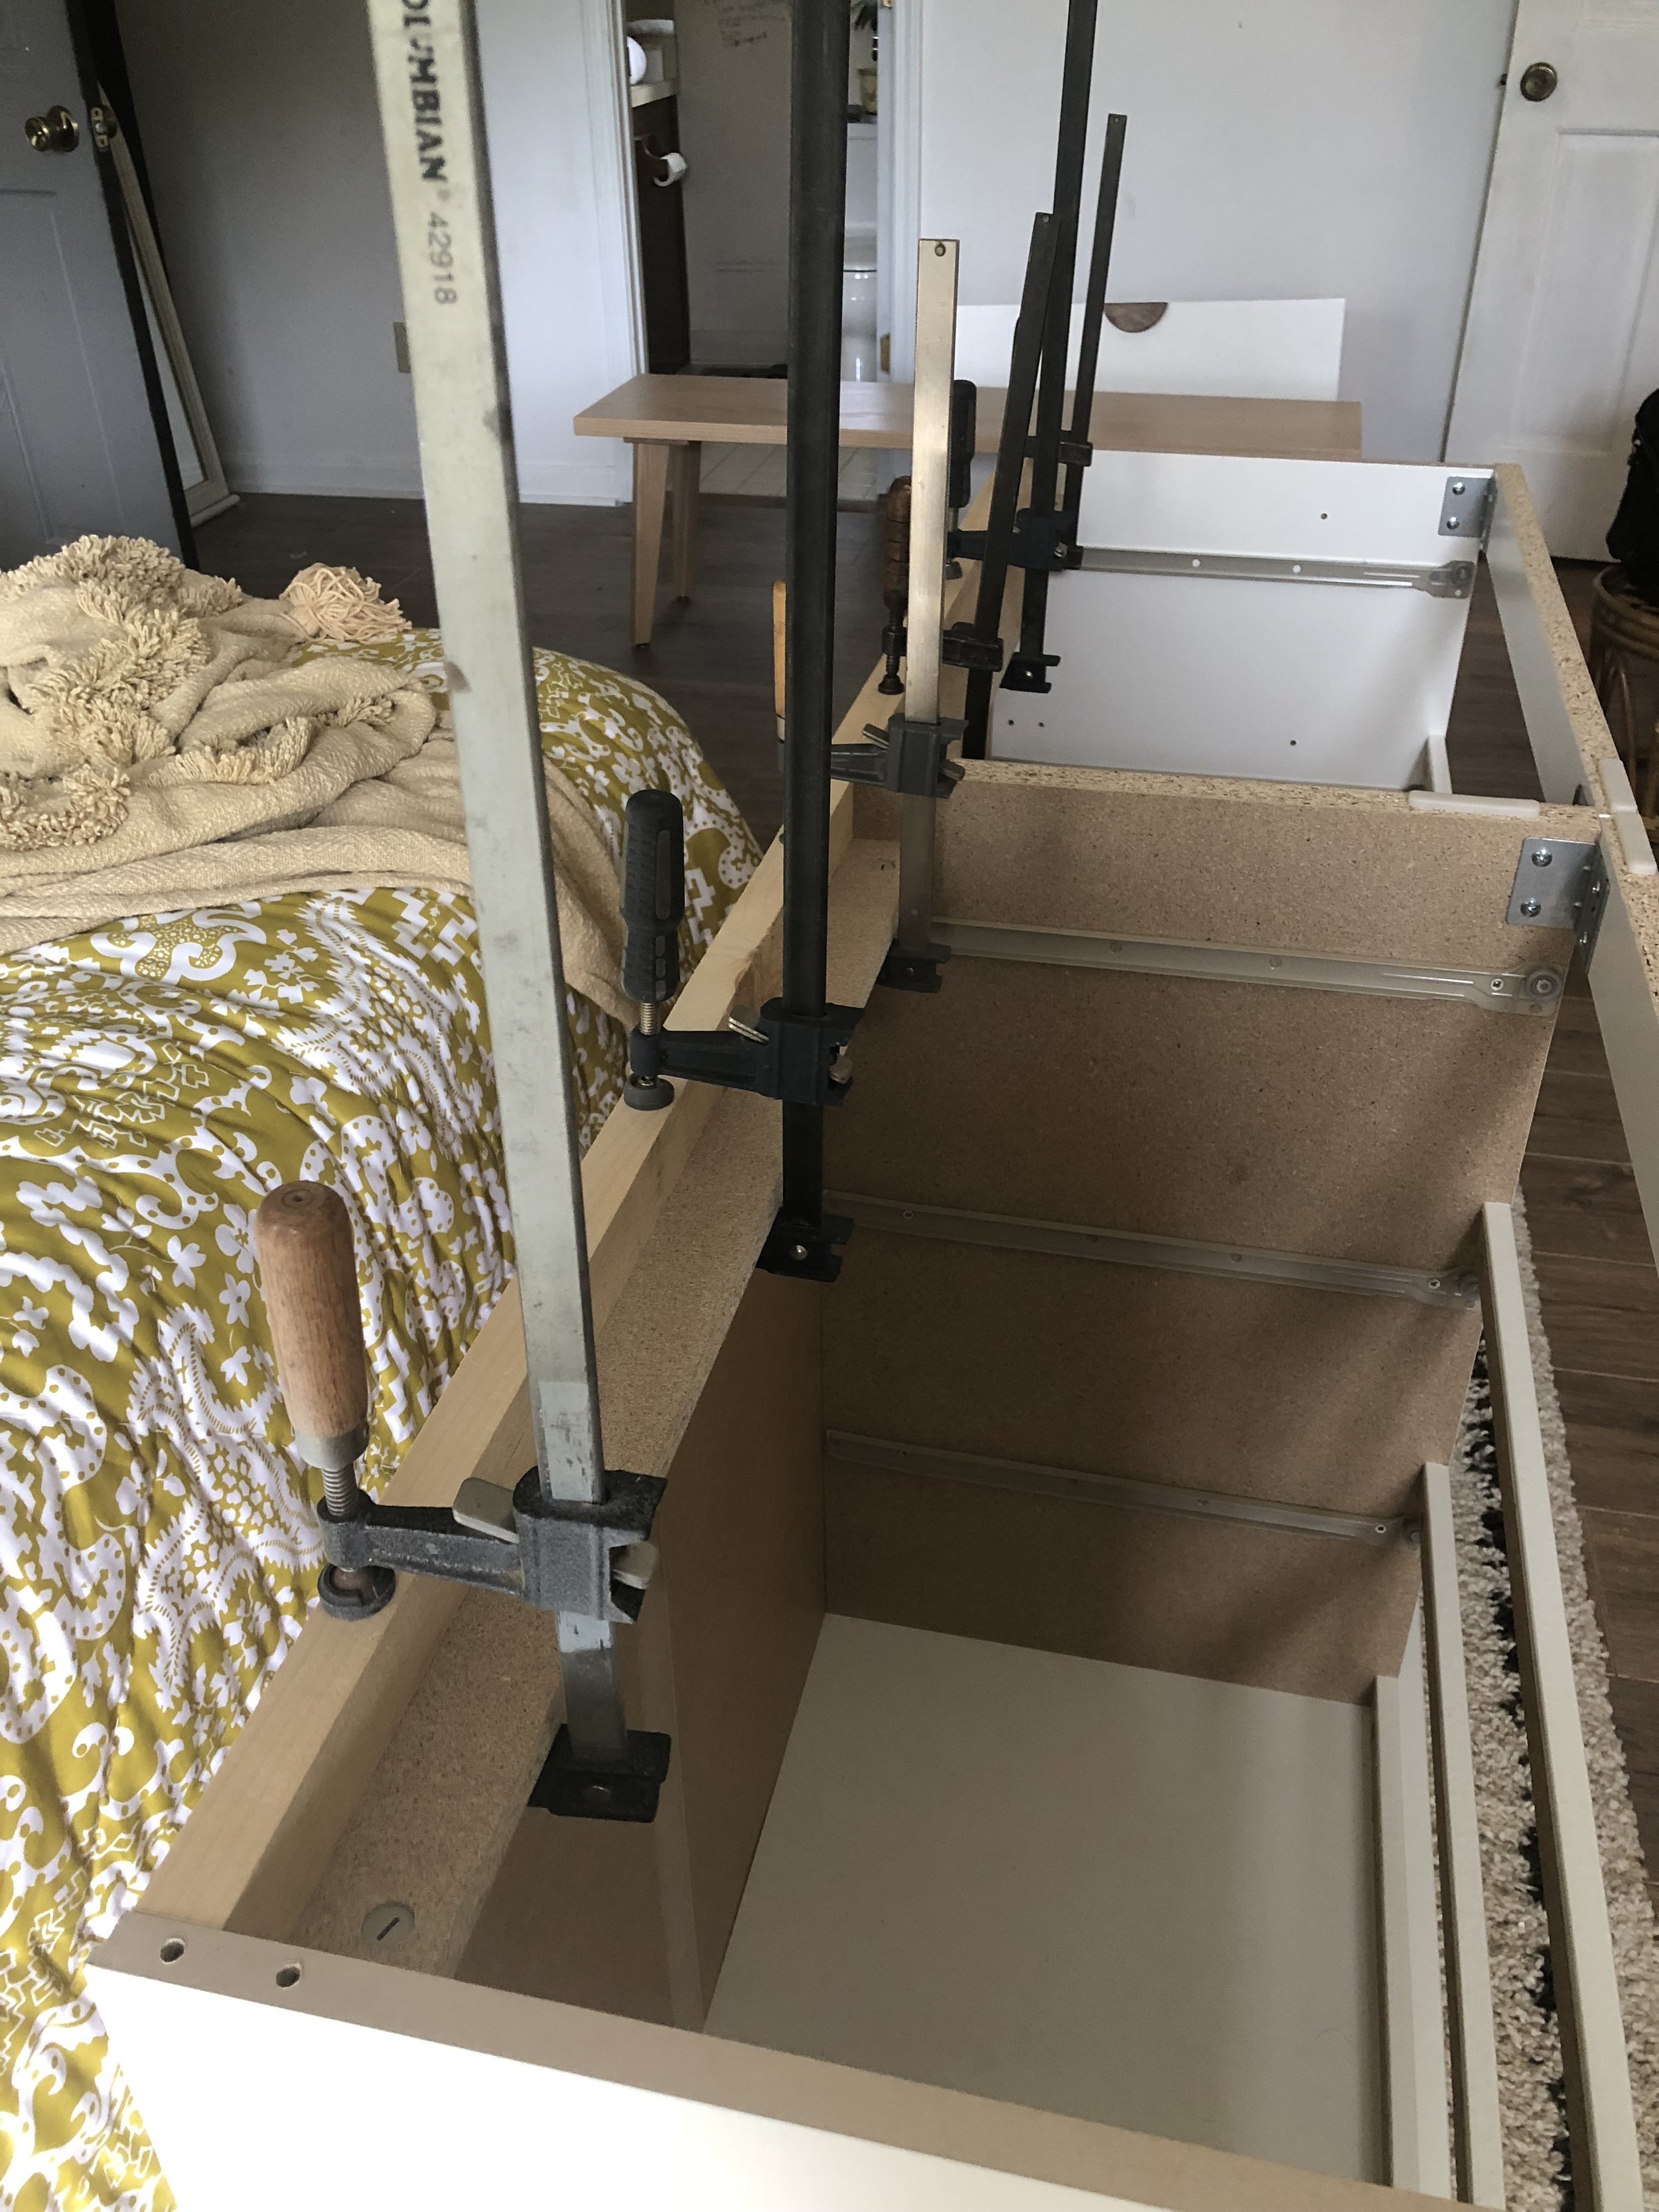
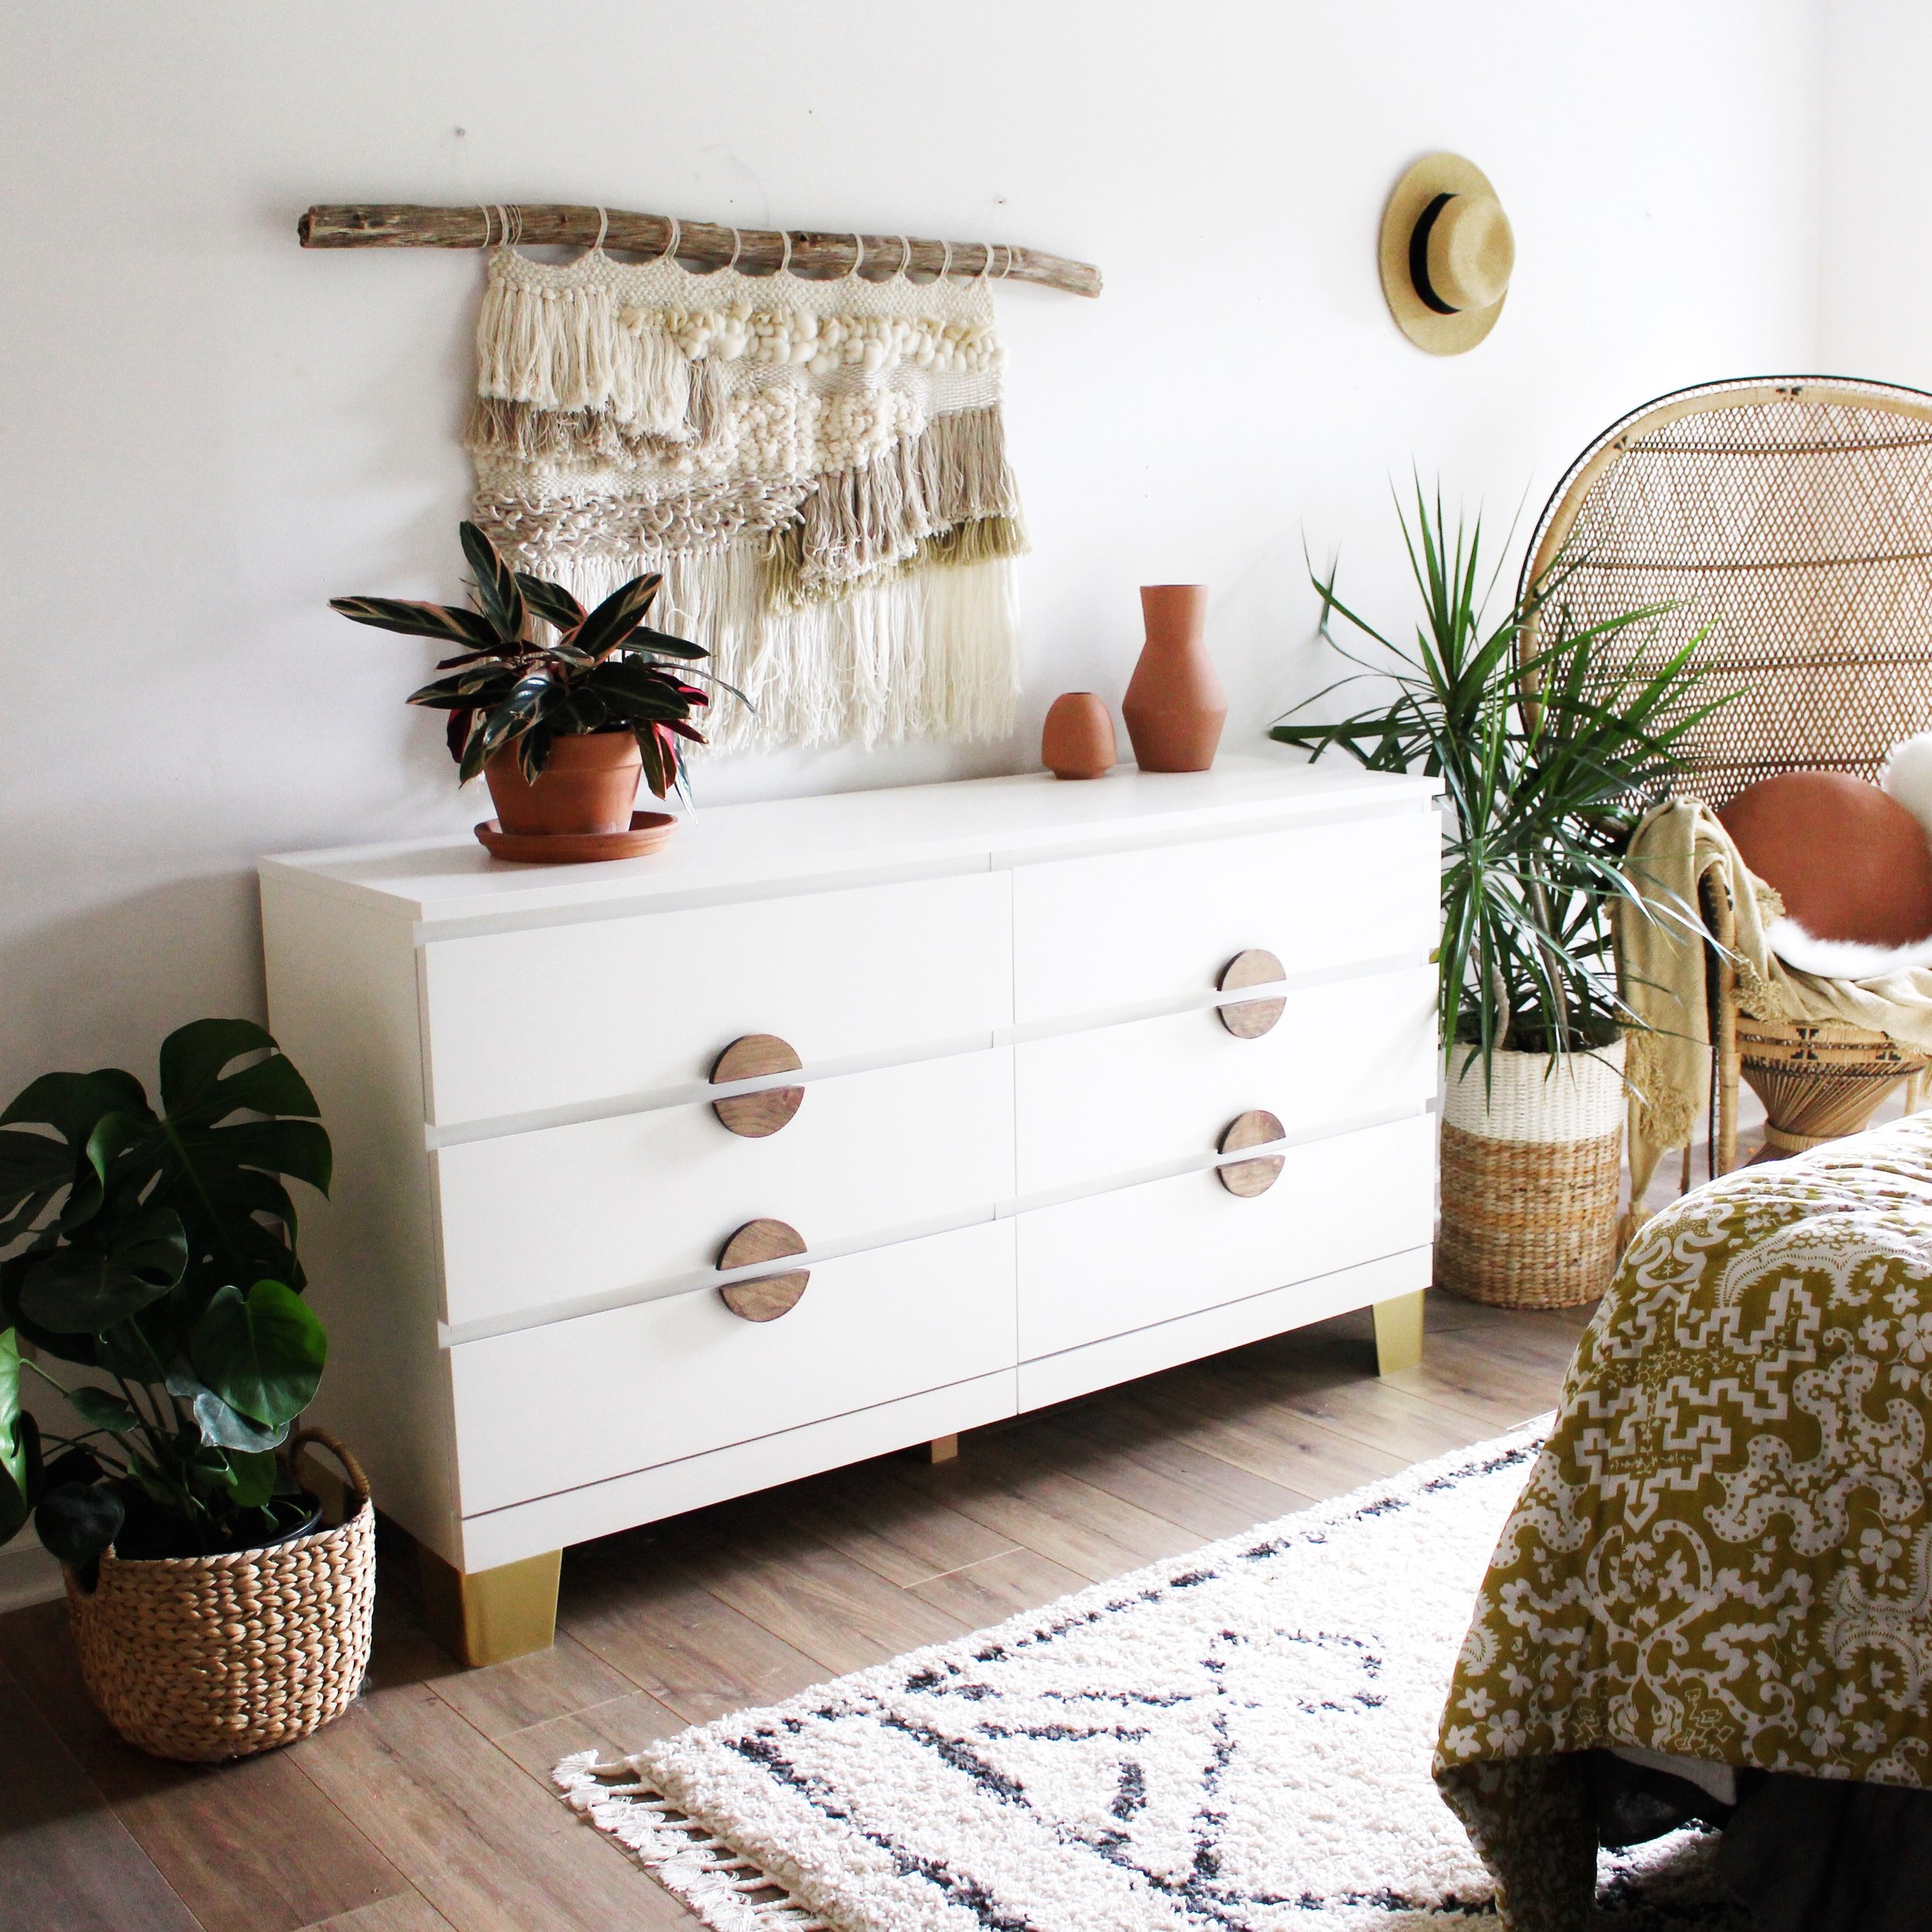
Once the frame was set, it was as easy as screwing the legs in place using the hardware that Pretty Pegs included with the legs. We flipped the dresser over, and voila! It was finished, and we absolutely love it!


Let me know if you have any questions in the comments below! And a big thanks to Pretty Pegs for sponsoring this project!
-Cheers!
Jodi
Some links in the post may contain affiliate links that help me support my blog! Thank you so much!
Week Three (and Two, and One) of ORC bedroom makeover
Lord, I am Queen, I mean QUEEN of last minute, what the heck, couple weeks late, let’s take on the challenge, cause why not!!
Dear Jesus, you’re gonna be with me, right!?
But my girl’s room people, it is in total and utter devastation. I’m too intimidated to take it on without some external kick in the pants, so here we go. Thank you in advance One Room Challenge for how much you’re gonna make my life suck these next three and a half weeks. We’re gonna create beauty from an almost literal storm.
Ready for the game plane?

Currently my girls, ages 13 and 4, SHARE a queen size bed! Bless my teenagers heart, she truly is a saint, but I am an a mission to change this sleeping situation! I stumbled across one of these beds selling on Craigslist for $60, and I scooped it up! I purchased the matching bed online at Walmart, and these two were the building blocks for the room.
My daughter is all about those city vibes, so she choose the brick wall mural from MuralsWallpaper, which I think will set the stage nicely for a loft style bedroom. I plan to keep the rest of the decor earthy and naturally toned. The blue rug is from BoutiqueRugs.com and we picked it out a few months ago in anticipation of a room makeover.
I’m going to keep their linens simple, since there’s enough texture and print happening in the room, and maybe just finish it off with a couple of matching throw pillows to tie the space together.
Okay, ready to see where the challenge comes in? Gulp! Side note, I’ve asked my daughter to clean her room every day for the past week, and this is how good it’s gotten.
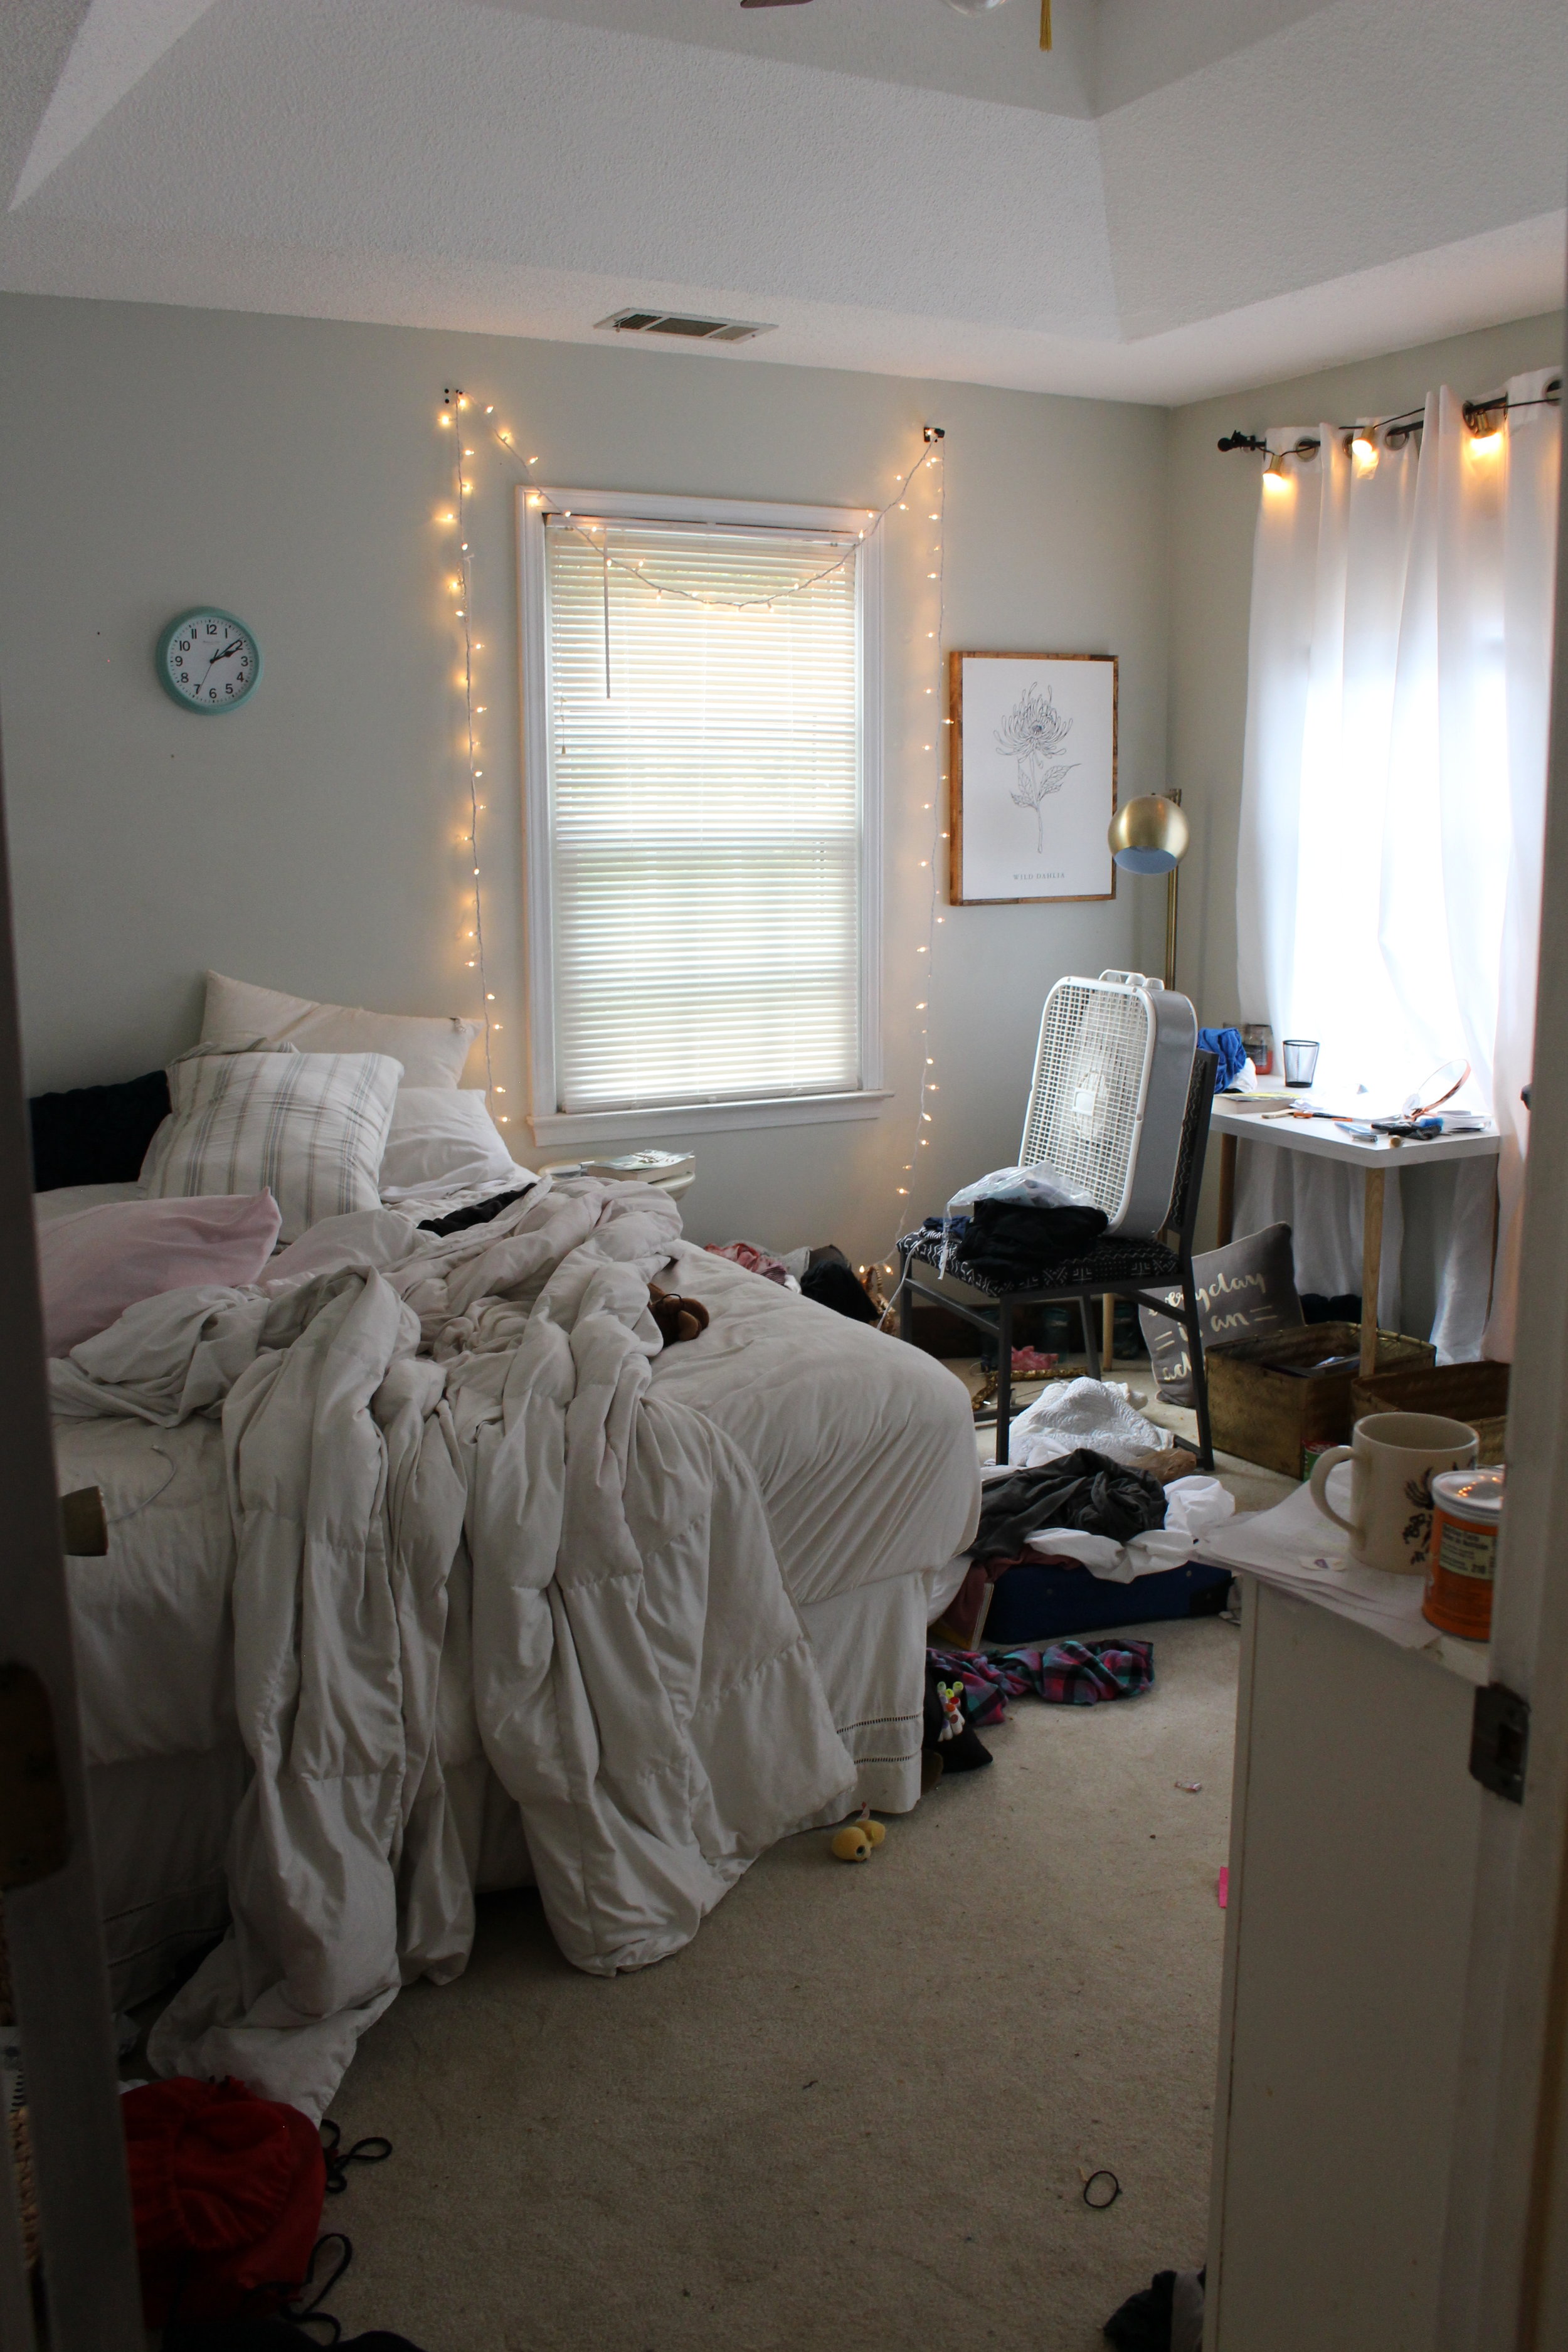

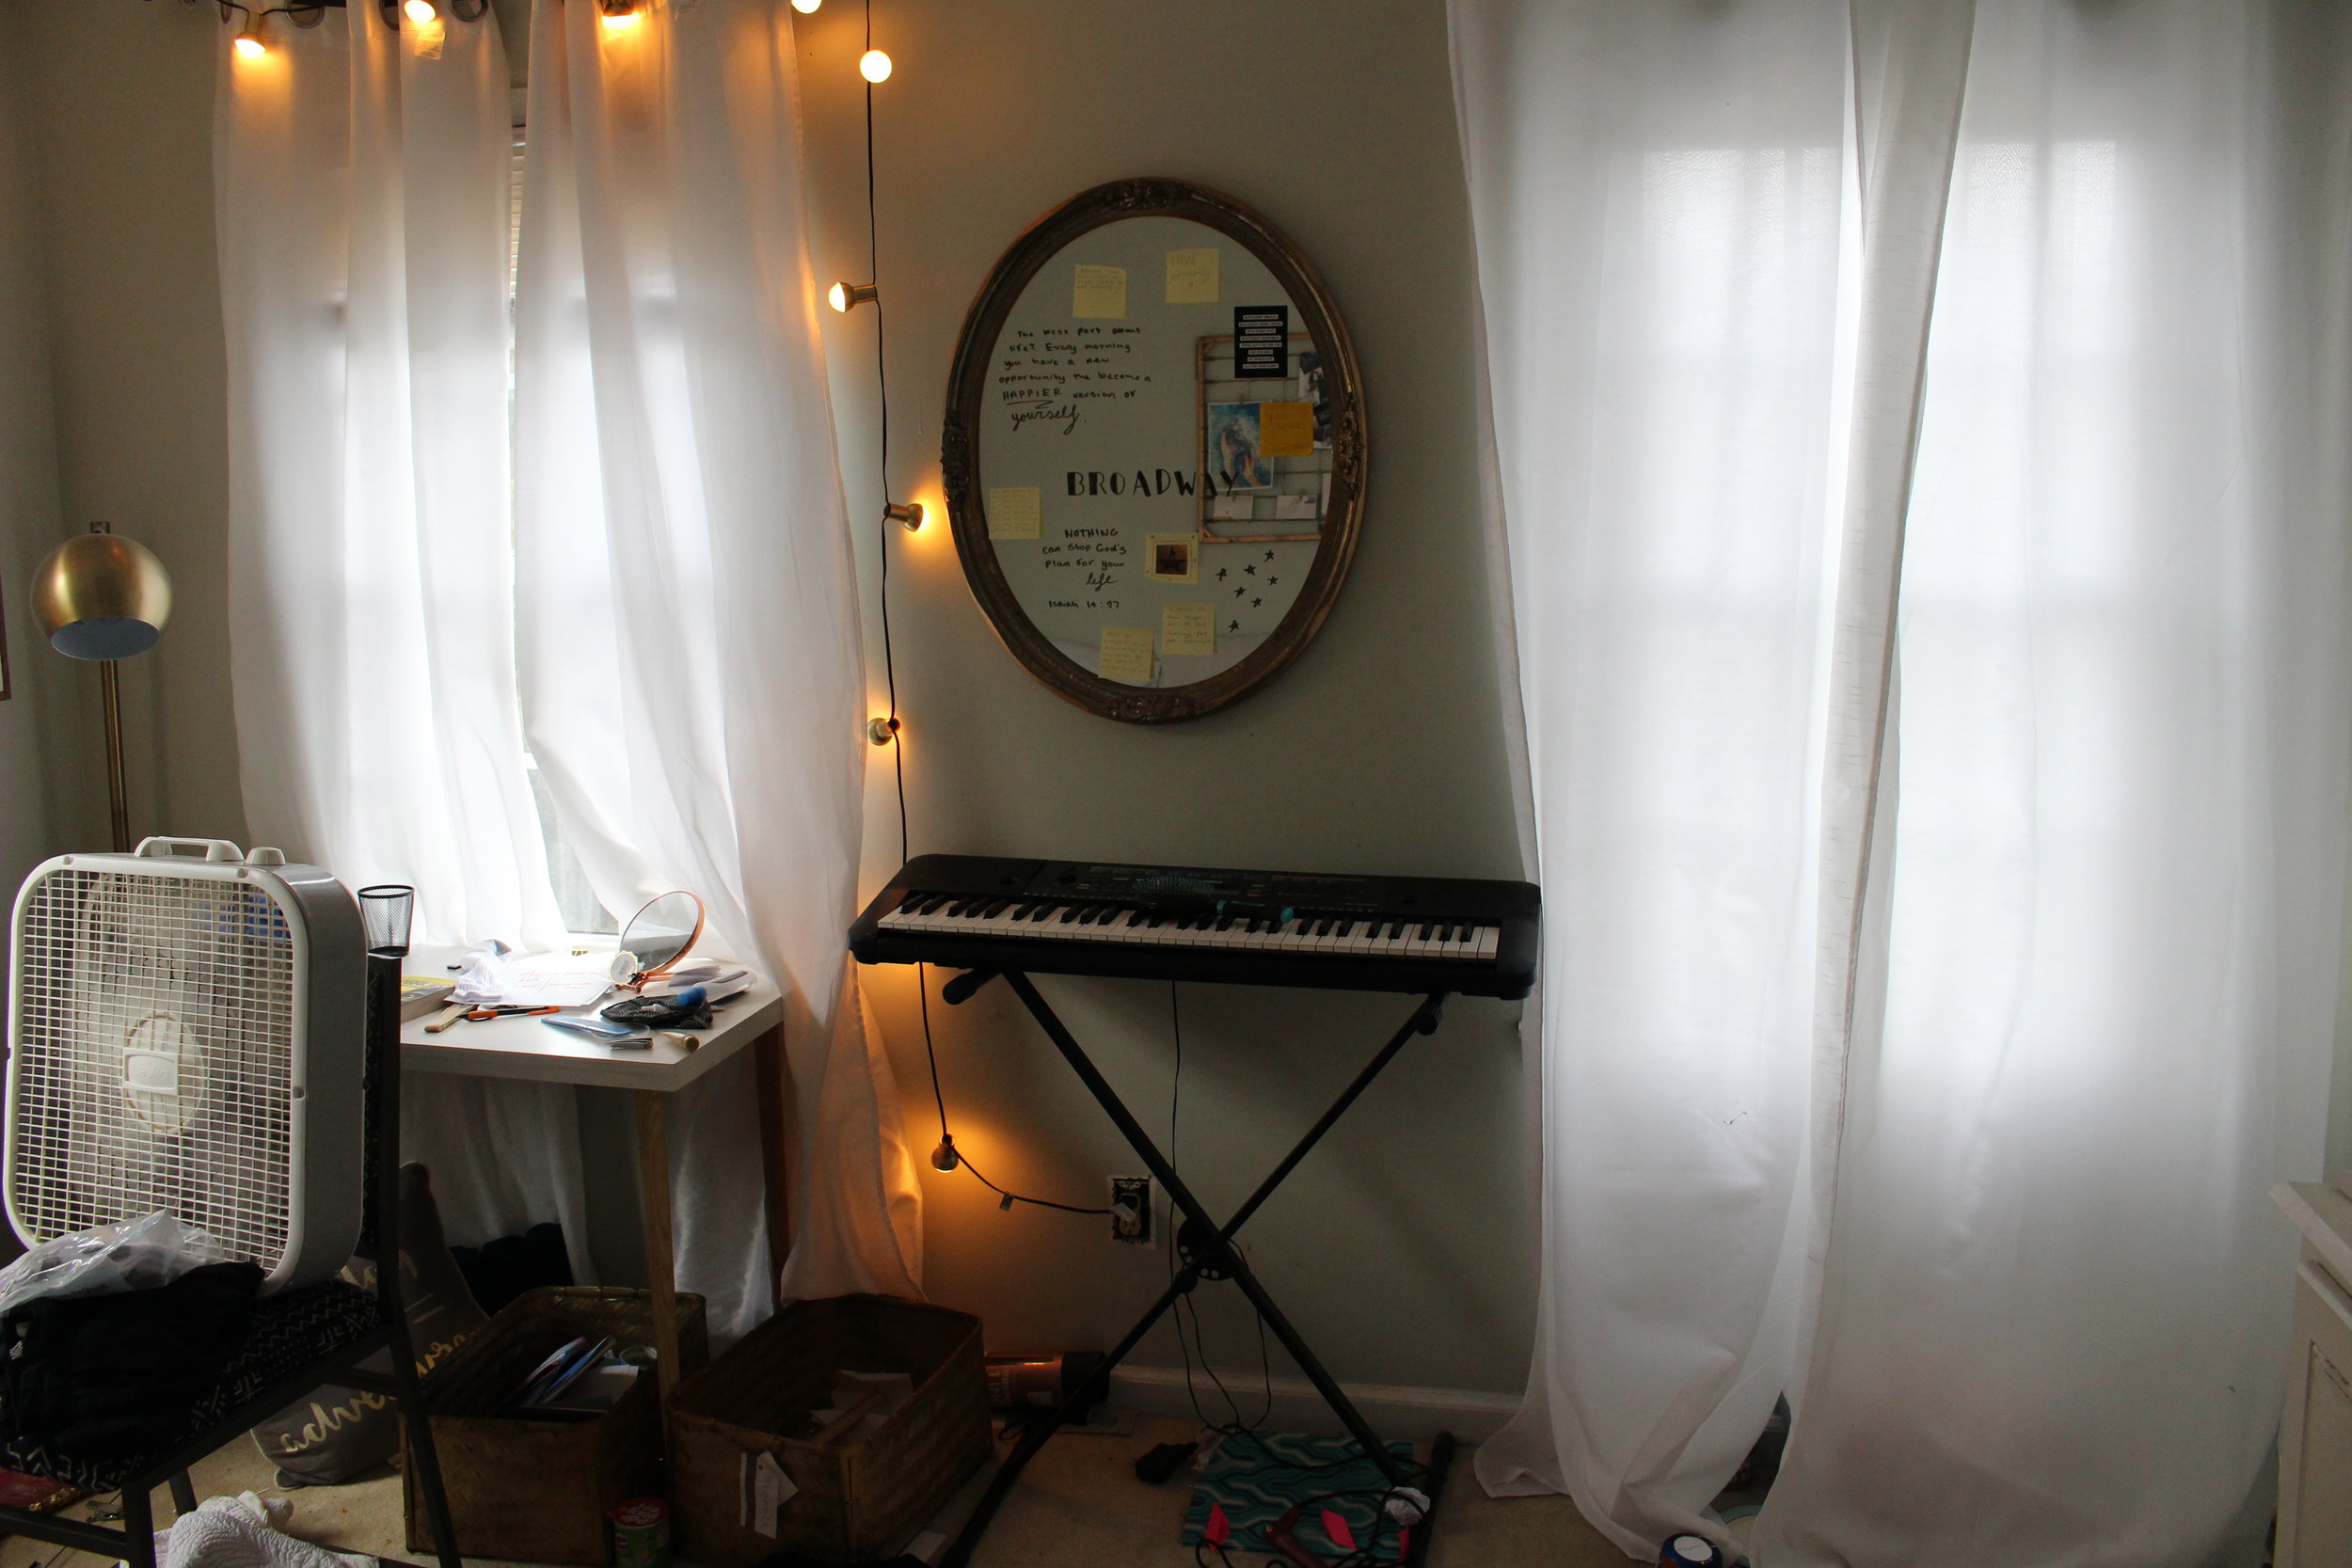
Ok, so what can I say? She’s a bit sentimental and doesn’t like to throw anything away! I think Momma’s gonna have to tackle this challenge during the week while she’s in school! Wish me luck friends. This is nutso!
Cheers!
XO -Jodi

BE SURE TO CHECK OUT ALL THE GUEST PARTICiPaNTS AND All the latest entries!
A couple links contain affiliate links, and I’ll get a little somethin’ somethin’ if you purchase! Thanks in advance!
Breakfast Nook Refresh
It’s amazing how a few little tweaks can change the feel of a space in a big way.

Our breakfast nook is the place in our home where the kids do all their homework, where all the arts and crafts happen (zoom in real close on the old kitchen table and you'll see it's covered in paint and permanent marker stains), and as the name suggests, where we all eat breakfast as we're getting ready for the day.
While there was certainly nothing wrong with this space, it was definately lacking style. It also had a bit of a farmhouse feel which I've been trying to phase out of this house.
Someday soon, I’d love to take the whole fam to Paris, and I wanted a look that represented that. A look that would help keep my dreaming alive. Tres Chic was the vibe I had in mind, as I excitedly began my idea board.

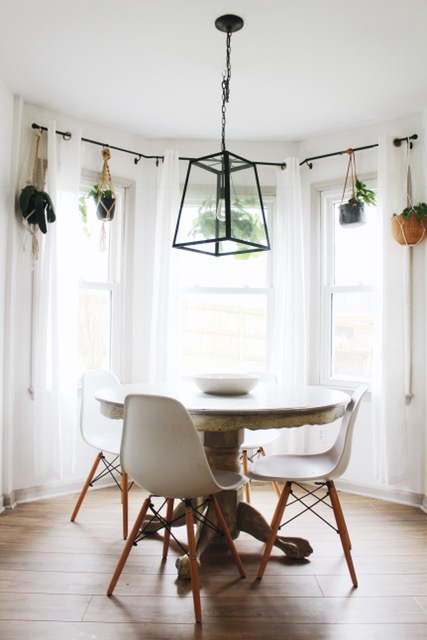
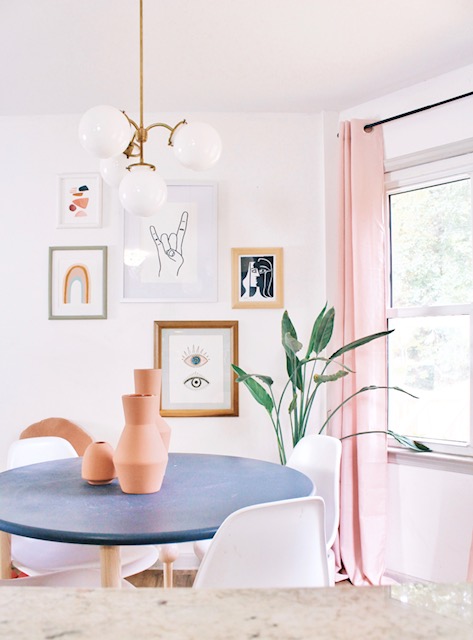
First step was lighting. I knew I wanted a vintage globe style light, but one that was more delicate than most of the midcentury lights I was seeing around. I found the sweetest Etsy shop, Pepe & Carol's, who's handmade lights stood out with a vintage classic look but with a flare towards the feminine. I choose this Glass Globe Waterfall Chandelier and I feel like it sits in the space beautifully.
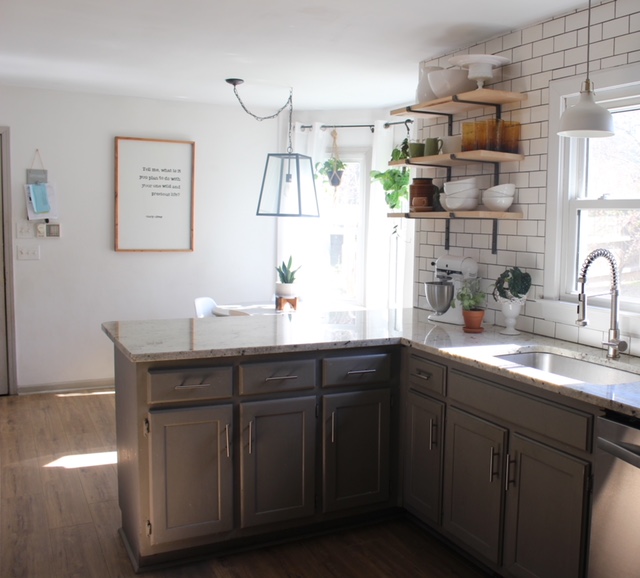
Next step was to replace the art. I wanted a gallery wall with a mix of graphic and lighthearted prints in vibrant pastels to climb up the wall in an irreverent pattern. Snoogs and Wilde has some of my favorite prints so I added two of theirs to the art collection. You can find those prints HERE. The rock on print in from Urban Outfitters which you can find HERE. I hand painted the little rainbow, and the Picasso replica is from Etsy. I had fun one morning heading to the thrift store and picking out a bunch of vintage frames to use for this gallery. Most cost around $2 so it was an incredibly affordable way to create a gallery wall, plus it adds the kind of lighthearted character that I value so much.
We decided to keep the current chairs that we had in the space, but we knew the table needed to be replaced. Because I was on a budget, I opted for an easy DIY using Pretty Peg table legs, and a table top that I found on Craigslist for $20. Pretty Pegs supplied all the hardware for the legs, so it was as simple as painting my table top and then drilling the mounting plates for the table and screwing them in. In the end we created a solid wood breakfast table for under $150.
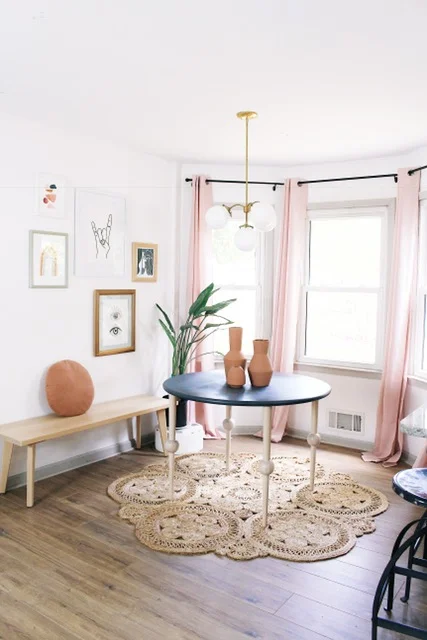
Finally it was time to put all the pieces together! The round jute rug under the table was a happy mistake. I ordered it for a different room but didn't love it there, so I rather haphazardly put it under the table, and it ended up being perfect. Isn't the texture so good? The rug is from overstock, and you can find it HERE.
I sat our Walnut and Oak bench under the gallery wall which is just inside the entry from the garage. It's slightly wider than your average bench, and beyond sturdy. We use it in the mornings to hold book bags and it's also the perfect size to sit down and put on shoes.
Lastly, the pink curtains were somewhat of a chance. I hung them up before the refresh was finished and was like "Nope, pink curtains don't belong in the kitchen." But after all the other pieces were in place, it was the pop of pink that ended up pulling everything together. I'm absolutely obsessed. You can find similar HERE. Also, lots of people ask about those curtain rods, yes, they are designed specifically for bay windows. You can find similar HERE.

And there you have it. I hope you enjoyed this little breakfast nook tour. If you have any questions or comments, please drop me a line! All sources are listed below!
Xo, Jodi