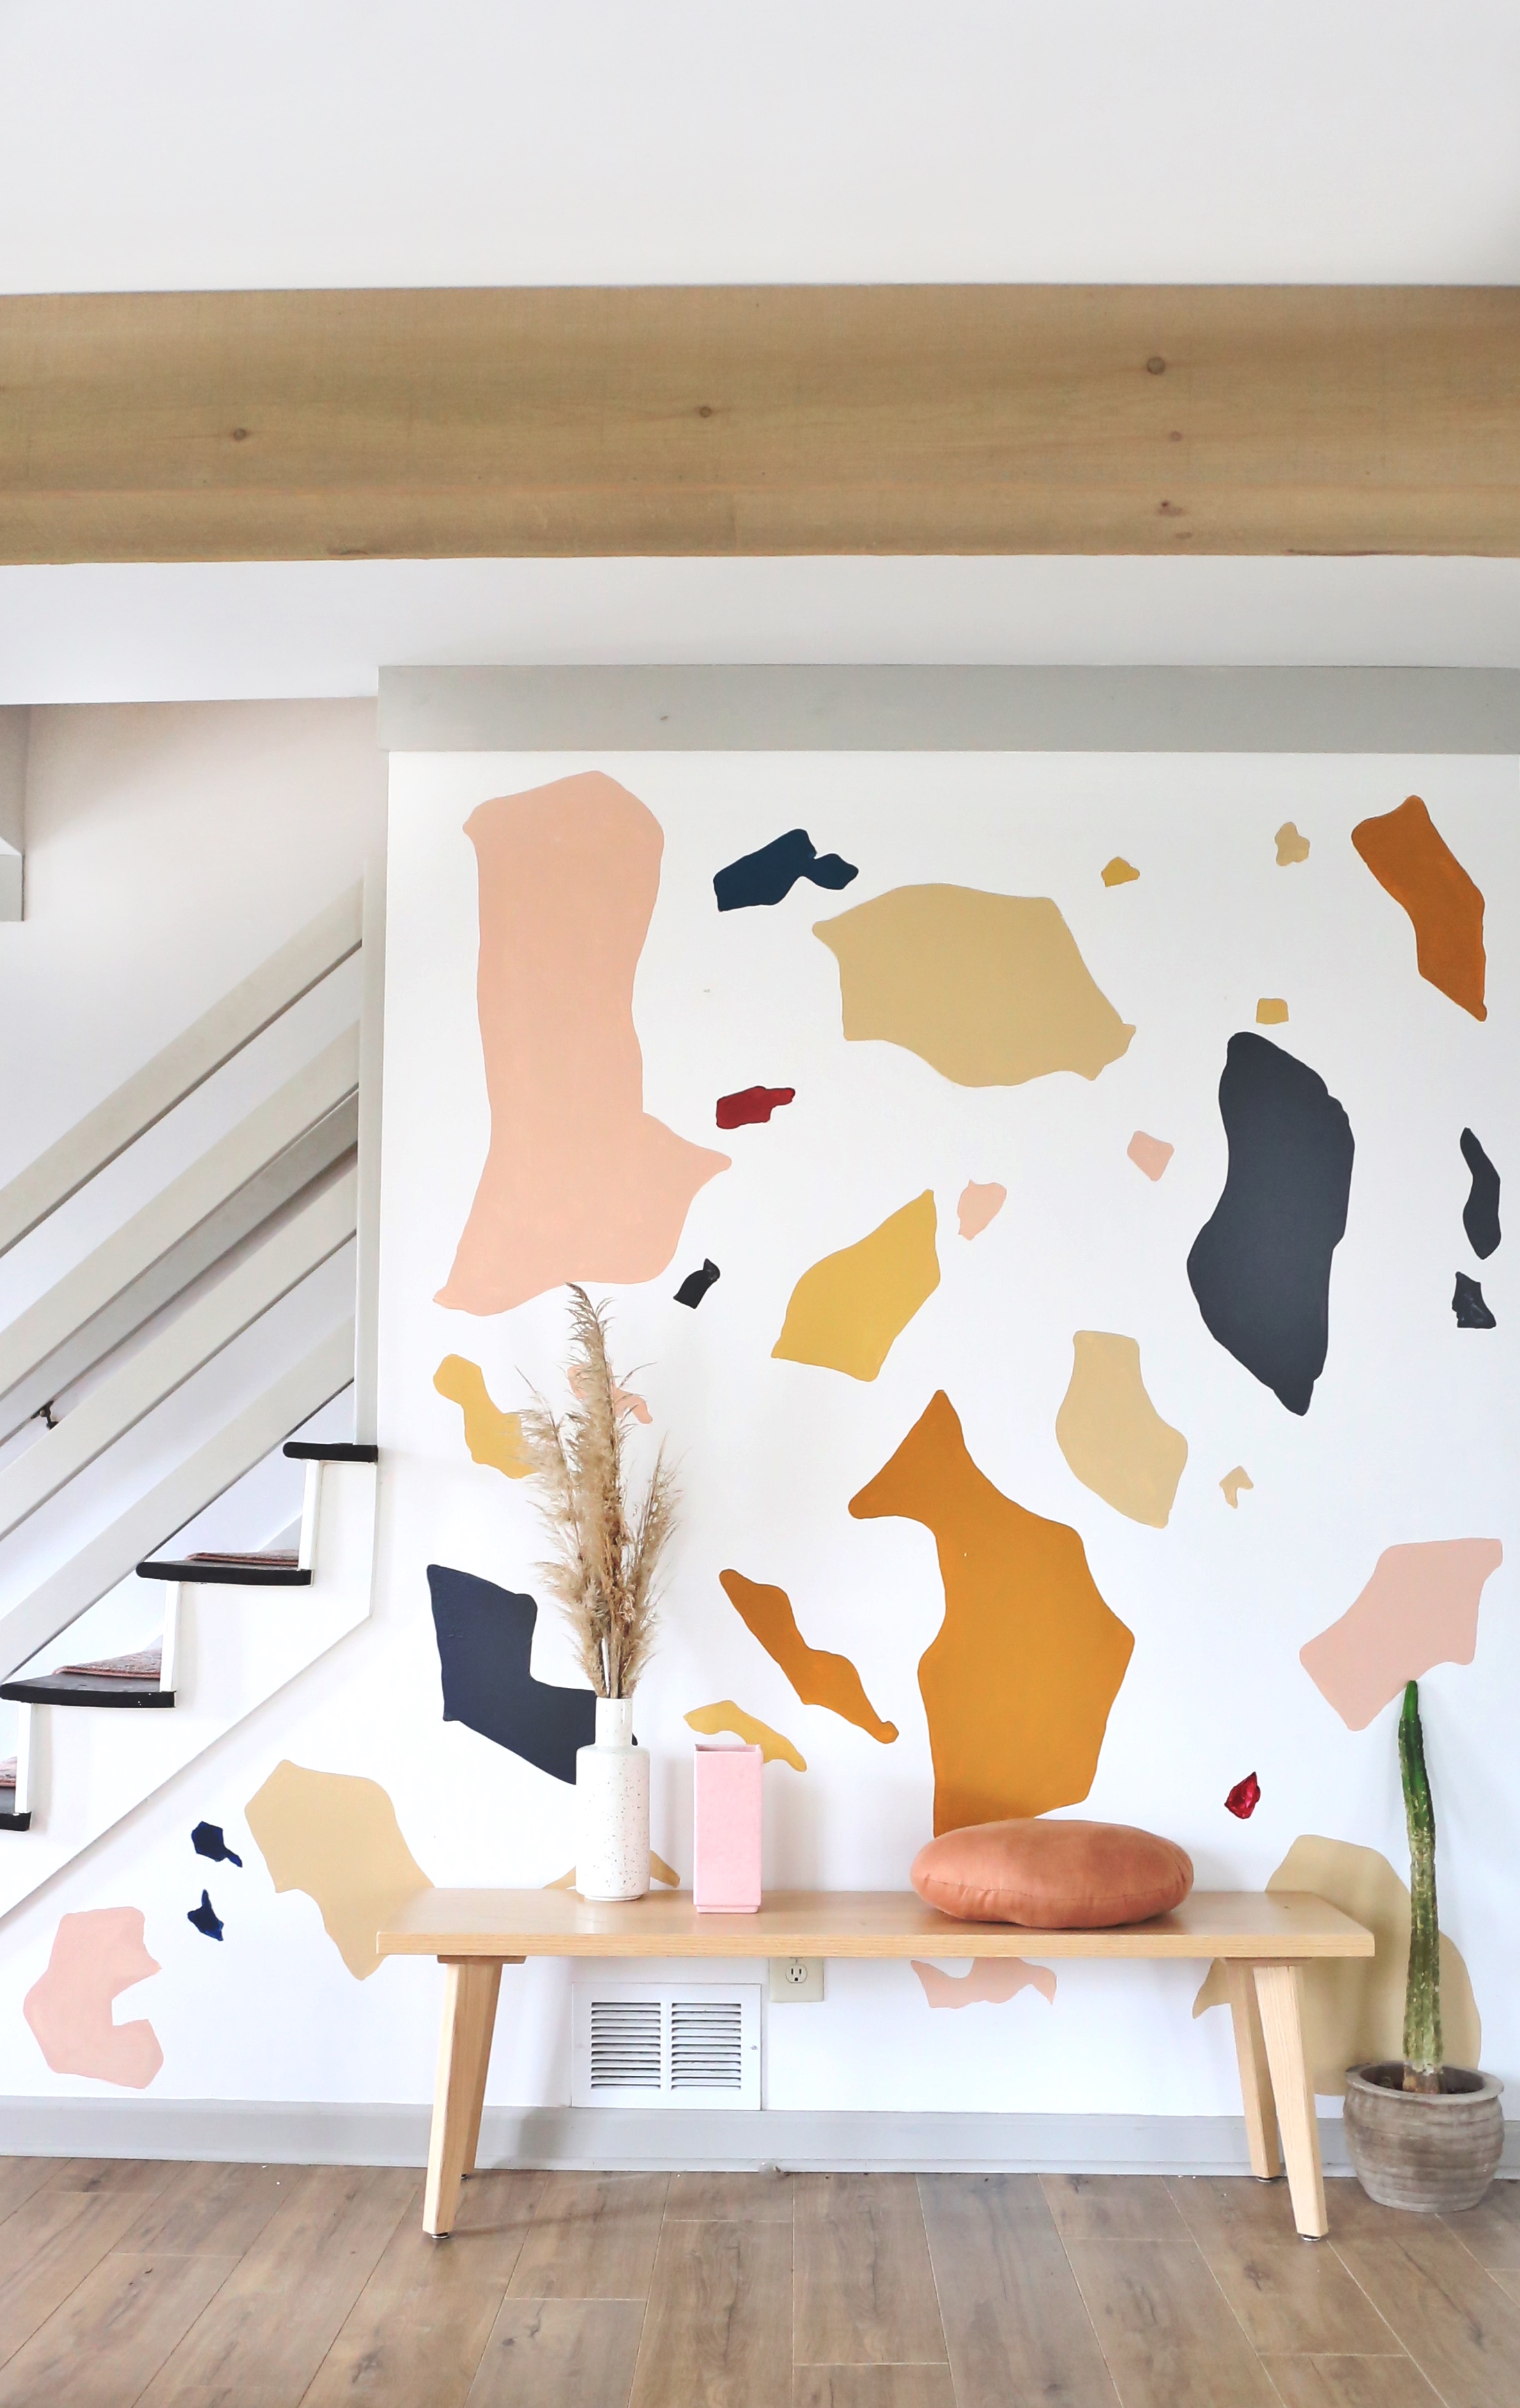
DIY Terrazzo Wall Mural Tutorial
It started with me staring at a blank wall. Then staring at it again. Then searching for the perfect art for that wall and putting so much pressure on how perfect it had to be, that I’d give up. Then sitting and staring at the wall again.
This process went on for a month.
I woke up yesterday and decided enough is enough. Instead of waiting around to find the perfect piece for that accent wall, why not just turn the whole wall into art?
I’ve been bent on adding a little Terrazzo flare to my home for some time, so I figured this was the perfect opportunity, especially using my favorite low risk medium - paint.
Having a plan, I headed to Pinterest for some inspo.
I decided large scale was the way to go for me. I wanted a color scheme incorporating pinks (to match my couch), beiges, and black.
Over the years I’ve collected quite a stash of sample paint jars from Lowes. I gathered them up and assessed the color situation. Yes, these would do. The colors I ended up going with were all Valspar brand. Chimney Smoke for my black, Amber Sienna for the mustard orange, Warm Buff for my beige, which I also used to mix with Coral Peach to make a beiger pink, and mixed with Pumpkin Butter to get a light beige yellow. I wanted a very dark blue, but only had Pacific Pleasure on hand, so I mixed that with my black. And lastly I used Spanish Tile as the dark red small accent color.
Next it was time to sketch up my shapes on the wall with a pencil. I resisted the urge to over think my placement and designs, and instead turned my music up loud, channelled my inner Picasso, and sketched those shapes in 3 minutes flat.
When I was done I stood back to see how it looked, and HA! the pencil line was too light to see from a step back meaning I had no idea how it all looked together. Now, any thoughtful person would have retraced their shapes with a darker pen, but I told myself ‘Nah, it’s gonna look great’, and got out my paint.
Ok, ok, I wasn’t AS careless as I’m coming off. I knew I had four large shapes that I wanted to accentuate, so I started painting those in first, making sure I liked the balance and composition of it all. Creating a Terrazzo art piece is rather tricky, because in art you want colors and shapes to be balanced in a certain way, but in actual Terrazzo, the chips fall where they may quite literally, so in order for the mural to look authentic, I had to allow for imperfections. Two of the same color shapes next to each other, and colors not placed equally in size and shape.
I wanted the colors to represent stone as much as possible, so instead of painting the shapes completely, I left them slightly translucent in places by dry brushing parts of the color. This made some areas look a little darker and some lighter. I used a regular Trim paint brush, and snagged one of my daughters larger watercolor brushes for the edges of the shapes.
As I was painting the shapes my husband came home and I asked for his honest opinion. In a very careful way (Ha!) he said he liked the pieces that had sharper edges best because the shapes with rounder edges looked a little Holstein to him.
Okay then. I went back in and gave the shapes a little bit pointier edges using a medium sized water color brush. It was a good call.
Over all the process was fast, fun and easy. I didn’t take myself too seriously, because any mistake is a quick sand and repaint over top. This wall mural is definitely the statement piece for the room, and we love it!
What do you guys think? Would you ever put a Terrazzo Wall Mural in your home?


